On This Page
Acceptance Devices | Tap to Pay on iPhone Acceptance Devices App
Use the information to navigate this guide and find further information.
Audience and Purpose
This guide is written for partner developers, system architects, and independent software
vendors (ISVs) who wish to use the Tap to Pay on iPhone Acceptance Devices App in Standalone
mode.
Implementing the Tap to Pay on iPhone Acceptance Devices App in Standalone mode does not
require integration with your point-of-sale system, and transactions can be started directly
on an iPhone. However, some tasks described in this guide, such as generating an activation
code or customizing app settings using a REST API, require software development skills.
Conventions
These statements appear in this document:
IMPORTANT
An
Important
statement contains information essential to
successfully completing a task or learning a concept.WARNING
A
Warning
contains information or instructions, which, if not
heeded, can result in a security risk, irreversible loss of data, or significant cost in
time or revenue or both.Support
For support information about any service, visit the Support Center:
Recent Revisions to This Document
26.08.01
- Initial release.
Introduction to Acceptance Devices | Tap to Pay on iPhone Acceptance Devices App
The Tap to Pay on iPhone Acceptance Devices App operates in Standalone mode.
These are some benefits of using Standalone mode:
- The solution provides a fast way to begin accepting contactless payments.
- There is no requirement for integration with your point-of-sale (POS) system.
- You can start transactions directly on a compatible iPhone.
IMPORTANT
When the Tap to Pay on iPhone Acceptance Devices App is operating in
Standalone mode, the iPhone does not communicate with your POS system to exchange
transaction details. You are responsible for reconciling transactions with your internal
systems and records.
Compatibility Requirements for iPhones
To accept contactless payments in the Tap to Pay on iPhone Acceptance Devices App, your iPhone
must be compatible with the app.
These are the requirements for a compatible iPhone:
- iPhone model XS or later.
- iOS version that is less than 1 year old. The recommendation is to use the latest iOS version available.
Getting Started with the Acceptance Devices App
Use the information to start using the Acceptance Devices app. You can process payments
after setting up the device and configuring the app.
Set Up an iPhone
Before setting up an iPhone, download and install the Acceptance Devices app from the Apple App
Store.
Follow these steps to set up an iPhone in the Acceptance Devices app:
- Open the Acceptance Devices App on an iPhone.
- On the Welcome screen, tapStart Configuration. The app is configured to use the production environment. To switch to the test environment, press and hold the Welcome screen for 5 seconds. The Select Environment screen appears. Choose an environment for configuration.

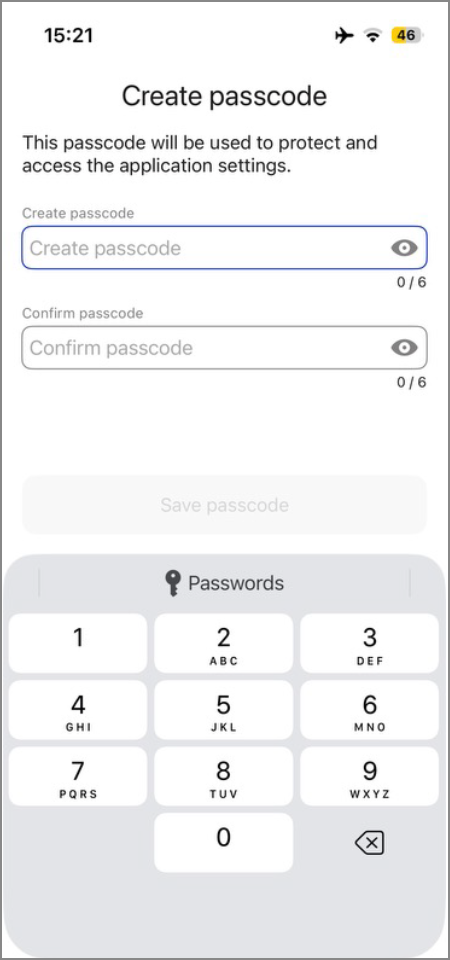
- On the Create Passcode screen, enter a unique passcode. The passcode must consist of six digits. Confirm the passcode by entering it a second time, then tapSave Passcode. You will use this passcode to access the app's settings menu, so choose a code that you will remember.
- If the Connect to the Internet screen appears, tapConnect to the internet, then choose an internet connection option.

- If the Internet Connected screen appears, tapContinue.

ADDITIONAL INFORMATION
You are prompted to activate your iPhone in the Acceptance Devices app.
Activating an iPhone in the Acceptance Devices App
Before you can process payments on your iPhone using the Acceptance Devices app, you must
use an activation code to activate the device in the Acceptance Devices app. You can
generate the code in the
Business Center
or by using an API request. After
generating the activation code, you enter it in the Acceptance Devices app.Generate an iPhone Activation Code in the Business Center
Business Center
Before activating an iPhone in the Acceptance Devices app, you must generate a device
activation code. The code is valid for 24 hours.
Follow these steps to generate an iPhone activation code in the
Business Center
:- In theBusiness Center, go to the left navigation panel and chooseAcceptance Devices>Activation Codes. The Activation Codes page appears.
- Click theSelect Transacting MIDdrop-down menu.
- Choose a transacting MID from the list.
- Click theSelect number of Activation Codesdrop-down menu.
- Choose the number of activation codes that you want to generate. The maximum number of codes is 15.
- ClickGenerate. The activation codes display on the page. To copy the codes to your clipboard, click the icon next to the code.
- To download a text file containing the activation codes, click theDownload codes as a .txt filebutton.
- Navigate to the Download folder on your computer to access the text file.
Generating an iPhone Activation Code Using a REST API Request
Before activating an iPhone in the Acceptance Devices app, you must generate a device
activation code. The code is valid for 24 hours.
Use this information to generate a device activation code using a REST API request.
You must authenticate each request that you send to a
Cybersource
API. To
authenticate an API request, you can use a REST shared secret key or a REST certificate.
For more information about authentication requirements, see the .Endpoints
The POST request must include the transacting merchant ID (MID) that is sending the
request and the quantity of activation codes to be generated. You can request up to
15 activation codes in a single request.
Test:
POST
https://apitest.cybersource.com
/dms/v2/merchants/{transacting
mid}/activation-codes?size={number of activation codes}Production:
POST
https://api.cybersource.com
/dms/v2/merchants/{transacting
mid}/activation-codes?size={number of activation codes}Required Fields to Generate an iPhone Activation Code
The body of the API request is empty. The POST request must include the information
required to return the response.
REST Example: Generate an iPhone Activation
Code
Request
The body of the request is empty. The POST request includes the information required
to return the response.
{
}
Response to a Successful Request
The response includes the activation code (
token
field) and the
amount of time (ttl
field) that the activation code is valid. The
ttl
field value is shown in milliseconds. The activation code
is valid for 24 hours.{ "tokens": [ { "token": "%N5wU2jH", "ttl": 86399805 } ] }
Enter an Activation Code in the Acceptance Devices App
Before activating an iPhone, you must generate an activation code for the device in
the
Business Center
or by using a REST API request. The activation code is valid
for 24 hours.Follow these steps to enter an activation code in the Acceptance Devices app:
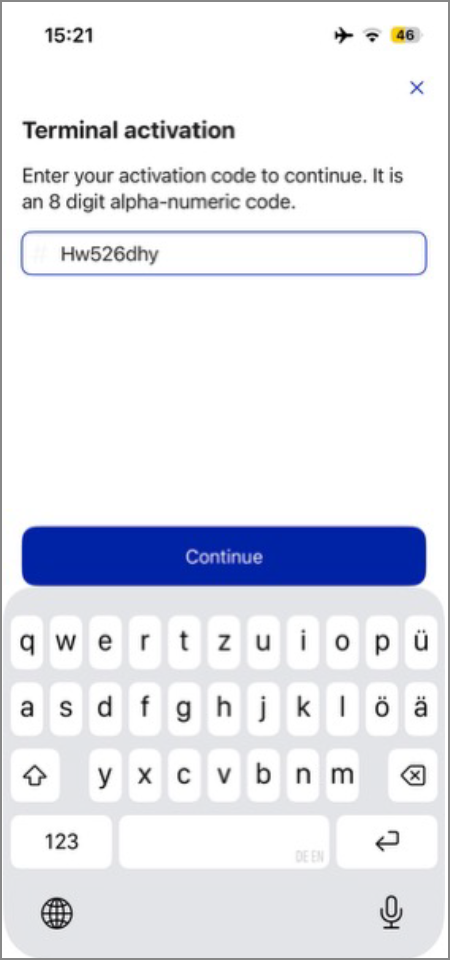
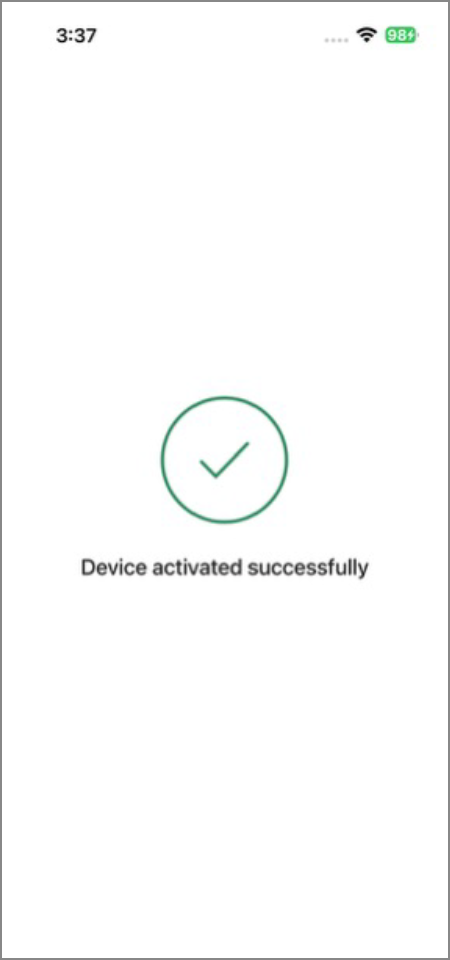
- On the Terminal Activation screen, enter the activation code that you generated. TapContinue. The Device Activated Successfully screen appears.
- When the Assigned Serial Number screen appears, record the serial number assigned to your device for future reference. You must provide the serial number when re-enrolling a device or when communicating with customer support about the device or solution. TapClose.

Customizing the Acceptance Devices App
Use this information to customize the Acceptance Devices app in the
Business Center
or
by using a REST API request.The Acceptance Devices Customizations feature in the
Business Center
enables you
to customize these parameters for a portfolio, merchant, or transacting merchant ID
(MID):- User interface
- Common
- Standalone mode
You can use a REST API request to perform these customization tasks:
- Retrieve and review your current parameter customization settings.
- Update customization settings for user interface, common, and Standalone mode parameters.
Customizable User Interface Parameters
You can customize these user interface parameters for the Acceptance Devices app when it is
operating in Standalone mode.
- Home screen logo
- This parameter defines the logo that is shown on the home screen of the app.
- Toolbar logo
- This parameter defines the logo that is shown during transaction processing.
- Primary color
- This parameter defines the color of the primary buttons.
- Color on primary
- This parameter defines the color of the text on the primary buttons.
- Background color
- This parameter defines the color of the screen background.
- Color on background
- This parameter defines the color of the text on the screen background.
- Button shape
- This parameter defines the shape of the buttons.
Customizable Common Parameters
You can customize these common parameters for the Acceptance Devices app when it is
operating in Standalone mode.
- Operating mode
- The Acceptance Devices app on iPhone solution operates in Standalone mode only. Other modes can be enabled for other Acceptance Devices solutions.
- Tipping options
- This parameter enables you to choose one of these tipping types:
- Percentage:The customer chooses from three pre-defined tip percentages or enters a custom tip amount. Define the tip values in the Tipping percentage values parameter. This setting is the default tipping type.
- Tip amount:The customer enters a custom tip amount.
- Total amount:The customer enters the total amount to be charged, including the tip amount.
- Tipping percentage values
- This parameter defines the three tipping percentage choices that appear on the screen for the customer to choose. This parameter applies only if the Tipping Type parameter is set toPercentage. The default settings are10, 15, 20.
- Transaction history view
- This parameter defines whether the transaction history view is shown at the merchant or device level. The default setting isMerchant.
Customizable Standalone Mode Parameters
You can customize this Standalone mode parameter for the Acceptance Devices app.
- Additional transaction types
- This parameter enables you to choose additional transaction types that the app supports. Sale and refund transactions are supported by default. The default setting for additional transaction types isNone.
Customize Parameters in the Business Center
Business Center
Follow these steps to customize common and Standalone mode parameters for the
Acceptance Devices app.
- In theBusiness Center, go to the left navigation panel and chooseAcceptance Devices>Customizations. The Customizations screen appears.
- Click theLoad customization parameter fordrop-down menu.
- Choose a user level from the list. ClickLoad.
- Scroll down to see the various parameter sections and which elements are available to customize for the chosen user level.
- Choose parameters to customize. To see a description of a parameter, hover your mouse over the Information icon.
- ClickApply Changes.
Retrieve Parameters Using a REST API Request
You can use a REST API request to retrieve and view customizable parameters and their
current values. Your account settings determine the values you can view for a portfolio,
merchant, or transacting merchant ID (MID).
You must authenticate each request that you send to a
Cybersource
API. To
authenticate an API request, you can use a REST shared secret key or a REST
certificate. For more information about authentication requirements, see the .Endpoints
The GET request must include the organization ID for the portfolio, merchant, or
transacting merchant ID that is sending the request.
Test:
GET
https://apitest.cybersource.com
/dms/v2/customization?type=organization&id={{organization
id}}Production:
GET
https://api.cybersource.com
/dms/v2/customization?type=organization&id={{organization
id}}Required Fields to Retrieve Parameters Using a REST API Request
The body of the API request is empty. The GET request must include the information
required to return the response.
REST Example: Retrieve Parameters Using a REST API
Request
Request
The body of the request is empty. The GET request includes the information required
to return the response.
{
}
Response to a Successful Request
{
    "id": "{{organization id}}",
    "customizations": {
        Your configured parameters response data appears here.
    },
    "customizationMetadata": {
        Your possible values for parameters response data appears here.
    }
}
Customize Parameters Using a REST API Request
You can use a REST API request to update customizable parameters for a portfolio,
merchant, or transacting merchant ID (MID).
You must authenticate each request that you send to a
Cybersource
API. To
authenticate an API request, you can use a REST shared secret key or a REST
certificate. For more information about authentication requirements, see the .Endpoints
The PUT request must include the organization ID for the portfolio, merchant, or
transacting merchant ID that is sending the request.
Test:
PUT
https://apitest.cybersource.com
/dms/v2/customizationProduction:
PUT
https://api.cybersource.com
/dms/v2/customizationRequired Fields to Customize Parameters Using a REST API Request
- type
- Set the value toorganization.
- id
- Set the value toorganization idfor the portfolio, merchant, or transacting MID.
- customizations
- Set the value to the parameters to be updated.
REST Example: Customize Parameters Using a REST API
Request
Request
{
    "type": "organization",
    "id": "{{organization id}}",
    "customizations":
    {
        "OPERATING_MODE": "STANDALONE",
        "TIPPING_TYPE": "TIP_AMOUNT",
        "SIGNATURE_TYPE": "ON_RECEIPT"
    }
}
Response to a Successful Request
The body of the response is empty. A successful response is indicated with a
200 OK
status.{ }
Standalone Mode Payment Services
Use the information to process payment services in the Tap to Pay on iPhone Acceptance Devices
App in Standalone mode.
IMPORTANT
When the Tap to Pay on iPhone Acceptance Devices App is operating in
Standalone mode, the iPhone does not communicate with your POS system to exchange
transaction details. You are responsible for reconciling transactions with your internal
systems and records.
Sale
Use the information to process a sale transaction when the app is operating in
Standalone mode. This transaction combines an authorization and a capture into a
single transaction.
Follow these steps to process a sale transaction:
- In the Acceptance Devices app, tapSale.
- Enter the transaction amount.
- TapSubmitto start the transaction.
Refund
Use the information to process a refund when the app is operating in Standalone mode. This type
of refund includes a reference to the original transaction for a full or partial
transaction amount.
Stand-alone credits are also supported in this Acceptance Devices solution. For more
information, see Stand-Alone Credit.
Follow these steps to process a refund:
- In the Acceptance Devices app, tapSettings.
- Enter your Acceptance Devices app passcode.
- TapTransaction History.
- Tap the transaction you want to refund.
- TapRefund.
- Enter the transaction amount.
- TapRefundto start the transaction.
Stand-Alone Credit
Use the information to process a stand-alone credit when the app is operating in
Standalone mode. This transaction is used to process a credit without reference to
the original transaction. The customer must present their payment card.
WARNING
When processing a stand-alone credit, there is no limit on the
credit amount because there is no reference to the original transaction amount. The
recommendation is to use a refund transaction whenever possible. For more
information, see Refund.
Follow these steps to process a stand-alone credit:
- In the Acceptance Devices app, tapOther Transactions.
- TapRefund.
- Enter your Acceptance Devices app passcode.
- Enter the transaction amount.
- TapSubmitto start the transaction.
Sale with On-Reader Tipping
Use the information to process a sale with on-reader tipping when the app is in
Standalone mode. At the start a transaction, the terminal prompts the customer to
add a tip by showing suggested tip amounts. The customer selects or enters a tip
amount on the terminal before presenting their payment card.
Follow these steps to process a sale with on-reader tipping:
- In the Acceptance Devices app, tapSettings.
- Enter your Acceptance Devices app passcode.
- TapStandalone Mode.
- Toggle Ask for Tip toON.
- Tap the back navigation arrow to return to the home screen.
- TapSale.
- Enter the transaction amount.
- TapSubmitto start the transaction.
Pre-Authorization
Use the information to process a pre-authorization for an initial amount when the app is in
Standalone mode. A pre-authorization transaction places a temporary hold on the
customer's payment card, which can be captured later.
Most authorizations expire in 5 to 7 days. The issuing bank sets the length of time
before expiration. When an authorization expires with the issuing bank, your bank or
processor might require that you re-submit an authorization request and include a
request for capture in the same message. For more information, see Capture.
Follow these steps to process a pre-authorization:
- In the Acceptance Devices app, tapOther Transactions.
- TapPre-Authorization.
- Enter the transaction amount.
- TapSubmitto start the transaction.
Capture
Use the information to capture a pre-authorized transaction when the app is operating
in Standalone mode. The capture request references the approved pre-authorization
request.
Follow these steps to process a capture:
- In the Acceptance Devices app, tapSettings.
- Enter your Acceptance Devices app passcode.
- TapTransaction History.
- Tap the transaction that you want to capture.
- TapCapture.
- Enter the transaction amount.
- TapCaptureto start the transaction.
Email a Customer Receipt
Use the information to email a customer receipt from a previous transaction when the app is
operating in Standalone mode.
Follow these steps to email a customer receipt:
- In the Acceptance Devices app, tapSettings.
- Enter your Acceptance Devices app passcode.
- TapTransaction History.
- Tap the transaction for which you want to email the receipt.
- TapSend Receipt.