This revision contains only editorial changes and no
technical updates.
Visa Platform Connect: Specifications and Conditions for
Resellers/Partners
The following are specifications and conditions that apply to a Reseller/Partner enabling
its merchants through
Cybersource for
Visa Platform Connect
(“VPC”)
processing
. Failure to meet any of the specifications and conditions below is
subject to the liability provisions and indemnification obligations under
Reseller/Partner’s contract with Visa/Cybersource.
Before boarding merchants for payment processing on a VPC acquirer’s connection,
Reseller/Partner and the VPC acquirer must have a contract or other legal agreement
that permits Reseller/Partner to enable its merchants to process payments with the
acquirer through the dedicated VPC connection and/or traditional connection with
such VPC acquirer.
Reseller/Partner is responsible for boarding and enabling its merchants in
accordance with the terms of the contract or other legal agreement with the relevant
VPC acquirer.
Reseller/Partner acknowledges and agrees that all considerations and fees associated
with chargebacks, interchange downgrades, settlement issues, funding delays, and
other processing related activities are strictly between Reseller and the relevant
VPC acquirer.
Reseller/Partner acknowledges and agrees that the relevant VPC acquirer is
responsible for payment processing issues, including but not limited to, transaction
declines by network/issuer, decline rates, and interchange qualification, as may be
agreed to or outlined in the contract or other legal agreement between
Reseller/Partner and such VPC acquirer.
DISCLAIMER: NEITHER VISA NOR CYBERSOURCE WILL BE RESPONSIBLE OR LIABLE FOR ANY ERRORS OR
OMISSIONS BY THE
Visa Platform Connect
ACQUIRER IN PROCESSING TRANSACTIONS. NEITHER VISA
NOR CYBERSOURCE WILL BE RESPONSIBLE OR LIABLE FOR RESELLER/PARTNER BOARDING MERCHANTS OR
ENABLING MERCHANT PROCESSING IN VIOLATION OF THE TERMS AND CONDITIONS IMPOSED BY THE
RELEVANT
Visa Platform Connect
ACQUIRER.
Introducing
Digital Accept
Secure Integration Product Suite
The Secure Integration Product Suite allows you to simplify the acceptance of sensitive
customer payment information. When a customer enters their payment details on your
webpage, app, or elsewhere, it is replaced with a transient token. Tokenization ensures
that the card data can be transported securely, which limits your exposure and
significantly reduces your Payment Card Industry Data Security Standard (PCI DSS)
compliance burden.
The Secure Integration Product Suite consists of three products that can be used in a
variety of scenarios:
Unified Checkout
,
Microform Integration
, and
Flex API
.
Unified Checkout
Unified Checkout
is a pre-configured drop-in UI for accepting online
payments. It supports multiple payment methods including traditional cards and
digital wallets such as Google Pay and Visa Click to Pay. Because it is
pre-configured with digital payment support,
Unified Checkout
enables
you to go live faster and substantially reduce the development burden of accepting a
multitude of payment options. This solution is ideal for sellers looking for a
complete payment acceptance technology with support for multiple payment
methods.
is a payment card and card verification acceptance
solution that can be embedded. Use it to securely accept payment information at your
web page and have complete control over the look and feel of your payment form.
Microform Integration
captures the card number and card verification
number fields from within your existing user interface. This solution is for sellers
looking for a secure way to capture sensitive payment data from within their own
customized payment form.
can be used to securely capture and transport payment
data between systems. This solution is ideal for Internet of Things (IoT) and
third-party integrations. For more information, see Flex API v2.
Digital Accept
Product Comparison
This chart compares
Digital Accept
products and features.
Figure:
Products and Features Comparison Chart
Flex API
v2
The
Flex API
v2 suite enables a merchant to ensure secure transmission
of payment information captured from client-side code. Integrate your system with
Flex API
v2 to enable
Cybersource
to protect your
customer's primary account number (PAN), card verification number (CVN), and other
payment information when payment processing activity crosses the Web.
IMPORTANT
Flex API
is not designed to be used from the
browser. For securing payment information from the browser, please see the
Microform Integration
product.
Use the APIs in this suite to secure your customer's payment information, and exchange
this sensitive data for a
transient token
. A transient token is a temporary
reference to sensitive data that
Cybersource
has securely stored on your
behalf. A transient token can be transported and stored safely without adding risk to
your PCI DSS burden.
IMPORTANT
The transient token response can be cryptographically validated
to ensure that payload injection attacks can be mitigated.
Before you capture the payment data from the client application, generate the context in
which the data is to be captured and tokenized. The
capture context
can
help you to limit PCI exposure to the context in which it is captured.
After you capture the payment data from the client application, the
Flex API
v2 can secure and tokenize the data:
Cybersource
secures your customer's card data at the device
using one-time public encryption keys.
Cybersource
then replaces the card data in the client
application form with a transient token. A transient token can only be accessed
by the merchant.
After you tokenize the payment information, you can initiate
Cybersource
services that use transient tokens in place of your customer's payment information.
Flex API
v2 Integration Task List
The
Flex API
v2 is a suite of APIs that enables a merchant to safely
and securely accept customer payment information from within a
client application. The objective is to replace
sensitive payment information with a transient token that can be transmitted without
exposing the payment information.
The first step to Flex API v2 is to generate the context of the customer payment
information that is to be captured and tokenized.
IMPORTANT
Declaring the capture context ensures that no data can be injected
into the process by a malicious actor.
To generate the capture context, use the
/sessions
API endpoint to
specify the payment data to be captured. The API returns a JSON Web Token (JWT) data
object that contains the authentication component of the interactions and the one-time
public encryption keys to which the payment information is to be secured.
IMPORTANT
The internal data structure of the JWT can expand to contain
additional data elements. Ensure that your integration and validation rules do not limit
the data elements contained in responses.
Resource
Send a fully authenticated POST request from your backend system to the
/sessions
API:
Test:
https://apitest.cybersource.com
/flex/v2/sessions
Production:
https://api.cybersource.com
/flex/v2/sessions
The resource returns a capture context, which is a JWT date element containing the
keys necessary to encrypt the payment data.
Payment API Fields
This is the list of possible fields to capture and tokenize.
orderInformation.amountDetails.currency
orderInformation.amountDetails.totalAmount
orderInformation.billTo.address1
orderInformation.billTo.address2
orderInformation.billTo.administrativeArea
orderInformation.billTo.buildingNumber
orderInformation.billTo.company
orderInformation.billTo.country
orderInformation.billTo.district
orderInformation.billTo.email
orderInformation.billTo.firstName
orderInformation.billTo.lastName
orderInformation.billTo.locality
orderInformation.billTo.phoneNumber
orderInformation.billTo.postalCode
orderInformation.shipTo.address1
orderInformation.shipTo.address2
orderInformation.shipTo.administrativeArea
orderInformation.shipTo.buildingNumber
orderInformation.shipTo.company
orderInformation.shipTo.country
orderInformation.shipTo.district
orderInformation.shipTo.firstName
orderInformation.shipTo.lastName
orderInformation.shipTo.locality
orderInformation.shipTo.postalCode
paymentInformation.card.expirationMonth
paymentInformation.card.expirationYear
paymentInformation.card.number
paymentInformation.card.securityCode
paymentInformation.card.type
This example shows the JWT decoded, containing the JSON Web Key (JWK) encryption
keys:
The capture context that you generate is a JSON Web Token (JWT) data object. The JWT is
digitally signed using a public key and confirms the validity of the JWT and that it
comes from
Cybersource
. When you do not have a key in the JWT header,
Cybersource
recommends that you follow cryptography best practices
and validate the capture context signature.
To validate a JWT, you must obtain its public key. This public RSA key is in JSON Web Key
(JWK) format. The public key is associated with the capture context on the
Cybersource
domain.
To get the public key of a capture context from the header of the capture context itself,
you must retrieve the key ID associated with the public key and then pass the key ID to
the
/flex/v2/public-keys
endpoint:
From the header of the capture context, get the key ID
(
kid
):
{
    "kid": "3g",
    "alg": "RS256"
}
Send a GET request to the
/flex/v2/public-keys
endpoint and
include the key ID. For example:
Test:
GET
https://apitest.cybersource.com
/flex/v2/public-keys/{3g}
Production:
GET
https://api.cybersource.com
/flex/v2/public-keys/{3g}
Production in
Saudi Arabia:
GET
https://api.sa.cybersource.com
/flex/v2/public-keys/{3g}
Test in Saudi
Arabia:
GET
https://apitest.sa.cybersource.com
/flex/v2/public-keys/{3g}
Depending on the cryptographic method you use to validate the public key, you
might need to convert the key to privacy-enhanced mail (PEM) format.
API endpoint accepts a JSON Web Encryption (JWE) data
object that has been encrypted using the RsaOaep encryption scheme and the JSON Web
Key (JWK) provided in the capture context. JWE is a standard that defines how data
can be encrypted using JSON-based data structures. For details, see IETF RFC 7516 at
https://tools.ietf.org/html/rfc7516.
The JWE format consists of five sections separated by a period (
.
) delimiters:
header . encrypted_key . cypher_text . iv . auth_tag
The payload for the
/tokens
request is a JWE data object.
This shows an encrypted payload in a fully formed JWE data object:
After the payment information is secured in a JWE data object, it can be tokenized.
Use the resulting transient token within
Cybersource
APIs in place of the payment information
associated with it.
To tokenize the payment information, send the encrypted payment data to the
/tokens
API endpoint. The API responds to the request with a
transient token in the form of a JSON Web Token (JWT).
IMPORTANT
The internal data structure of the JWT can expand to contain
additional data elements. Ensure that your integration and validation rules do not
limit the data elements contained in responses.
Resource
IMPORTANT
Flex API
is not designed to be used from
the browser. For securing payment information from the browser, please see the
Microform Integration
product.
Send an unauthenticated POST request from your customer’s device or backend system to
the
/tokens
API endpoint:
Test:
https://apitest.cybersource.com
/flex/v2/tokens
Production:
https://api.cybersource.com
/flex/v2/tokens
The resource returns a transient token that represents the supplied customer card
data. The token can replace the payment information in any follow-on
After receiving the transient token, validate its integrity using the public key
embedded within the capture context created at the beginning of this flow. This
verifies that
Cybersource
issued the token and that no data
tampering occurred during transit.
Use the capture context public key to cryptographically validate the JWT provided
from a successful
/tokens
call.
You might have to convert the JSON Web Key (JWK) to privacy-enhanced mail (PEM)
format for compatibility with some JWT validation software libraries.
Using the Transient Token to Process a Payment
After you validate the transient token, you can use it in
place of the PAN with payment services for 15 minutes. The transient token can be
used multiple times within the 15-minute period.
When the consuming service receives a request containing a transient token, it
retrieves the tokenized data and injects the values into your request before
processing, and none of the sensitive data is stored on your systems.
In some scenarios, the jti value contained in the JWT transient token response must
be extracted and used instead of the entire JWT.
After receiving the transient token, validate its integrity using the public key embedded
within the capture context created at the beginning of this flow. This verifies that
Cybersource
issued the token and that no data tampering occurred
during transit.
Use the capture context public key to cryptographically validate the JWT provided from a successful
/tokens
call.
You might have to convert the JSON Web Key (JWK) to privacy-enhanced mail (PEM) format for compatibility with some JWT validation software libraries.
Using the Transient Token to Process a Payment
After you validate the transient token, you can use it in
place of the PAN with payment services for 15 minutes. The transient token can be
used multiple times within the 15-minute period.
When the consuming service receives a request containing a transient token, it retrieves the tokenized data and injects the values into your request before processing, and none of the sensitive data is stored on your systems.
In some scenarios, the jti value contained in the JWT transient token response must be extracted and used instead of the entire JWT.
After you validate the transient token, you can use it in
place of the PAN with payment services for 15 minutes. The transient token can be
used multiple times within the 15-minute period.
When the consuming service receives a request containing a transient token, it retrieves the tokenized data and injects the values into your request before processing, and none of the sensitive data is stored on your systems.
In some scenarios, the jti value contained in the JWT transient token response must be extracted and used instead of the entire JWT.
JSON Web Tokens (JWTs) are digitally signed JSON objects based on the open standard RFC 7519. These tokens provide a compact, self-contained
method for securely transmitting information between parties. These tokens are
signed with an RSA-encoded public/private key pair. The signature is calculated
using the header and body, which enables the receiver to validate that the content
has not been tampered with.
A JWT takes the form of a string, and consists of three parts separated by dots:
<Header>.<Payload>.<Signature>
The header and payload is
Base64-encoded JSON
and contains these claims:
Header
: The algorithm and token type. For
example:
{
"kid": "zu",
"alg": "RS256"
}
Payload
: The claims of what the token represents. For
example:
: The signature is computed from the header and payload using a
secret or private key.
IMPORTANT
When working with JWTs,
Cybersource
recommends that you use a well- maintained JWT library to ensure proper decoding
and parsing of the JWT.
IMPORTANT
When parsing the JWT’s JSON payload, you must ensure that you
implement a robust solution for transversing JSON. Additional elements can be
added to the JSON in future releases. Follow JSON parsing best practices to
ensure that you can handle the addition of new data elements in the future.
Microform Integration
v2
Microform Integration
replaces the sensitive payment input fields of a client
application with secure
Cybersource
-hosted fields. These fields securely
accept payment information
, including card
and check data,
and replaces it with a non-sensitive tokens.
You can style these fields to look and behave like any other field on your website, which
could qualify you for PCI DSS assessments based on SAQ A.
Microform Integration
provides the most secure method for tokenizing card
and check
data. Sensitive data is
encrypted on the customer’s device before HTTPS transmission to
Cybersource
. This method reduces the potential for man-in-the middle attacks
on the HTTPS connection.
IMPORTANT
Each request that you send to
Cybersource
requires header information. For information about
constructing the headers for your request, see the
JavaScript library to securely replace
sensitive input fields with
Cybersource
-hosted secure iframes. These
iframes capture payment information, including card numbers
and
eCheck
data. This ensures that sensitive data is
handled securely within your checkout process.
Accepting Card Information
For card transactions, the captured card number is replaced with a mathematically
irreversible token that only you can use. This token can be used in place of the
card number for follow-on transactions in existing
Cybersource
APIs.
Microform Integration
replaces the following card payment fields in your
input form:
Payment Card (PAN)
CVN
Month (non-sensitive)
Year (non-sensitive)
With this option you can pass imonth and year in the request (if required), but these
fields are non-sensitive.
This figure shows the
Microform Integration
process for accepting
card information.
Figure:
Microform Integration
Process with Card Information
Accepting
eCheck
Information
Microform Integration
also supports the
acceptance of
eCheck
information. As with card transactions, the
sensitive
eCheck
data is securely captured and replaced with a
token.
Accepting
eCheck
information enables merchants to collect funds
from a customer's bank account through both the ACH service and eCheck service (US
only) for
either of these flows:
ACH services
are a set of connections composed of the legacy gateway
solutions where
Cybersource
serves as the gateway.
eCheck
, the new service on Payments 2.0, is the
acquirer solution where
Cybersource
is the acquirer.
Microform Integration
replaces these
eCheck
information fields in your payment input form:
Routing Number
Account Number
Account type (non-sensitive)
This figure shows the
Microform Integration
process for accepting
eCheck
information.
Figure:
Microform Integration
Process with
eCheck
Information
PCI Compliance
The least burdensome level of PCI compliance is SAQ A. To achieve this compliance, you
must securely capture sensitive payment data using a validated payment provider.
To meet this requirement,
Microform Integration
renders secure iframes for
the payment information as follows:
Card information input fields:
Payment card or PAN
CVN
eCheck
information input fields:
Routing number
Account number
These iframes are hosted by
Microform Integration
, and the payment data is
submitted directly to
Cybersource
through the secure Flex API v2 suite.
This means that this data never passes through your systems.
Getting Started
Microform Integration
replaces the primary account number (PAN) or card
verification number (CVN) field, or both, in your payment input form. It has two components:
Server-side component to create a capture context request that contains limited-use
public keys from the
Flex API
v2 suite.
Client-side JavaScript library that you integrate into your digital payment acceptance
web page for the secure acceptance of payment information:
Card information input fields:
Payment card or PAN
CVN
eCheck
information input fields:
Routing number
Account number
Accept Card Information
This section covers the implementation steps needed to complete the server-side and
client-side setup for accepting card information with
This section contains the information you need to set up your server. Initializing
Microform Integration
within your webpage begins with a server-to-server
call to the sessions API. This step authenticates your merchant credentials and
establishes how the
Microform Integration
front-end components will function.
The sessions API request contains parameters that define how
Microform Integration
performs.
The server-side component provides this
information:
A transaction-specific public key is used by the customer's browser to protect the
transaction.
An authenticated context description package that manages the payment experience on
the client side. It includes available payment options such as card networks,
payment interface styling, and payment methods.
The functions are compiled in a JSON Web Token (JWT)
object referred to as the
The capture context request is a signed JSON Web Token
(JWT) that includes all of the merchant-specific parameters. This request tells the
front-end JavaScript library how to behave within your payment experience. The request
provides authentication, one-time keys, the target origin to the
Microform Integration
, in addition to allowed card networks and payment types
(card or check)
.
These fields are available for requesting the capture context for accepting card information:
Ensure that all endpoints within your ownership are secure with some kind of
authentication so they cannot be called at will by bad actors.
Do not pass the
targetOrigin
field in any external requests.
Hard code it on the server side.
For more information on requesting the capture context, see Capture Context.
Validating the Server-Side Capture Context
The capture context that you generated is a JSON Web Token (JWT) data object. The
JWT is digitally signed using a public key. The purpose is to ensure the validity of the
JWT and confirm that it comes from
Cybersource
. When you do not have a
key specified locally in the JWT header, you should follow best cryptography practices
and validate the capture context signature.
To validate a JWT, you can obtain its public key. This public RSA key is in JSON Web Key
(JWK) format. This public key is associated with the capture context on the
Cybersource
domain.
To get the public key of a capture context from the header of the capture context itself,
retrieve the key ID associated with the public key. Then, pass the key ID to the
public-keys
endpoint.
Example
From the header of the capture context, get the key ID (
kid
) as shown in
this example:
{
"kid": "3g"
,
"alg": "RS256"
}
Append the key ID to the endpoint
/flex/v2/public-keys/
3g
. Then,
call this endpoint to get the public key.
IMPORTANT
Depending on the cryptographic method you use to validate the public key,
you might need to convert the key to privacy-enhanced mail (PEM) format.
Resource
Pass the key ID (kid), that you obtained from the capture context header, as a path
parameter, and send a GET request to the
/public-keys
endpoint:
Test:
https://apitest.cybersource.com
/flex/v2/public-keys/
{kid}
Production:
https://api.cybersource.com
/flex/v2/public-keys/
{kid}
The resource returns the public key. Use this public RSA key to validate the capture
context.
with your native payment
acceptance web page or mobile application.
Web Page
Initiate and embed
Microform Integration
into your payment
acceptance web page.
Decode the JWT from the
/microform/v2/sessions
response to
get the capture context.
Use the
clientLibrary
and
clientLibraryIntegrity
values that are returned in
the JWT from
/microform/v2/sessions
response to obtain the
Microform Integration
JavaScript library URL and integrity
value that you use to create your script tags.
IMPORTANT
You must use these values for every transaction.
These values can be unique for each transaction.
IMPORTANT
Do not hard code these values, because doing so can
result in client-side
Microform Integration
errors. If you do
not hard code these values for all transactions, you can load a
JavaScript library that is incompatible with the version you requested
in the
/sessions
request.
Example
/sessions
Response:
"data":{ "clientLibrary":"[EXTRACT clientLibrary VALUE from here]", "clientLibraryIntegrity": "[EXTRACT clientLibraryIntegrity VALUE from here]" }
Example Script
Tags
<script src="[INSERT clientLibrary VALUE HERE]" integrity=”[INSERT clientLibraryIntegrity VALUE HERE]” crossorigin=”anonymous”> </script>
Example Code for Loading the Script Dynamically Following JWT
Extraction
Tags
// values read from capture context
const clientLibrary = " ";
const clientLibraryIntegrity = " ";
// create script tag
const script = document.createElement("script");
script.src = clientLibrary;
script.type = "text/javascript";
script.async = true;
script.integrity = clientLibraryIntegrity;
script.crossOrigin = "anonymous";
// run setup code after script has loaded successfully
script.onload = function () {
// SETUP
};
// insert to document
document.head.appendChild(script);
Create the HTML placeholder objects to attach to the microforms.
Microform Integration
attaches the microform fields to
containers within your HTML. Within your HTML checkout, replace the
payment card and CVN tag with a simple container.
Microform Integration
uses the container to render an iframe for
secured credit card input. This example contains simple
div
tags to define where to place the PAN and CVN
fields within the payment acceptance page:
Invoke the Flex SDK by passing the capture context that was generated in
the previous step to the microform object.
const flex = new Flex(captureContext);
Initiate the microform object with styling to match your web page.
After you create a new Flex object, you can begin creating your
Microform. You will pass your baseline styles and ensure that the button
matches your merchant page:
Create a function for the customer to submit their payment information, and
invoke the tokenization request to
Microform Integration
for the
transient token.
Mobile Application
To initiate and embed
Microform Integration
into a native payment
acceptance mobile application, follow the steps for web page set up, and ensure that
these additional requirements are met:
The card information acceptance fields of PAN and CVV must be hosted on a
web page.
The
eCheck
information acceptance fields of routing
number, account number, and confirmed account number must be hosted on a web
page.
The native application must load the hosted card entry form web page in a
web view.
Transient Tokens for Accepting Card Information
The response to a successful customer interaction with
Microform Integration
is a transient token. The transient token is a reference to the payment data that is
collected on your behalf. Tokens allow secure card or check payments to occur without
risk of exposure to sensitive payment information. The transient token is a short-term
token that expires after 15 minutes. This reduces your PCI burden/responsibility and
ensures that sensitive information is not exposed to your back-end systems.
Transient Token Time Limit
The sensitive data associated with the transient token is available for use in API
requests for a 15-minute duration. The transient token can be used multiple times within
the 15-minute period. After 15 minutes, you must prompt the customer to restart the
checkout flow.
Example: Creating the Pay Button with Event Listener for Accepting Card Information
const button = document.querySelector("#myButton");
button.addEventListener("click", function () {
// Compiling MM & YY into optional parameters
const options = {
expirationMonth: document.querySelector("#expMonth").value,
expirationYear: document.querySelector("#expYear").value,
};
//
microform.createToken(options, function (err, token) {
// handle err
if (err) {
console.error(err);
errorsOutput.textContent = err.message;
return;
}
// At this point you may pass the token back to your server as you wish.
// In this example we append a hidden input to the form and submit it.
console.log(JSON.stringify(token));
flexResponse.value = JSON.stringify(token);
form.submit();
});
});
When the customer submits the form,
Microform Integration
securely collects
and tokenizes the data in the loaded fields as well as the options supplied to the
createToken()
function.
The Account Type is included in the request.
If tokenization succeeds, your callback receives the token as its second parameter.
Send the token to your server, and use it in place of the
card information
when you use supported payment services.
Example: Customer-Submitted Form for Accepting Card
Information
<script>
// Variables from the HTML form
const form = document.querySelector('#my-sample-form');
const payButton = document.querySelector('#pay-button');
const flexResponse = document.querySelector('#flexresponse');
const expMonth = document.querySelector('#expMonth');
const expYear = document.querySelector('#expYear');
const errorsOutput = document.querySelector('#errors-output');
// the capture context that was requested server-side for this transaction
const captureContext = <% -keyInfo %> ;
// custom styles that will be applied to each field we create using Microform
const myStyles = {
'input': {
'font-size': '14px',
'font-family': 'helvetica, tahoma, calibri, sans-serif',
'color': '#555'
},
':focus': { 'color': 'blue' },
':disabled': { 'cursor': 'not-allowed' },
'valid': { 'color': '#3c763d' },
'invalid': { 'color': '#a94442' }
};
// setup Microform
const flex = new Flex(captureContext);
const microform = flex.microform({ styles: myStyles });
const number = microform.createField('number', { placeholder: 'Enter card number' });
const securityCode = microform.createField('securityCode', { placeholder: '•••' });
number.load('#number-container');
securityCode.load('#securityCode-container');
// Configuring a Listener for the Pay button
payButton.addEventListener('click', function () {
// Compiling MM & YY into optional parameters
const options = {
expirationMonth: document.querySelector('#expMonth').value,
expirationYear: document.querySelector('#expYear').value
};
//
microform.createToken(options, function (err, token) {
if (err) {
// handle error
console.error(err);
errorsOutput.textContent = err.message;
} else {
// At this point you may pass the token back to your server as you wish.
// In this example we append a hidden input to the form and submit it.
console.log(JSON.stringify(token));
flexResponse.value = JSON.stringify(token);
form.submit();
}
});
});
</script>
Transient Token Response Format
The transient token is issued as a JSON Web Token (RFC
7519). A JWT is a string consisting of three parts that are separated by
dots:
Header
Payload
Signature
JWT example:
xxxxx.yyyyy.zzzzz
The payload portion of the token is an encoded Base64url JSON string and contains various
claims. For more information, see JSON Web Tokens.
IMPORTANT
When you integrate with
Cybersource
APIs,
Cybersource
recommends that you dynamically parse the response for the fields that
you are looking for. Additional fields may be added in the future.
You must ensure that your
integration can handle new fields that are returned in the response. While the underlying
data structures will not change, you must also ensure that your integration can handle
changes to the order in which the data is returned.
The internal data structure of the
JWT can expand to contain additional data elements. Ensure that your integration and
validation rules do not limit the data elements contained in responses.
Example: Token Payload for Accepting Card Information
After receiving the transient token, validate its integrity using the public key embedded
within the capture context created at the beginning of this flow. This verifies that
Cybersource
issued the token and that no data tampering occurred
during transit.
Use the capture context public key to cryptographically validate the JWT provided from a
successful
microform.createToken
call. You might have to convert
the JSON Web Key (JWK) to privacy-enhanced mail (PEM) format for compatibility with some
JWT validation software libraries.
The
Cybersource
SDK has functions that verify the token response. You
must verify the response to ensure that no tampering occurs as it passes through the
cardholder device. Do so by using the public key generated at the start of the
process.
Using the Transient Token to Process a Payment
After you validate the transient token, you can use it in
place of the PAN with payment services for 15 minutes. The transient token can be
used multiple times within the 15-minute period.
When the consuming service receives a request containing a transient token, it retrieves
the tokenized data and injects the values into your request before processing, and none
of the sensitive data is stored on your systems. In some scenarios, the
jti
value contained in the JWT transient token response must be
extracted and used instead of the entire JWT.
In this use case, the customer is adding a new credit card to their account or wallet.
Microform Integration
securely captures the primary account number (PAN)
and card verification value (CVV). The card expiration month and year is rendered and
collected by the merchant.
Overview
Figure:
Add a New Credit Card Flow
The
Microform Integration
replaces the PAN and CVV.
You render non-sensitive fields for card expiration month and year.
When the customer submits the form, you call
microform.createToken()
. You can also include the card
expiration month and year but it is not required.
Microform Integration
securely tokenizes the PAN, CVV, and any
optional fields that are supplied.
Microform Integration
returns
a transient token in the form of a JWT.
Transient Token Contents
The transient token is JWT that includes the PAN and CVV. If the card expiration
month and year are included in
microform.createToken()
, they are
returned in clear text in the decoded transient token payload.
Microform Integration
does not render or host expiration date fields.
After you receive the transient token, you can perform a zero‑amount authorization
using
Cybersource
APIs and create a permanent token in
Token Management Service
(
TMS
).
To create a permanent token, the authorization request must include these fields and
values
Set the
processingInformation.actionList
field to
TOKEN_CREATE
.
Set the
processingInformation.actionTokenTypes
field set to
the desired token type such as,
paymentInstrument
,
instrumentIdentifier
, or
customer
.
After you create a permanent token it can be stored and reused for future
transactions.
In this use case, the customer selects a previously saved card and is prompted to
re-enter the card verification value (CVV).
Overview
Figure:
Checkout with a Saved Card Flow
The merchant renders a
Microform Integration
field for the
CVV.
The PAN and expiration date are not collected when they are already
associated with a stored token.
When the customer submits the form,
Microform Integration
returns a transient token containing the CVV.
Transient Token Contents
The transient token is a JWT that replaces the CVV in the authorization request. A
zero‑amount authorization is not required in this flow.
For security reasons, the CVV value is not visible in the decoded token. If you
require access to decrypted CVV data, you must use the Payment Credential Retrieval
APIs.
In this use case, the customer edits an existing saved card. This use case is most common
when the customer must update the expiration date and re‑enter the card verification
value (CVV).
Overview
Figure:
Edit a Credit Card Flow
The merchant renders
Microform Integration
fields for the
CVV.
You render non-sensitive fields for card expiration month and year.
When the customer submits the form, you call
microform.createToken()
. You can also include the card
expiration month and year but it is not required.
Transient Token Contents
The transient token is JWT that includes the CVV. If the card expiration month and
year are included in
microform.createToken()
, they are returned in
clear text in the decoded transient token payload. In this use case, the PAN is not
collected.
After you receive the transient token, you can perform an authorization using
This section contains the information you need to set up your server. Initializing
Microform Integration
within your webpage begins with a server-to-server
call to the sessions API. This step authenticates your merchant credentials and
establishes how the
Microform Integration
front-end components will function.
The sessions API request contains parameters that define how
Microform Integration
performs.
The server-side component provides this
information:
A transaction-specific public key is used by the customer's browser to protect the
transaction.
An authenticated context description package that manages the payment experience on
the client side. It includes available payment options such as card networks,
payment interface styling, and payment methods.
The functions are compiled in a JSON Web Token (JWT)
object referred to as the
The capture context request is a signed JSON Web Token (JWT) that includes all of the
merchant-specific parameters. This request tells the front-end JavaScript library how to
behave within your payment experience. The request provides authentication, one-time
keys, the target origin to the
Microform Integration
, in addition to allowed
card networks and payment types.
These fields are available for requesting the capture context for accepting eCheck
information:
Ensure that all endpoints within your ownership are secure with some kind of
authentication so they cannot be called at will by bad actors.
Do not pass the
targetOrigin
in any external requests. Hard
code it on the server side.
For more information on requesting the capture context, see Capture Context.
Validating the Server-Side Capture Context
The capture context that you generated is a JSON Web Token (JWT) data object. The
JWT is digitally signed using a public key. The purpose is to ensure the validity of the
JWT and confirm that it comes from
Cybersource
. When you do not have a
key specified locally in the JWT header, you should follow best cryptography practices
and validate the capture context signature.
To validate a JWT, you can obtain its public key. This public RSA key is in JSON Web Key
(JWK) format. This public key is associated with the capture context on the
Cybersource
domain.
To get the public key of a capture context from the header of the capture context itself,
retrieve the key ID associated with the public key. Then, pass the key ID to the
public-keys
endpoint.
Example
From the header of the capture context, get the key ID (
kid
) as shown in
this example:
{
"kid": "3g"
,
"alg": "RS256"
}
Append the key ID to the endpoint
/flex/v2/public-keys/
3g
. Then,
call this endpoint to get the public key.
IMPORTANT
Depending on the cryptographic method you use to validate the public key,
you might need to convert the key to privacy-enhanced mail (PEM) format.
Resource
Pass the key ID (kid), that you obtained from the capture context header, as a path
parameter, and send a GET request to the
/public-keys
endpoint:
Test:
https://apitest.cybersource.com
/flex/v2/public-keys/
{kid}
Production:
https://api.cybersource.com
/flex/v2/public-keys/
{kid}
The resource returns the public key. Use this public RSA key to validate the capture
context.
with your native payment
acceptance web page or mobile application.
Web Page
Initiate and embed
Microform Integration
into your payment
acceptance web page.
Decode the JWT from the
/microform/v2/sessions
response to
get the capture context.
Use the
clientLibrary
and
clientLibraryIntegrity
values that are returned in
the JWT from
/microform/v2/sessions
response to obtain the
Microform Integration
JavaScript library URL and integrity
value that you use to create your script tags.
IMPORTANT
You must do this for every transaction as these
values can be unique for each transaction. Do not hard code these
values, as this can result in client-side
Microform Integration
errors. If you do not do this for every transaction, you may load a
JavaScript library that is incompatible with the version you requested
in the
/sessions
request.
Example
/sessions
Response:
"data":{ "clientLibrary":"[EXTRACT clientLibrary VALUE from here]", "clientLibraryIntegrity": "[EXTRACT clientLibraryIntegrity VALUE from here]" }
Example Script
Tags
<script src="[INSERT clientLibrary VALUE HERE]" integrity=”[INSERT clientLibraryIntegrity VALUE HERE]” crossorigin=”anonymous”> </script>
Example Code for Loading the Script Dynamically Following JWT
Extraction
Tags
// values read from capture context
const clientLibrary = " ";
const clientLibraryIntegrity = " ";
// create script tag
const script = document.createElement("script");
script.src = clientLibrary;
script.type = "text/javascript";
script.async = true;
script.integrity = clientLibraryIntegrity;
script.crossOrigin = "anonymous";
// run setup code after script has loaded successfully
script.onload = function () {
// SETUP
};
// insert to document
document.head.appendChild(script);
Create the HTML placeholder objects to attach to the microforms.
Within your HTML
checkout, replace the routing number,
account number, and confirm account number tag with a simple container.
Microform Integration
uses the container to render an
iframe for secured credit card input. This example contains simple
div
tags to define where to place the
routing number, account number, and confirm account
number fields within the payment acceptance page:
Invoke the Flex SDK by passing the capture context that was generated in
the previous step to the microform object.
const flex = new Flex(captureContext);
Initiate the microform object with styling to match your web page.
After you create a new Flex object, you can begin creating your
Microform. You will pass your baseline styles and ensure that the button
matches your merchant page:
Create a function for the customer to submit their payment information, and
invoke the tokenization request to
Microform Integration
for the
transient token.
Mobile Application
To initiate and embed
Microform Integration
into a native payment
acceptance mobile application, follow the steps for web page setup, and ensure that
these additional requirements are met:
The card information acceptance fields of routing
number, account number, and confirm account number must be hosted on a web
page.
The
eCheck
information acceptance fields of routing
number, account number, and confirmed account number must be hosted on a web
page.
The native application must load the hosted
eCheck
entry form web page in a web view.
Transient Tokens for Accepting
eCheck
Information
The response to a successful customer interaction with
Microform Integration
is a transient token. The transient token is a reference to the payment data that is
collected on your behalf. Tokens allow secure card or check payments to occur without
risk of exposure to sensitive payment information. The transient token is a short-term
token that expires after 15 minutes. This reduces your PCI burden/responsibility and
ensures that sensitive information is not exposed to your back-end systems.
Transient Token Time Limit
The sensitive data associated with the transient token is available for use in API
requests for a 15-minute duration. The transient token can be used multiple times within
the 15-minute period. After 15 minutes, you must prompt the customer to restart the
checkout flow.
Example: Creating the Pay Button with Event Listener for Accepting
eCheck
Information
const button = document.querySelector("#myButton");
button.addEventListener("click", function () {
// Compiling accounttype into optional parameters
const options = {
accountType: document.querySelector(“#accountType”).value,
};
//
microform.createToken(options, function (err, token) {
// handle err
if (err) {
console.error(err);
errorsOutput.textContent = err.message;
return;
}
// At this point you may pass the token back to your server as you wish.
// In this example we append a hidden input to the form and submit it.
console.log(JSON.stringify(token));
flexResponse.value = JSON.stringify(token);
form.submit();
});
});
When the customer submits the form,
Microform Integration
securely collects
and tokenizes the data in the loaded fields as well as the options supplied to the
createToken()
function.
If tokenization succeeds, your callback receives the token as its second parameter.
Send the token to your server, and use it in place of the
eCheck
information
when you use supported payment services.
Example: Customer-Submitted Form for Accepting
eCheck
Information
<script>
// Variables from the HTML form
const form = document.querySelector('#my-sample-form');
const payButton = document.querySelector('#pay-button');
const flexResponse = document.querySelector('#flexresponse');
const accountType = document.querySelector('#accountType')
const errorsOutput = document.querySelector('#errors-output');
// the capture context that was requested server-side for this transaction
const captureContext = <% -keyInfo %> ;
// custom styles that will be applied to each field we create using Microform
const myStyles = {
'input': {
'font-size': '14px',
'font-family': 'helvetica, tahoma, calibri, sans-serif',
'color': '#555'
},
':focus': { 'color': 'blue' },
':disabled': { 'cursor': 'not-allowed' },
'valid': { 'color': '#3c763d' },
'invalid': { 'color': '#a94442' }
};
// setup Microform
const flex = new Flex(captureContext);
const microform = flex.microform("check", { styles: myStyles });
const routingNumber = microform.createField("routingNumber", { placeholder: "Enter routing number" });
const accountNumber = microform.createField("accountNumber", { placeholder: "Enter account number" });
const accountNumberConfirm = microform.createField("accountNumberConfirm", { placeholder: "accountNumberConfirm" });
routingNumber.load('#routingNumber-container')
accountNumber.load('#accountNumber-container')
accountNumberConfirm.load('#accountNumberConfirm-container')
// Configuring a Listener for the Pay button
payButton.addEventListener('click', function () {
// Compiling MM & YY into optional parameters
const options = {
accountType: document.querySelector('#accountType').value,
};
//
microform.createToken(options, function (err, token) {
if (err) {
// handle error
console.error(err);
errorsOutput.textContent = err.message;
} else {
// At this point you may pass the token back to your server as you wish.
// In this example we append a hidden input to the form and submit it.
console.log(JSON.stringify(token));
flexResponse.value = JSON.stringify(token);
form.submit();
}
});
});
</script>
Transient Token Response Format
The transient token is issued as a JSON Web Token (RFC
7519). A JWT is a string consisting of three parts that are separated by
dots:
Header
Payload
Signature
JWT example:
xxxxx.yyyyy.zzzzz
The payload portion of the token is an encoded Base64URL JSON string and contains various
claims. For more information, see JSON Web Tokens.
IMPORTANT
When you integrate with
Cybersource
APIs,
Cybersource
recommends that you dynamically parse the response for the fields that
you are looking for. Additional fields may be added in the future.
You must ensure that your
integration can handle new fields that are returned in the response. While the underlying
data structures will not change, you must also ensure that your integration can handle
changes to the order in which the data is returned.
The internal data structure of the
JWT can expand to contain additional data elements. Ensure that your integration and
validation rules do not limit the data elements contained in responses.
After receiving the transient token, validate its integrity using the public key embedded
within the capture context created at the beginning of this flow. This verifies that
Cybersource
issued the token and that no data tampering occurred
during transit.
Use the capture context public key to cryptographically validate the JWT provided from a
successful
microform.createToken
call. You might have to convert
the JSON Web Key (JWK) to privacy-enhanced mail (PEM) format for compatibility with some
JWT validation software libraries.
The
Cybersource
SDK has functions that verify the token response. You
must verify the response to ensure that no tampering occurs as it passes through the
cardholder device. Do so by using the public key generated at the start of the
process.
Next Steps
After you complete the server-side and client-side setup for accepting payment
information with
events and obtain
them through event listeners. For information, see Events.
Styling
Microform Integration
can be styled to look and behave like any other input field
on your site.
General Appearance
The
<iframe>
element rendered by Microform has an entirely transparent background that completely fills the container you specify. By styling your container to look like your input fields, your customer will be unable to detect any visual difference. You control the appearance using your own stylesheets. With stylesheets, there are no restrictions and you can often re-use existing rules.
Explicitly Setting Container Height
Typically, input elements calculate their height from font size and line height (and a few
other properties), but
Microform Integration
requires explicit configuration of height. Make
sure you style the height of your containers in your stylesheets.
Managed Classes
In addition to your own container styles,
Microform Integration
automatically
applies some classes to the container in response to internal state changes.
Class
Description
.flex-microform
Base class added to any element in
which a field has been loaded.
.flex-microform-autocomplete
The field has been filled using
an
autocomplete/autofill
event.
.flex-microform-disabled
The field has been disabled.
.flex-microform-focused
The field has user focus.
.flex-microform-incomplete
The field is incomplete and could be
valid.
.flex-microform-invalid
The input card number invalid.
.flex-microform-valid
The input card number is valid.
To make use of these classes, include overrides in your application’s stylesheets. You can combine these styles using regular CSS rules. Here is an example of applying CSS transitions in response to input state changes:
To style the text within the iframe element, use the JavaScript library.
The
styles
property in the set-up options accepts a CSS-like object that
allows customization of the text. Only a subset of the CSS properties is supported.
const customStyles = {
'input': {
'font-size': '16px',
'color': '#3A3A3A'
},
'::placeholder': {
'color': 'blue'
},
':focus': {
'color': 'blue'
},
':hover': {
'font-style': 'italic'
},
':disabled': {
'cursor': 'not-allowed',
},
'valid': {
'color': 'green'
},
'invalid': {
'color': 'red'
}
};
const flex = new Flex('..........');
// apply styles to all fields
const microform = flex.microform({ styles: customStyles });
const securityCode = microform.createField('securityCode');
// override the text color for the card number field
const number = microform.createField('number', { styles: { input: { color: '#000' }}});
Supported Properties
These CSS properties are supported in the
styles: { ... }
configuration hash. Unsupported properties are not added to the inner field, and a warning is output to the console.
color
cursor
font
font-family
font-kerning
font-size
font-size-adjust
font-stretch
font-style
font-variant
font-variant-alternates
font-variant-caps
font-variant-east-asian
font-variant-ligatures
font-variant-numeric
font-weight
line-height
opacity
text-shadow
text-rendering
transition
-moz-osx-font-smoothing
-moz-tap-highlight-color
-moz-transition
-o-transition
-webkit-font-smoothing
-webkit-tap-highlight-color
-webkit-transition
Events
You can subscribe to
Microform Integration
events and obtain them through event
listeners. Using these events, you can easily enable your checkout user interface to respond
to any state changes as soon as they happen.
Events
Event Name
Emitted When
autocomplete
Customer fills the credit card number using a browser or third-party extension.
This event provides a hook onto the additional information provided during
the
autocomplete
event.
blur
Field loses focus.
change
Field contents are edited by the customer. This event contains various data such as
validation information and details of any detected card types.
focus
Field gains focus.
inputSubmitRequest
Customer requests submission of the field by pressing the Return key or
similar.
load
Field has been loaded on the page and is ready for user input.
unload
Field is removed from the page and no longer available for user input.
update
Field configuration was updated with new options.
Some events may return data to the event listener’s callback as described in the next
section.
Subscribing to Events
Using the
.on()
method provided in the
microformInstance
object, you can easily subscribe to any of the supported events.
For example, you could listen for the
change
event and in turn display appropriate card art and display brand-specific information.
const secCodeLbl = document.querySelector('#mySecurityCodeLabel');
const numberField = microform.createField('number');
// Update your security code label to match the detected card type's terminology
numberField.on('change', function(data) {
secCodeLbl.textContent = (data.card && data.card.length > 0) ? data.card[0].securityCode.name : 'CVN';
});
numberField.load('#myNumberContainer');
The
data
object supplied to the event listener’s callback includes any information specific to the triggered event.
Card Detection
By default,
Microform Integration
attempts to detect the card type as it is
entered. As card numbers are entered, detection information is sent back in the
change
event. You can use this information to build a dynamic user
experience by providing feedback to the user as they type their card number.
is unable to determine a single card type,
you can use this information to prompt the customer to choose from a possible range of
values.
If
type
is specified in
the
microformInstance.createToken(options,...)
method, the specified
value always takes precedence over the detected value.
It is up to the merchant to then take the results from
cardDetection
and pass that
into the
type
parameter within the
microformInstance.createToken(options,...)
method.
Microform Integration
no longer attempts to determine a single card type by default.
Instead, it returns
detectedCardTypes
, in the transient token response and the
merchant can decide how to handle this information.
Support for Dual-Branded Cards
Microform Integration
supports dual-branded cards. To utilize this feature, you
must include the card networks that have overlapping BIN ranges in the capture context
request. For
example:
When a card number within an overlapping BIN range is entered,
Microform Integration
returns the detected card types based on the order specified
in the
allowedCardNetworks
array. You must then decide which card
type to pass.
Domestic Scheme Rules
For markets where domestic routing, network preference, or co-badging regulations
apply, you are responsible for ensuring that domestic payment schemes are
prioritized appropriately within the
allowedCardNetworks
configuration.
In these scenarios, domestic schemes must be listed ahead of international networks
such as Visa or Mastercard where required by local regulations or scheme rules.
If network preference varies by transaction, the order of networks should be
dynamically configured when you create the capture context request using the
Sessions API.
You are responsible for reviewing and complying with all applicable local regulatory,
scheme, and acquirer requirements relating to domestic routing and network
selection.
Support for Card Types without Security Code
Some card types, such as KCP and UATP, do not have security codes (CVV or CVN).
Microform Integration
supports these card types and provides automatic card detection.
This enables you to dynamically display the fields that are relevant for the detected card
type.
If you support only card types that do not have security codes, you must render only the
card number field and the required fields. Do not render the security code field.
If you support card types that do not have security codes as well as cards types that do
have security codes, you can use card detection to determine if the security code field
should be enabled or disabled based on the card details that are entered by the
customer.
This example shows an implementation that accounts for both cards that do and do not have
security codes:
const numberField = microform.createField('number');
const securityCodeField = microform.createField('securityCode');
numberField.on('change', function (data) {
// Check if detected cards don't have a security code
const allCardsWithoutSecurityCode =
data.card &&
data.card.length > 0 &&
data.card.every(function (card) {
return card.securityCode === false;
});
if (allCardsWithoutSecurityCode) {
// Disable the security code field only when detected cards don't require a security code
securityCodeField.update({ disabled: true });
} else {
// Enable the security code field when any card requires CVV
securityCodeField.update({ disabled: false });
}
});
Autocomplete
By default,
Microform Integration
supports the autocomplete event of
the
cardnumber
field provided by certain browsers and third-party
extensions. An
autocomplete
event is provided to allow easy access to the
data that was provided to allow integration with other elements in your checkout
process.
The format of the data provided in the event might be as follows:
These properties are in the object only if they contain a value; otherwise, they are
undefined. Verify the properties before using the event. This example displays how to use
this event to update other fields in your checkout process:
const number = microform.createField('number');
number.on('autocomplete', function(data) {
if (data.name) document.querySelector('#myName').value = data.name;
if (data.expirationMonth) document.querySelector('#myMonth').value = data.expirationMonth;
if (data.expirationYear) document.querySelector('#myYear').value = data.expirationYear;
});
This reference provides additional information for creating
Microform Integration
web pages.
JavaScript API Reference
This reference provides details about the JavaScript API for creating
Microform Integration
web
pages.
Class: Field
An instance of this class is returned when you add a Field to a Microform integration using
microform.createField. With this
object, you can then interact with the Field to subscribe to events, programmatically set
properties in the Field, and load it to the DOM.
Methods
clear()
Programmatically clear any entered value within the field.
Example
field.clear();
dispose()
Permanently remove this field from your Microform integration.
Example
field.dispose();
focus()
Programmatically set user focus to the Microform input field.
Example
field.focus();
load(container)
Load this field into a container element on your page.
Successful loading of this field will trigger a load event.
Parameters
Name
Type
Description
container
HTMLElement | string
Location in which to load this field. It can be
either an HTMLElement reference or a CSS selector string that will be used to load
the element.
Unsubscribe an event handler from a Microform Field.
Parameter
Name
Type
Description
type
string
Name of the event you wish to unsubscribe from.
listener
function
The handler you wish to be unsubscribed.
Example
// subscribe to an event using .on() but keep a reference to the handler that was supplied.
const focusHandler = function() { console.log('focus received'); }
field.on('focus', focusHandler);
// then at a later point you can remove this subscription by supplying the same arguments to .off()
field.off('focus', focusHandler);
on(type, listener)
Subscribe to events emitted by a Microform Field. Supported eventTypes are:
autocomplete
blur
change
focus
inputSubmitRequest
load
unload
update
Some events may return data as the first parameter to the callback otherwise this will be
undefined. For further details see each event's documentation using the links above.
Remove a the Field from the DOM. This is the opposite of a load operation.
Example
field.unload();
update(options)
Update the field with new configuration options. This accepts the same parameters as
microform.createField(). New options will be merged into the existing configuration of the
field.
Parameter
Name
Type
Description
options
object
New options to be merged with previous
configuration.
Example
// field initially loaded as disabled with no placeholder
const number = microform.createField('number', { disabled: true });
number.load('#container');
// enable the field and set placeholder text
number.update({ disabled: false, placeholder: 'Please enter your card number' });
Events
autocomplete
Emitted when a customer has used a browser or third-party tool to perform an
autocomplete/autofill on the input field. Microform will attempt to capture additional
information from the autocompletion and supply these to the callback if available. Possible
additional values returned are:
name
expirationMonth
expirationYear
If a value has not been supplied in the autocompletion, it will be undefined in the
callback data. As such you should verify that it exists before use.
Updating the rest of your checkout after an autocomplete event
field.on('autocomplete', function(data) {
if (data.name) document.querySelector('#myName').value = data.name;
if (data.expirationMonth) document.querySelector('#myMonth').value = data.expirationMonth;
if (data.expirationYear) document.querySelector('#myYear').value = data.expirationYear;
});
blur
This event is emitted when the input field has lost focus.
Example
field.on('blur', function() {
console.log('Field has lost focus');
});
// focus the field in the browser then un-focus the field to see your supplied handler execute
change
Emitted when some state has changed within the input field. The payload for this event
contains several properties.
const cardImage = document.querySelector('img.cardDisplay');
const cardSecurityCodeLabel = document.querySelector('label[for=securityCode]');
// create an object to map card names to the URL of your custom images
const cardImages = {
visa: '/your-images/visa.png',
mastercard: '/your-images/mastercard.png',
amex: '/your-images/amex.png',
maestro: '/your-images/maestro.png',
discover: '/your-images/discover.png',
dinersclub: '/your-images/dinersclub.png',
jcb: '/your-images/jcb.png'
};
field.on('change', function(data) {
if (data.card.length === 1) {
// use the card name to set the correct image src
cardImage.src = cardImages[data.card[0].name];
// update the security code label to match the detected card's naming convention
cardSecurityCodeLabel.textContent = data.card[0].securityCode.name;
} else {
// show a generic card image
cardImage.src = '/your-images/generic-card.png';
}
});
Use the card detection result to filter select element in another part of your
checkout.
});
// disable any select options not in the detected card types list
cardTypeOptions.forEach(function (o) {
o.disabled = detectedCardTypes.includes(o.value);
});
});
field.on('focus', function() {
console.log('Field has received focus');
});
// focus the field in the browser to see your supplied handler execute
inputSubmitRequest
Emitted when a customer has requested submission of the input by pressing Return key or
similar. By subscribing to this event you can easily replicate the familiar user experience
of pressing enter to submit a form. Shown below is an example of how to implement this. The
JWT string that you requested via a
server-side authenticated call before starting the checkout flow.
Example
Basic Setup
<script src="[INSERT clientLibrary VALUE HERE]" integrity=”[INSERT clientLibraryIntegrity VALUE HERE]” crossorigin=”anonymous”>
</script>//Note: Script location and integrity value should be sourced from the capture context response clientLibrary and clientLibraryIntegrity values.
<script> const flex = new Flex('captureContext');</script>
Methods
microform(optionsopt) > {Microform}
This method is the main setup function used to initialize
Microform Integration
. Upon
successful setup, the callback receives a
microform
, which is used to
interact with the service and build your integration. For details, see Class: Microform.
Parameter
Name
Type
Description
options
Object
Property
Name
Type
Attributes
Description
styles
Object
<optional>
Apply custom styling to all the fields in
your integration.
Returns:
Type: Microform
Examples
Minimal Setup
const flex = new Flex('header.payload.signature');
const microform = flex.microform();
An instance of this class is returned when you create a Microform integration
using
flex.microform
. This object allows the creation of Microform
Fields. For details, see Module: Flex.
Methods
createField(fieldType, optionsopt) > {Field}
Create a field for this Microform integration.
Parameters
Name
Type
Attributes
Description
fieldType
string
Supported values:
number
securityCode
options
object
<optional>
To change these options after
initialization use
field.update()
.
Properties
Name
Type
Attributes
Default
Description
aria-label
string
<optional>
true
Set the input's label for use by
assistive technologies using the aria-label attribute.
aria-required
boolean
<optional>
true
Used to indicate through assistive
technologies that this input is required for submission using the aria-required attribute.
autoformat
Boolean
<optional>
true
Enable or disable automatic formatting of
the input field. This is only supported for number fields and will automatically
insert spaces based on the detected card type.
description
string
<optional>
Sets the input's description for use by
assistive technologies using the aria-describedby attribute.
disabled
Boolean
<optional>
false
Sets
the
disabled
attribute on the input.
maxLength
number
<optional>
3
Sets the maximum length attribute on the
input. This is only supported for
securityCode
fields and may take
a value of
3
or
4
.
placeholder
string
<optional>
Sets
the
placeholder
attribute on the input.
styles
stylingOptions
<optional>
Apply custom styling to this
field.
title
string
<optional>
Sets the title attribute on the input. Typically used
to display tooltip text on hover.
Returns
Type: Field
Examples
Minimal Setup
const= new Flex('.........');
const microform = flex.microform('card');
const number = microform.createField('number');
const= new Flex('.........');
// apply styles to all fields
const microform = flex.microform('card', { styles: customStyles });
// override the text color for the card number field only
const number = microform.createField('number', { styles: { input: { color: '#000' }}});
Providing Custom Styles to A Specific Field within the
Request a token using the card data captured in the Microform fields. A successful token creation will receive a transient token as its second callback parameter.
Parameter
Name
Type
Description
options
object
Additional tokenization options.
callback
callback
Any error will be returned as the first
callback parameter. Any successful creation of a token will be returned as a string
in the second parameter.
Properties
Name
Type
Attributes
Description
type
string
<optional>
Three-digit card type string. If set,
this will override any automatic card detection.
expirationMonth
string
<optional>
Two-digit month string. Must be padded
with leading zeros if single digit.
An Object detailing occurred errors,
otherwise null.
data
*
<optional>
<nullable>
In success scenarios, this is whatever
data has been returned by the asynchronous function call, if any.
Returns
Type: void
Example
This example shows how to make use of this style of error handling in your code:
foo(function (err, data) {
// check for and handle any errors
if (err) throw err;
// otherwise use the data returned
console.log(data);
});
StylingOptions
Styling options are supplied as an object that resembles CSS but is limited to a subset of CSS properties that relate only to the text within the iframe.
Supported CSS selectors:
input
::placeholder
:hover
:focus
:disabled
valid
invalid
incomplete
Supported CSS properties:
color
cursor
font
font-family
font-kerning
font-size
font-size-adjust
font-stretch
font-style
font-variant
font-variant-alternates
font-variant-caps
font-variant-east-asian
font-variant-ligatures
font-variant-numeric
font-weight
incomplete
line-height
opacity
text-shadow
text-rendering
transition
-moz-osx-font-smoothing
-moz-tap-highlight-color
-moz-transition
-o-transition
-webkit-font-smoothing
-webkit-tap-highlight-color
-webkit-transition
Any unsupported properties will not be applied and will raise
a
console.warn()
alert.
Properties
Name
Type
Attributes
Description
input
object
<optional>
Main styling applied to the input
field.
::placeholder
object
<optional>
Styles for the ::placeholder
pseudo-element within the main input field. This also adds vendor prefixes for
supported browsers.
:hover
object
<optional>
Styles to apply when the input field is
hovered over.
:focus
object
<optional>
Styles to apply when the input field has
focus.
:disabled
object
<optional>
Styles applied when the input field has
been disabled.
valid
object
<optional>
Styles applied when Microform detects
that the input card number is valid. Relies on card detection being enabled.
invalid
object
<optional>
Styles applied when Microform detects
that the input card number is invalid. Relies on card detection being
enabled.
The capture context request is a signed JSON Web Token (JWT) that includes all of the
merchant-specific parameters. This request tells the front-end JavaScript library how to
behave within your payment experience. The request provides authentication, one-time
keys, the target origin to the
Microform Integration
, in addition to allowed
card networks and payment types
(card or check)
. The capture context request
includes these elements:
You can define the payment cards and digital payments that you want to
accept in the capture context.
You can provide up to nine origins in the
targetOrigins
field for nested iframes. If your
list of origins in the
targetOrigins
field contains
more than five entries, you must do the following:
Compare the list of origins in the
v2/sessions
targetOrigins
field with the
location.ancestorOrigins of the browser and ensure that they
match. For more information, see this description about
the location.ancestorOrigins property on the Mozilla Developer
website.
Confirm that the count of origins in the
targetOrigins
field matches that in the
content. If any origins are missing or are mismatched, the
system will not allow Microform to load and a client-side error
message appears.
If your application does not require up to nine nested iframes,
Cybersource
recommends that you minimize the number of nested
iframes to maintain optimal performance.
Allowed Card Networks
Use the
allowedCardNetworks
field to define the card
types.
These card networks are available for card entry:
American Express
Carnet
Cartes Bancaires
China UnionPay
Diners Club
Discover
EFTPOS
ELO
Jaywan
JCB
JCrew
KCP
Mada
Maestro
Mastercard
Meeza
PayPak
UATP
Visa
When you integrate with
Microform Integration
to accept
card
or
eCheck
information, you must include at least one card network in the
allowedCardNetworks
field in the capture context
request.
Allowed Payment Types
You can specify the type of
Microform Integration
you want to
accept in the capture context. You can accept card
and
eCheck
information.
Use the
allowedPaymentTypes
field to define the payment
type:
CARD
CHECK
The
allowedPaymentTypes
field is optional. When this
field is provided in the capture context, the
Microform Integration
defaults the field value to
CARD
and is returned in the
response.
Include Card Prefix
You can control the length of the card number prefix to be received in the
response to the capture context
/sessions
request:
6 digits
8 digits
no prefix at all
To specify your preferred card number prefix length, include or exclude
the
transientTokenResponseOptions.includeCardPrefix
field
in the capture context
/sessions
request.
If you want to receive a 6-digit card number prefix in the
response:
Do not
include the
transientTokenResponseOptions.includeCardPrefix
field in the capture context
/sessions
request.
This example shows how a 6-digit card number prefix
If you want to receive an 8-digit card number prefix in the
response:
Include the
transientTokenResponseOptions.includeCardPrefix
field in the capture context request, and set the value to
true
.
IMPORTANT
Per PCI DSS
requirements, this requirement applies only to card numbers
longer than 15 digits and for Discover, JCB, Mastercard,
UnionPay, and Visa brands.
If the card type entered is not part of these
brands, a 6-digit card number prefix is returned
instead.
If the card type entered is not part of these brands
but is
co-branded
with these brands, an
8-digit card number prefix is returned.
payButton.('click', function () {
// Compiling MM & YY into optional parameters
const options = {
expirationMonth: document.querySelector('#expMonth').value,
expirationYear: document.querySelector('#expYear').value
};
//
microform.createToken(options, function (err, token) {
if (err) {
// handle error
console.error(err);
errorsOutput.textContent = err.message;
} else {
// At this point you may pass the token back to your server as you wish.
// In this example we append a hidden input to the form and submit it.
console.log(JSON.stringify(token));
flexResponse.value = JSON.stringify(token);
form.submit();
}
});
});
Example: Creating the Pay Button with
Event Listener for Checks
payButton.('click', function () {
// Compiling account type into optional parameters
var options = {
accountType: document.querySelector('#accountType').value,
};
//
microform.createToken(options, function (err, token) {
if (err) {
// handle error
console.error(err);
errorsOutput.textContent = err.message;
} else {
// At this point you may pass the token back to your server as you wish.
// In this example we append a hidden input to the form and submit it.
console.log(JSON.stringify(token));
flexResponse.value = JSON.stringify(token);
form.submit();
}
});
});
Example: Customer-Submitted Form with Card
Information
<script>
// Variables from the HTML form
const form = document.querySelector('#my-sample-form');
const payButton = document.querySelector('#pay-button');
const flexResponse = document.querySelector('#flexresponse');
const expMonth = document.querySelector('#expMonth');
const expYear = document.querySelector('#expYear');
const errorsOutput = document.querySelector('#errors-output');
// the capture context that was requested server-side for this transaction
const captureContext = <% -keyInfo %> ;
// custom styles that will be applied to each field we create using Microform
const myStyles = {
'input': {
'font-size': '14px',
'font-family': 'helvetica, tahoma, calibri, sans-serif',
'color': '#555'
},
':focus': { 'color': 'blue' },
':disabled': { 'cursor': 'not-allowed' },
'valid': { 'color': '#3c763d' },
'invalid': { 'color': '#a94442' }
};
// setup Microform
const flex = new Flex(captureContext);
const microform = flex.microform({ styles: myStyles });
const number = microform.createField('number', { placeholder: 'Enter card number' });
const securityCode = microform.createField('securityCode', { placeholder: '•••' });
number.load('#number-container');
securityCode.load('#securityCode-container');
// Configuring a Listener for the Pay button
payButton.addEventListener('click', function () {
// Compiling MM & YY into optional parameters
const options = {
expirationMonth: document.querySelector('#expMonth').value,
expirationYear: document.querySelector('#expYear').value
};
//
microform.createToken(options, function (err, token) {
if (err) {
// handle error
console.error(err);
errorsOutput.textContent = err.message;
} else {
// At this point you may pass the token back to your server as you wish.
// In this example we append a hidden input to the form and submit it.
console.log(JSON.stringify(token));
flexResponse.value = JSON.stringify(token);
form.submit();
}
});
});
</script>
<script>
// Variables from the HTML form
const form = document.querySelector('#my-sample-form');
const payButton = document.querySelector('#pay-button');
const flexResponse = document.querySelector('#flexresponse');
const accountType = document.querySelector('#accountType')
const errorsOutput = document.querySelector('#errors-output');
// the capture context that was requested server-side for this transaction
const captureContext = <% -keyInfo %> ;
// custom styles that will be applied to each field we create using Microform
const myStyles = {
'input': {
'font-size': '14px',
'font-family': 'helvetica, tahoma, calibri, sans-serif',
'color': '#555'
},
':focus': { 'color': 'blue' },
':disabled': { 'cursor': 'not-allowed' },
'valid': { 'color': '#3c763d' },
'invalid': { 'color': '#a94442' }
};
// setup Microform
const flex = new Flex(captureContext);
const microform = flex.microform("check", { styles: myStyles });
const routingNumber = microform.createField("routingNumber", { placeholder: "Enter routing number" });
const accountNumber = microform.createField("accountNumber", { placeholder: "Enter account number" });
const accountNumberConfirm = microform.createField("accountNumberConfirm", { placeholder: "accountNumberConfirm" });
routingNumber.load('#routingNumber-container')
accountNumber.load('#accountNumber-container')
accountNumberConfirm.load('#accountNumberConfirm-container')
// Configuring a Listener for the Pay button
payButton.addEventListener('click', function () {
// Compiling MM & YY into optional parameters
const options = {
accountType: document.querySelector('#accountType').value,
};
//
microform.createToken(options, function (err, token) {
if (err) {
// handle error
console.error(err);
errorsOutput.textContent = err.message;
} else {
// At this point you may pass the token back to your server as you wish.
// In this example we append a hidden input to the form and submit it.
console.log(JSON.stringify(token));
flexResponse.value = JSON.stringify(token);
form.submit();
}
});
});
</script>
JSON Web Tokens (JWTs) are digitally signed JSON objects based on the open standard RFC 7519. These tokens provide a compact, self-contained
method for securely transmitting information between parties. These tokens are
signed with an RSA-encoded public/private key pair. The signature is calculated
using the header and body, which enables the receiver to validate that the content
has not been tampered with.
A JWT takes the form of a string, and consists of three parts separated by dots:
<Header>.<Payload>.<Signature>
The header and payload is
Base64-encoded JSON
and contains these claims:
Header
: The algorithm and token type. For
example:
{
"kid": "zu",
"alg": "RS256"
}
Payload
: The claims of what the token represents. For
example:
: The signature is computed from the header and payload using a
secret or private key.
IMPORTANT
When working with JWTs,
Cybersource
recommends that you use a well- maintained JWT library to ensure proper decoding
and parsing of the JWT.
IMPORTANT
When parsing the JWT’s JSON payload, you must ensure that you
implement a robust solution for transversing JSON. Additional elements can be
added to the JSON in future releases. Follow JSON parsing best practices to
ensure that you can handle the addition of new data elements in the future.
Browser Support
Microform Integration
is supported on these browsers and versions:
Chrome 80 or later
Edge 109 or later
Firefox 115 or later
Opera 106 or later
Safari 13 or later
PCI DSS Guidance
Any merchant accepting payments must comply with the PCI Data Security Standards (PCI
DSS).
Microform Integration
’s approach facilitates PCI DSS compliance through
self-assessment and the storage of sensitive PCI information.
Self-Assessment Questionnaire
Microform Integration
handles the card number input and transmission from within iframe elements
served from
Cybersource
controlled domains. This approach can
qualify merchants for SAQ A-based assessments. Related fields,
such as card holder name or expiration date, are not considered sensitive when not
accompanied by the PAN.
Storing Returned Data
Responses from
Microform Integration
are stripped of sensitive PCI information such as card
number. Fields included in the response, such as card type and masked card number,
are not subject to PCI compliance and can be safely stored within your systems. If
you collect the CVN, note that it can be used for the initial authorization but not
stored for subsequent authorizations.
WCAG 2.2 Compliance
Your integration must be compliant with the Web Content Accessibility Guidelines (WCAG
2.2) in order to meet accessibility standards and regulations.
Microform Integration
is designed with these guidelines in mind but some
accessibility compliance is dependent on your integration, particularly the custom
styling of fields. This section contains the minimum required information to ensure that
Microform Integration
is compliant with WCAG 2.2.
Microform Integration
automatically handles many accessibility requirements,
but the hosting page and custom styling elements are your responsibility. The parent
page that contains
Microform Integration
must meet WCAG 2.2 standards. This
includes proper heading structure, page titles, and other accessibility requirements.
All fields that are rendered in
Microform Integration
are automatically
assigned as
aria-required
set to
true
. The parent
page must implement clear visual indicators to indicate that these fields are required
for users. For information about WCAG 2.2 guidelines, see the Web Content
Accessibility Guidelines (WCAG) 2.2 on the W3C website.
Font Configuration
You must follow these guidelines when you apply custom styles to
Microform Integration
:
Set the font size to at least 16px (1rem) for input fields.
Select font families that are compatible with screen readers and assistive
technologies.
Set a line height that is at least 1.5 times the font size.
This is an example
Microform Integration
font configuration:
// define accessible custom styles
var customStyles = {
'input': {
'font-size': '16px',
'family': 'Arial, sans-serif',
'lineHeight': '1.5'
}
}
// apply styles to all fields
var microform = flex.microform({ styles: customStyles });
Color and Contrast
Follow these guidelines to ensure that visibility is compliant for all users:
Maintain a minimum contrast ratio of 4.5:1 between text and background
colors.
Do not rely solely on color to convey information.
Implement distinct focus states using both color changes and other visual
indicators.
Use the
flex-microform-focused
class for consistent focus
indication.
This is an example of color and contrast configuration for
Microform Integration
:
/* add a visual indicator for focus */
.flex-microform-focused {
background: lightyellow;
}
Handle Errors
Microform Integration
provides managed classes to indicate field
validation states. You must handle any errors that are returned by the
createToken
method. Follow these guidelines to handle
errors:
Implement error handling that programmatically associates error messages with
their respective form fields.
Associate all helper text with its corresponding form control by setting
aria-describedby
to
helperTextId
.
helperTextId
is the unique ID of the helper text
container element.
Use the
MicroformError
object to determine to which fields
the error applies.
Ensure that all error messages are clear, descriptive, and concise.
Make error messages visible and properly announced by screen readers.
This is an example
MicroformError
object:
{
"name": "MicroformError",
"reason": "CREATE_TOKEN_VALIDATION_FIELDS",
"message": "One or more fields have a validation error.",
"informationLink": "https://www.company.com/products/payment_security/secure_acceptance",
"details": [
{
"message": "Validation error",
"location": "number"
}
]
}
Testing
Follow these guidelines to verify that your integration is compliant before you
deploy:
Test keyboard navigation through the entire payment form.
Validate that your implementation works with screen readers (NVDA, JAWS,
VoiceOver).
Run automated accessibility checks with tools such as Axe or Lighthouse.
Conduct manual testing with common assistive technologies.
When you follow these guidelines, your
Microform Integration
implementation maintains compliance with WCAG 2.2 while you provide an accessible
payment experience for all users.
Test Card Numbers
Use these test card numbers to test your
Microform Integration
configuration.
Combine the BIN with the card number when sending to
Microform Integration
.
Test Card Numbers
Card Brand
BIN
Card Number
Expiration Date
CVV
Visa
424242
4242424242
12/2026
123
Mastercard
555555
5555554444
02/2026
265
American Express
378282
246310005
03/2026
7890
Cartes Bancaires
436000
0001000005
04/2040
123
Carnet
506221
0000000009
04/2024
123
China UnionPay
627988
6248094966
04/2040
123
Diners Club
305693
09025904
04/2040
123
Discover
644564
4564456445
04/2040
123
JCB
353011
13333 0000
04/2040
123
Maestro
675964
9826438453
04/2040
123
Mada
446404
0000000007
04/2040
123
ELO
451416
0000000003
04/2040
123
JCrew
515997
1500000005
04/2040
123
EFTPOS
401795
000000000009
04/2040
123
Meeza
507808
3000000002
04/2040
123
UATP
148512
345678905
04/2040
KCP
949022
0011669217
04/2040
Jaywan
669000
0000000000
04/2040
123
Introduction to
Unified Checkout
Unified Checkout
provides a single interface with which you can
accept numerous types of card, digital, and alternative payments.
Unified Checkout
calls other follow-on services such as Payments,
Decision Manager
,
Payer Authentication
, and
Token Management Service
(
TMS
).
Unified Checkout
consists of a server-side component and a
client-side JavaScript library.
The server-side component authenticates your merchant identity and instructs the
system to act within your payment environment. The response contains limited-use public
keys. The keys are for end-to-end encryption and contain merchant-specific payment
information that drives the interaction of the application. The client-side JavaScript
library dynamically and securely places digital payment options onto your e-commerce
page.
The provided JavaScript library enables you to securely accept many payment
options within your e-commerce environment.
Unified Checkout
can be
embedded seamlessly into your existing webpage, simplifying payment acceptance.
When a customer selects a payment method from the button widget,
Unified Checkout
handles all interactions with the payment method that was
chosen.
Unified Checkout
is also able to orchestrate requests for to
follow-on services such as Payments,
Decision Manager
,
Payer Authentication
, and
TMS
before it provides a
response to your e-commerce system.
The figure below shows
Unified Checkout
with customer checkout
payment options.
Figure:
Button Widget
For examples of different payment method UIs through
: You can use as few as three lines of JavaScript
to accept payments, as well as add or remove payment methods through portal
configuration without changing your integration code.
PCI SAQ-A compliant
: Payment data never touches your systems.
Fully customizable
: You can match the payment experience to your
brand with theming, fonts, and layout options. Embed inline or display as a
sidebar overlay.
Service orchestration
: You can use
Decision Manager
,
Payer Authentication
(
3-D Secure
), and
Token Management Service
(
TMS
) throughout the session.
Unified Checkout
Quick Start
Unified Checkout
is a powerful and flexible payment solution that
simplifies the integration process and enhances the customer checkout experience. This
guide will help you get up and running with
Unified Checkout
.
Key Features
Seamless integration with your existing e-commerce platform.
Support for multiple payment methods.
Customizable checkout flow.
Enhanced security features.
Responsive design for mobile and desktop.
Benefits
Simplified integration process.
Improved conversion rates.
Reduced cart abandonment.
Enhanced customer experience.
Compliance with industry security standards.
This graphic provides an overview of the steps you must follow to get set up with
Unified Checkout
:
Figure:
Unified Checkout
Integration Overview
Step 1: Enable
Unified Checkout
To begin using
Unified Checkout
, you must first ensure that your
merchant ID (MID) is configured to use the service and that any payment methods you
intend to use are properly set up.
If you are unable to access this page, contact your sales
representative.
In the
Business Center
, go to the left navigation panel and choose
Payment Configuration
>
Unified
Checkout
. The
Unified Checkout
customer experience
page appears:
Figure:
Unified Checkout
Customer Experience
The
Unified Checkout
configuration interface provides complete
low-code control over your checkout experience by using dedicated configuration
screens accessible through the
Business Center
. The configuration
interface is organized into separate screens, each accessible from the
My
customer experience
page. Configure each of these components of the
checkout experience:
Payment Options
: Add, remove, and arrange payment methods. For
information about configuring payment methods, see Configure Payment Options.
within your webpage, you need to set
up the server-side component. This task involves generating a capture context. A capture
context is a signed JSON Web Token (JWT) that contains your merchant configuration,
one-time encryption keys, and payment parameters.
Follow these steps to make a
server-to-server call to the Sessions API to authenticate your merchant credentials
and establish how the
Unified Checkout
front-end components will
function:
Implement a server-to-server call to the Sessions API.
ADDITIONAL INFORMATION
This call should include parameters that define how
Unified Checkout
performs.
Handle the response from the Sessions API.
ADDITIONAL INFORMATION
The response will contain:
A transaction-specific public key for securing the transaction in the
customer's browser.
An authenticated context description package that manages the payment
experience on the client side, including available payment options,
interface styling, and payment methods.
Store and manage the JSON Web Token (JWT) object, referred to as the
capture
context
.
This JWT contains all the functions compiled from the Sessions API
response:
array must include every
origin that will host the SDK. The response JWT is passed to the client-side
library.
This capture context contains only the minimum required fields.
For information about the components of the capture context and how to
create one using the Sessions API, see Sessions API. For a complete capture context
with all available fields, see Example: Unified Checkout Complete Capture Context.
. This attaches the payment UI to
your page. The argument determines the display mode:
Sidebar Mode
The payment screen appears as an overlay sidebar. Pass a CSS selector for the
payment button list, or omit it
entirely:
// Full sidebar — buttons and payment screen both in sidebar
const result = await checkout.mount();
// Buttons embedded, payment screen in sidebar
const result = await checkout.mount('#payment-buttons');
Embedded Mode
Both the button list and payment screen render inline within your page
layout:
const result = await checkout.mount({
paymentSelection: '#payment-buttons',
paymentScreen: '#payment-form'
});
Mount Result
When
autoProcessing
is enabled,
mount()
resolves with the completed payment result JWT once the customer finishes the
payment flow.
When
autoProcessing
is disabled,
mount()
resolves with a transient token JWT. You then call
Proper configuration ensures that your checkout process aligns with your business
needs and provides a smooth experience for your customers. You can configure the
checkout process in the
Business Center
:
Select and configure the payment methods you support:
, it's crucial to thoroughly test
your integration to ensure it works correctly and provides a smooth checkout experience
for your customers. This section outlines the steps to test your
Unified Checkout
integration.
Set up your test environment:
Log in to the
Business Center
account using your test
credentials.
Switch to the test environment if not already in test mode.
Set up a test website or application that integrates
Unified Checkout
.
Use test card numbers to simulate different payment scenarios.
Verify that the capture context object that you get from the sessions API is
correct and that your integration can handle tokens.
Ensure that your integration correctly handles the capture context and
transient tokens throughout the payment process.
Test error handling and edge cases.
Simulate various error scenarios to ensure your integration gracefully
handles and reports errors to the user.
Verify webhook notifications, if configured.
If you set up webhook notifications, ensure that your system correctly
receives and processes them for various transaction events. For information
about configuring your webhook notifications, see Webhooks Support.
AFTER COMPLETING THE TASK
After completing these testing steps, you should have confidence in your
integration. Remember to test in both the test and production environments before going
live.
Unified Checkout
Flow
To integrate
Unified Checkout
into your
platform, you must follow several integration steps. This section gives a high-level
overview of how to integrate and launch
Unified Checkout
on your
webpage and process a transaction. You can find the detailed specifications of the
APIs later in this document.
Information that is captured by
Unified Checkout
, including the billing
and shipping address, can be retrieved using the Payment Details API.
The figure below shows the
Unified Checkout
payment flow using the
Sessions API to generate the capture context:
Figure:
Unified Checkout
Payment Flow
For more information on the specific APIs referenced, see these topics:
Sessions API: This
generates the capture context and determines what fields are displayed to
the customer in the UI during checkout.
Payment Details API: This
API can be used to retrieve personally identifiable information that is
associated with a
Unified Checkout
transient token, such as
the cardholder name and billing and shipping details, without retrieving
payment credentials.
Payment Methods
This section describes the payment methods you can use in your
Unified Checkout
integration. After you successfully integrate one payment
method, you can add another from the same category with minimal adjustments to your
existing configuration.
You can use these token types to pay with a token in
Unified Checkout
:
Customer Tokens
When you include the customer token, your UI displays the default payment
instrument that is inked to a customer. To display a customer token, you
must include the
paymentConfigurations.TMS_TOKEN.customer.id
field
in your Sessions API request.
IMPORTANT
When you include a customer token ID here with
tokenCreate
for a
paymentInstrument
or
instrumentIdentifier
, the complete mandate
creates a new payment instrument or instrument identifier within the
level of the customer token that you provide.
When you include an instrument identifier token, your UI displays the
payment instrument that is associated with the specified instrument
identifier. To display an instrument identifier token, you must include the
When you include a payment instrument, your UI displays the payment
instrument that is associated with the specified payment instrument token
identifier. To display a payment instrument, you must include the
When you meet these requirements, a new payment instrument or instrument
identifier is created under the specified customer token.
eCheck/ACH Service
Unified Checkout
supports the acceptance of eCheck information.
Sensitive eCheck data is securely captured and replaced with a token. Acceptance of
eCheck information enables merchants to collect funds from a customer's bank account
through both the ACH service and eCheck service (US only) for either of these flows:
ACH services are a set of connections composed of the legacy gateway
solutions where
Cybersource
serves as the gateway.
eCheck, the new service on Payments 2.0, is the acquirer solution where
Cybersource
is the acquirer.
Unified Checkout replaces these eCheck information fields in your payment input form:
Routing number
Account number
Account type (non-sensitive)
Enrolling in eCheck/ACH Services
Unified Checkout
can accept bank account payments using the eCheck product.
To accept eCheck payments through
Unified Checkout
, you must have the
eCheck processing service enabled. To request access to eCheck processing and enable
eCheck, you must submit an application in the
Business Center
. Once your
application is approved, you can accept eCheck payments.
For step-by-step instructions on enrolling and enabling eCheck, see the “Getting
Started with the eCheck Service” section of the
. If
eCheck is not listed in the Available Products section in the
Business Center
, you must contact your portfolio owner to enable your account to apply for
eCheck.
IMPORTANT
If you have a business account or a financial relationship
with Bank of America, Wells Fargo, or Chase, and you would like them to process
your transactions, you must contact our Sales or Support team for more
information on our ACH product.
Pay with eCheck/ACH Service UI
These screen captures show the sequence of events your customer can expect when
completing a payment with the eCheck/ACH service.
Figure:
eCheck/ACH Service Account Order Summary
Figure:
Pay with eCheck/ACH Service Checkout
Figure:
Pay with eCheck/ACH Service Review and Confirm
Digital Wallets
Digital wallets are secure applications or services that enable users to store payment
details, such as debit or credit cards electronically.
Digital wallets such as Apple Pay, and Google Pay are accessible with smartphones,
computers, or even directly in web browsers. Digital wallets allow customers to pay for
goods and services both online and in physical stores without a physical card, often
using biometrics, a device passcode, or wallet login, and approve the payment in just a
few clicks.
For online transactions, the wallet securely passes a payment token to the merchant or
payment processor. This means that you do not handle sensitive customer data directly.
This reduces friction at checkout, improves conversion rates, and enhances security
through built‑in authentication and tokenization.
Wallets are best suited for one‑time online purchases and express checkout experiences.
Support for subscriptions and recurring payments varies by wallet, so you must ensure
compatibility if future charges or merchant‑initiated transactions are required.
Unified Checkout
supports these wallet-based payment options:
Apple Pay
Google Pay
Click to Pay
Paze
This is how payments with digital wallets work:
Apple Pay
Apple Pay is a digital payment solution that enables your customers to make secure
and convenient purchases without requiring them to enter their card details or
shipping information. This section includes information about accepting Apple Pay
payments with your
Unified Checkout
integration.
Enrolling in Apple Pay
Apple Pay is a digital payment service that enables users to make secure and convenient
transactions using their Apple devices. Users can add their credit or debit cards to the
Wallet app and use them to pay online or in apps in a safe and convenient consumer
experience.
To enable Apple Pay you must first host a public certificate on your
web page and then pass your merchant name and domain name to Apple. Apple crawls out
to your web page to validate the presence of this certificate to ensure the web
pages are properly vetted and registered with Apple.
Follow these steps to
validate your domain and enroll in Apple Pay:
These screen captures show the sequence of events your customer can expect when
completing a payment with Google Pay.
Figure:
Google Pay UI
Click to Pay
Click to Pay
is a secure online checkout method that enables
customers to make purchases without entering their payment details for every
purchase. This section includes information about accepting
Click to Pay
payments with your
Unified Checkout
integration.
Enabling
Click to Pay
in the
Business Center
To begin your integration, you must first enable
Click to Pay
.
Click to Pay
is a digital payment solution that allows customers
to pay with their preferred card network and issuer without entering their card details
on every website. Customers can use Visa, Mastercard, and American Express cards to
streamline their purchase experience.
Click to Pay
provides a fast,
secure, and consistent checkout experience across devices and browsers.
If you are unable to access this page, contact your sales
representative.
In the
Business Center
, go to the left navigation panel and choose
Payment Configuration
>
Unified
Checkout
. The
Unified Checkout
customer experience
page appears:
Figure:
Unified Checkout
Customer Experience
In the Payment Options section, click
Manage
. The Payment Options page
appears.
Click
Manage
next to
Click to Pay
. The
Click to Pay
configuration page appears.
Enter your business name and website URL.
Click
Submit
.
IMPORTANT
Click to Pay
uses network tokenization for transactions. These network tokens are stored
in the vault of the token requestor ID (TRID) for the card scheme.
Set Up Customer Authentication for
Click to Pay
Follow these steps to use the
Business Center
to enable customer
authentication through
Click to Pay
. Authentication methods differ in
each region and are dependent on the issuer, the cardholder device, and the
Click to Pay
configuration.
Click to Pay
authentication is available for Visa and Mastercard card types.
IMPORTANT
This authentication method is different
from the authentication that is completed entirely in the
Cybersource
platform. To authenticate within the
Cybersource
platform, you must include the
consumerAuthentication
field in your request.
These authentication methods are available:
3-D Secure
FIDO/Passkey
Card verification value (CVV)
One-time password (OTP)
IMPORTANT
After you complete these steps,
the card issuer determines which authentication method to use. When the issuer
determines that they will authenticate, they authenticate each
Click to Pay
transaction through the appropriate method. This may
be a frictionless authentication or the customer may need to provide more
information when required by the issuer.
IMPORTANT
Click to Pay
authentication is not the same
as consumer authentication using the complete mandate. See Test Authentication.
If you are unable to access this page, contact your sales
representative.
In the
Business Center
, go to the left navigation panel and choose
Payment Configuration
>
Unified
Checkout
.
You must have
Click to Pay
enabled as a digital payment
method in order to use this method of authentication. Click
Manage
to
view the digital payment methods that you have enabled.
If
Click to Pay
is not enabled, click
On
next to
Click to Pay
.
Click
Set up
under Value Added Solutions. The Value Added Solutions page
appears.
Click
Set up
to set up
3-D Secure
. The 3DS page
appears.
Enter the required information in the Merchant Details section. You must enter
the information that is provided to you by
your acquirer or processor
.
Step Result
This completes the authentication setup for the entered acquirer
merchant ID and BIN. If you do not know what these values are, you must contact
your acquirer
. Completing this information
enables
Cybersource
to send Visa and Mastercard the information
that is required for authentication.
IMPORTANT
Charges for
3-D Secure
may apply. You must speak with
your acquirer
for more information
about the charges associated with
3-D Secure
.
Click to Pay
Customer Authentication
When you enable customer authentication through
Click to Pay
, you give
Cybersource
permission to send Visa and Mastercard the required
authentication information for each transaction. When the customer completes a
transaction using a Visa or Mastercard card that is already stored in
Click to Pay
, authentication is managed within
Click to Pay
.
Click to Pay
authentication is only available for Visa branded cards that
are tokenized with
Click to Pay
. If
Click to Pay
does not
authenticate the transaction, but you are using the complete mandate with the
consumerAuthentication
field set to
3DS
, authentication is attempted as
part of this request. When you do not use the complete mandate, you must check the
result of the
cardholderAuthenticationStatus
field in the transient
token and request
Payer Authentication
directly when it is required.
IMPORTANT
American Express card brands cannot be authenticated through
Click to Pay
customer authentication.
Authentication Flow
Click to Pay
UI
These screen captures show the sequence of events your customer can expect when
completing a payment with
Click to Pay
.
Figure:
Click to Pay
UI
Click to Pay
UI Guidelines
The UI that is built in
Unified Checkout
for
Click to Pay
is built based on the EMV
Click to Pay
XC Guidelines V1.1.
Unified Checkout
has simplified the integration of the UI. The only UI
work that you must complete is the placement of the payment option.
IMPORTANT
You must include
Click to Pay
as one of the
presented payment methods and not as a separate payment method.
Unified Checkout
captures all card details that are manually entered by the
cardholder. This enables the cardholder to enroll in
Click to Pay
and removes the requirement for the cardholder to manually enter their card details the
next time they check out.
Unified Checkout
provides a standard payment label in the
Unified Checkout
JavaScript that is loaded in your checkout page. One of these
scenarios occurs when the cardholder selects the button:
The cardholder is recognized.
The cardholder is not recognized but has a
Click to Pay
account.
The cardholder does not have a
Click to Pay
account.
You can also trigger the
Unified Checkout
flow using a custom button. If
you are using your own custom button, your payment button or widget must display the
Your implementation consultant will ask you for a mock-up of your
payment flow for confirmation that it is compliant with the
Click to Pay
UI design standards.
Recognized
Click to Pay
Customer
The cardholder is presented with their stored
Click to Pay
cards
in the UI when they are on a recognized device:
Figure:
Recognized
Click to Pay
Customer UI
Unrecognized
Click to Pay
Customer
When the cardholder has a
Click to Pay
account but is not on a
registered device, they receive a one-time password to their registered email
address and phone number to authenticate their identity before their stored
Click to Pay
credentials are shown:
Figure:
Unrecognized
Click to Pay
Customer on a Recognized
Device UI
No
Click to Pay
Account
When the cardholder does not have a
Click to Pay
account, they
can provide a new email address to perform a new lookup or they can choose to enter
their card details manually. The cardholder can make a one-time payment or complete
the payment and choose to create a
Click to Pay
account for
future use:
Figure:
No
Click to Pay
Account UI
Click to Pay
UI Examples
This section contains UI examples of how you should display
Click to Pay
on your payment page. For information about how to display
the UI, see JavaScript API Reference.
Click to Pay
Replaces PAN Capture
Click to Pay
is the card entry payment option within your payment
page.
JavaScript flow within your own
payment button without requiring the cardholder to select a card payment option.
This example shows a recognized user payment flow where the cardholder's information
is shown automatically next to the other payment methods hosted within your payment
page. For information about customizing how to trigger
Loaded Automatically From Trigger or
Components UI
Card Payment Options with
Click to Pay
in UI
Do not present the
Unified Checkout
payment button as a separate
payment method from the card payment button. If you do this, the cardholder is not
prompted with their
Click to Pay
cards and must manually enter
their payment details. They will also not have the option to store their card within
Click to Pay
for future use.
These examples show multiple card payment options and
Click to Pay
in a UI:
Figure:
Multiple Card Payment Options in UI Example 1
Figure:
Multiple Card Payment Options in UI Example 2
Figure:
Multiple Card Payment Options in UI Example 3
Paze
Paze is an online checkout option, or
digital wallet
, that enables you to
offer customers a fast and secure way to make purchases online. This section
includes information about accepting Paze payments with your
Unified Checkout
integration.
Paze UI
These screen captures show the sequence of events your customer can expect when
completing a payment with Paze.
Figure:
Paze UI
Alternative Payment Methods
This section describes the alternative payment methods you can use in your
Unified Checkout
integration. After you successfully integrate one payment
method, you can add another from the same category with minimal adjustments to your
existing configuration.
Online bank transfers enable customers to complete their purchase by securely logging
into their online banking environment. This method is secure, trusted, and widely used
in many European countries.
IMPORTANT
Before you can enroll in these alternative payment method on
Unified Checkout
, you must first be enabled for the alternative
payment platform. Contact your portfolio administrator for more information.
This is how online bank transfers work:
Figure:
Online Bank Transfers
The customer chooses online bank transfer as their payment method during
checkout.
The customer chooses their bank from the list of available banks and is
redirected to their bank's website or application where they are prompted to
enter their account credentials.
The customer confirms their payment and completes the authorization
process.
The customer is notified that the payment is complete.
The customer returns to your website for payment confirmation.
Unified Checkout
supports these online bank transfer payment methods:
Bancontact
DragonPay
iDeal
Multibanco
MyBank
Przelewy24|P24
Tink Pay By Bank
Online Bank Transfer Payment Methods
Payment Method
Capture Context
allowedPaymentTypes
Capture Context
completeMandate.type
Separate Capture?
Payment Confirmation
Customer Country (Country Code)
Customer ISO Currency Code
iDEAL
IDEAL
CAPTURE
or
PREFER_AUTH
No
Immediate
Netherlands (NL)
EUR
Multibanco
MULTIBANCO
CAPTURE
or
PREFER_AUTH
No
Immediate
Portugal (PT)
EUR
Przelewy24
PRZELEWY24
CAPTURE
or
PREFER_AUTH
No
Immediate
Poland (PL)
PLN
Bancontact
BANCONTACT
CAPTURE
or
PREFER_AUTH
No
Immediate
Belgium (BE)
EUR
MyBank
MYBANK
CAPTURE
or
PREFER_AUTH
No
Immediate
Italy (IT)
EUR
Belgium (BE)
Portugal (PT)
Spain (ES)
DragonPay
DRAGONPAY
CAPTURE
or
PREFER_AUTH
No
Immediate
Philippines (PH)
PHP
Tink Pay by Bank
TINKPAYBYBANK
CAPTURE
or
PREFER_AUTH
No
Immediate
France (FR)
EUR
Germany (DE)
EUR
Ireland (IE)
EUR
Netherlands (NL)
EUR
Spain (ES)
EUR
United Kingdom (GB)
GBP
Bancontact
Bancontact enables customers to make secure online and in-store purchases directly from
their bank accounts. Bancontact is a leading payment method in Belgium.
When the total amount of the order is outside the range of accepted transaction amounts,
the Bancontact payment button is not displayed in
Unified Checkout
. These
are the accepted transaction amounts:
Minimum transaction amount
: EUR 0.01
Maximum transaction amount
: Not applicable
Opt in to Bancontact on
Unified Checkout
Follow these steps to opt in to Bancontact on
Unified Checkout
:
Add Bancontact to your integration by adding
BANCONTACT
to the
allowedPaymentTypes
field object within the capture
context request.
Set the
completeMandate.type
field value to
CAPTURE
or
PREFER_AUTH
.
You can capture
the funds immediately if you include the
completeMandate.type
field in the capture context
request and set the value to
CAPTURE
.
If you support
more than one payment type and must perform an authorization where funds are
collected at a later time, set the
completeMandate.type
field to
PREFER_AUTH
. The funds will be captured
immediately for the online bank transfer.
Include these required fields for online bank transfers in the capture context request:
data.orderInformation.billTo.country
data.orderInformation.billTo.firstName
data.orderInformation.billTo.lastName
Include this optional field for online bank transfers in the capture context request:
data.orderInformation.billTo.address1
data.orderInformation.billTo.email
DragonPay
DragonPay provides Filipino customers and businesses with a secure payment channel that
does not require customers to be banked or have a credit card. Customers can make
purchases online and pay by bank transfer.
When the total amount of the order is outside the range of accepted transaction amounts,
the DragonPay payment button is not displayed in
Unified Checkout
. These
are the accepted transaction amounts:
Minimum transaction amount
: PHP 50.01
Maximum transaction amount
: Not applicable
Opt in to DragonPay on
Unified Checkout
Follow these steps to opt in to Multibanco on
Unified Checkout
:
Add DragonPay to your integration by adding
DRAGONPAY
to the
allowedPaymentTypes
field object within the capture
context request.
Set the
completeMandate.type
field value to
CAPTURE
or
PREFER_AUTH
.
You can capture
the funds immediately if you include the
completeMandate.type
field in the capture context
request and set the value to
CAPTURE
.
If you accept
more than one payment type and must perform an authorization where funds are
collected at a later time, set the
completeMandate.type
field to
PREFER_AUTH
. The funds are captured immediately
for the online bank transfer.
Include these required fields for online bank transfers in the capture context request:
data.orderInformation.billTo.country
data.orderInformation.billTo.firstName
data.orderInformation.billTo.lastName
Include this optional field for online bank transfers in the capture context request:
data.orderInformation.billTo.address1
data.orderInformation.billTo.email
Tink Pay By Bank
Tink is an alternative payment method that uses the
pay by bank
payment method.
Tink Pay By Bank enables customers to make payments directly from their bank account to
the seller's account and bypasses traditional payment methods such as credit cards.
When the total amount of the order is outside the range of accepted transaction amounts,
Tink Pay By Bank is not displayed in
Unified Checkout
.
These are the accepted transaction amounts for the United Kingdom (GB):
Minimum transaction amount
: Not applicable
Maximum transaction amount
: GBP 8,500
Opt in to Tink Pay By Bank on
Unified Checkout
You can enable Tink Pay By Bank from the
Unified Checkout
merchant
experience section in the
Business Center
. For information about how to
enable Tink Pay By Bank using the
API. Follow these steps to opt in to the Tink Pay By
Bank payment method using the API:
Add Tink Pay by Bank to your integration by adding
TINKPAYBYBANK
to the
allowedPaymentTypes
field object within the capture context request.
To use Tink Pay By Bank in your selected country, you must set the
country
field value to the correct value in the capture
context request:
Tink Pay By Bank
country
Field Values
Country
country
Field Value
United Kingdom
GB
Set the
completeMandate.type
field value to
CAPTURE
or
PREFER_AUTH
.
You can capture
the funds immediately if you include the
completeMandate.type
field in the capture context
request and set the value to
CAPTURE
.
If you accept
more than one payment type and must perform an authorization where funds are
collected at a later time, set the
completeMandate.type
field to
PREFER_AUTH
. The funds are captured immediately
for the online bank transfer.
To use Tink Pay By Bank in your selected country, you must set the
data.orderInformation.billTo.country
field value to the
correct value in the capture context request:
Tink Pay By Bank
data.orderInformation.billTo.country
Field
Values
Country
data.orderInformation.billTo.country
Field Value
United Kingdom
GB
To use Tink Pay By Bank in your selected country, you must set the
data.orderInformation.amountDetails.currency
field value
to the correct value in the capture context request:
Tink Pay By Bank
data.orderInformation.amountDetails.currency
Field Values
Country
data.orderInformation.amountDetails.currency
Field Value
United Kingdom
GBP
Include this optional field for online bank transfers in the capture context request:
data.orderInformation.billTo.firstName
data.orderInformation.billTo.lastName
data.orderInformation.shipTo.address1
data.orderInformation.shipTo.address2
data.orderInformation.shipTo.country
data.orderInformation.shipTo.district
data.orderInformation.shipTo.firstName
data.orderInformation.shipTo.lastName
data.orderInformation.shipTo.locailty
data.orderInformation.shipTo.postalCode
iDeal
iDEAL enables customers to pay online through their mobile banking app or online bank
account and provides you with a payment guarantee. iDEAL supports these banks:
ABN AMRO
ASN Bank
bunq
ING
Knab
Rabobank
RegioBank
Revolut
SNS
Svenska Handelsbanken
Triodos Bank
Van Lanschot
When the total amount of the order is outside the range of accepted transaction amounts,
the iDeal payment button is not displayed in
Unified Checkout
. These are
the accepted transaction amounts:
Minimum transaction amount
: EUR 0.01
Maximum transaction amount
: Subject to transaction approval from the
customer's account.
Opt in to iDeal on
Unified Checkout
Follow these steps to opt in to iDeal on
Unified Checkout
:
Add iDeal to your integration by adding
IDEAL
to the
allowedPaymentTypes
field object within the capture
context request.
Set the
completeMandate.type
field value to
CAPTURE
or
PREFER_AUTH
.
You can capture
the funds immediately if you include the
completeMandate.type
field in the capture context
request and set the value to
CAPTURE
.
If you accept
more than one payment type and must perform an authorization where funds are
collected at a later time, set the
completeMandate.type
field to
PREFER_AUTH
. The funds are captured immediately
for the online bank transfer.
Include these required fields for online bank transfers in the capture context request:
data.orderInformation.billTo.country
data.orderInformation.billTo.firstName
data.orderInformation.billTo.lastName
Include this optional field for online bank transfers in the capture context request:
data.orderInformation.billTo.address1
data.orderInformation.billTo.email
MyBank
MyBank enables customers to pay for their online purchases in an easy and safe way using
real-time bank transfers. MyBank customers complete payments by selecting their bank and
logging in with their online banking credentials.
When the total amount of the order is outside the range of accepted transaction amounts,
the MyBank payment button is not displayed in
Unified Checkout
. These are
the accepted transaction amounts:
Minimum transaction amount
: EUR 0.01
Maximum transaction amount
: EUR 999,999,999.99
Opt in to MyBank on
Unified Checkout
Follow these steps to opt in to MyBank on
Unified Checkout
:
Add MyBank to your integration by adding
MYBANK
to the
allowedPaymentTypes
field object within the capture
context request.
Set the
completeMandate.type
field value to
CAPTURE
or
PREFER_AUTH
.
You can capture
the funds immediately if you include the
completeMandate.type
field in the capture context
request and set the value to
CAPTURE
.
If you accept
more than one payment type and must perform an authorization where funds are
collected at a later time, set the
completeMandate.type
field to
PREFER_AUTH
. The funds are captured immediately
for the online bank transfer.
Include these required fields for online bank transfers in the capture context request:
data.orderInformation.billTo.country
data.orderInformation.billTo.firstName
data.orderInformation.billTo.lastName
Include this optional field for online bank transfers in the capture context request:
data.orderInformation.billTo.address1
data.orderInformation.billTo.email
Multibanco
Multibanco enables customers to pay for a range of goods and services by bank transfer.
These services include e-commerce, licenses, and taxes post-purchase. Multibanco is
supported by all banks in Portugal.
When the total amount of the order is outside the range of accepted transaction amounts,
the Multibanco payment button is not displayed in
Unified Checkout
. These
are the accepted transaction amounts:
Minimum transaction amount
: No minimum
Maximum transaction amount
: EUR 99,999
Opt in to Multibanco on
Unified Checkout
Follow these steps to opt in to Multibanco on
Unified Checkout
:
Add Multibanco to your integration by adding
MULTIBANCO
to the
allowedPaymentTypes
field object within the capture
context request.
Set the
completeMandate.type
field value to
CAPTURE
or
PREFER_AUTH
.
You can capture
the funds immediately if you include the
completeMandate.type
field in the capture context
request and set the value to
CAPTURE
.
If you accept
more than one payment type and must perform an authorization where funds are
collected at a later time, set the
completeMandate.type
field to
PREFER_AUTH
. The funds are captured immediately
for the online bank transfer.
Include these required fields for online bank transfers in the capture context request:
data.orderInformation.billTo.country
data.orderInformation.billTo.firstName
data.orderInformation.billTo.lastName
Include this optional field for online bank transfers in the capture context request:
data.orderInformation.billTo.address1
data.orderInformation.billTo.email
Przelewy24|P24
Przelewy24, or P24, is a Poland-based real-time online bank transfer payment method. P24
is one of the most popular payment methods in Poland covering all major consumer
banks.
When the total amount of the order is outside the range of accepted transaction amounts,
the P24 payment button is not displayed in
Unified Checkout
. These are the
accepted transaction amounts:
Minimum transaction amount
: PLN 0.01, EUR 0.01
Maximum transaction amount
: PLN 55,000.00, EUR 12,500.00
Opt in to Przelewy24|P24 on
Unified Checkout
Follow these steps to opt in to Przelewy24|P24 on
Unified Checkout
:
Add Przelewy24|P24 to your integration by adding
PRZELEWY24
to
the
allowedPaymentTypes
field object within the capture
context request.
Set the
completeMandate.type
field value to
CAPTURE
or
PREFER_AUTH
.
You can capture
the funds immediately if you include the
completeMandate.type
field in the capture context
request and set the value to
CAPTURE
.
If you support
more than one payment type and must perform an authorization where funds are
collected at a later time, set the
completeMandate.type
field to
PREFER_AUTH
. The funds will be captured
immediately for the online bank transfer.
Include these required fields for online bank transfers in the capture context request:
data.orderInformation.billTo.country
data.orderInformation.billTo.email
data.orderInformation.billTo.firstName
data.orderInformation.billTo.lastName
Include this optional field for online bank transfers in the capture context request:
data.orderInformation.billTo.address1
Verify Status for Online Bank Transfers
When the status of your payment request is
PENDING
, you can verify the status by using the URL method and the payload
that is included in the
You can also send a request to this endpoint to verify the status:
Production:
POST
https://api.cybersource.com
/pts/v2/refresh-payment-status/
{id}
Test:
POST
https://apitest.cybersource.com
/pts/v2/refresh-payment-status/
{id}
The
{id}
is the ID that is returned in the webhook response. For
more information, see Webhooks Support.
Handle Responses
When
Unified Checkout
automatically processes a payment with
autoProcessing
is set to
true
or you have set
autoProcessing
to
false
and are using
checkout.Complete()
, you must handle both successful responses
and various errors. After the payment is complete, the
completeResponse
field object contains information about the
transaction outcome.
When a payment is processed successfully, you must parse the response to confirm the
payment status, update their order records, and trigger any post-payment workflows.
Post-payment workflows include sending confirmation emails or updating inventory. See
JavaScript Example: Processing a Payment.
Your error handling should account for specific cases such as
COMPLETE_TRANSACTION_CANCELED
and
COMPLETE_TRANSACTION_FAILED
.
COMPLETE_TRANSACTION_CANCELED
occurs when the user cancels the
transaction and
COMPLETE_TRANSACTION_FAILED
indicates that the
consumer’s transaction failed.
For PPRO-enabled online bank transfers, only cancellation errors are returned, and Tink
Pay By Bank returns failure and cancellation errors. For information about possible
errors that can occur when calling the complete API see UnifiedCheckoutError in Handle Errors.
Buy Now, Pay Later
Buy Now, Pay Later payment methods enable customers to purchase goods or services
immediately and pay in installments over time. With Buy Now, Pay Later, you are paid
immediately and in full, while your customers pay nothing or only a portion of the total
at the time of purchase. The remaining balance is typically spread over equal, often
interest-free, payments.
Buy Now, Pay Later is increasingly popular for both online and in-store purchases.
IMPORTANT
Before you can enroll in these alternative payment method on
Unified Checkout
, you must first be enabled for the alternative
payment platform. Contact your portfolio administrator for more information.
This is how Buy Now, Pay Later works:
Figure:
Buy Now, Pay Later
The customer chooses their Buy Now, Pay Later payment method during
checkout.
The customer chooses how much they want to pay, such as nothing, installments,
or the total amount.
The unpaid amount is divided into equal installments that are paid over a fixed
amount of time.
You receive the full payment after the customer completes checkout, and the Buy
Now, Pay Later provider collects the installment payments from your
customer.
Unified Checkout
supports the Afterpay/Clearpay and Paypal Buy Now, Pay
Later payment methods.
Afterpay is a Buy Now, Pay Later service that allows customers to purchase items
immediately and pay for them in four interest-free installments over a period of 6
weeks. Afterpay is also known as Clearpay in the UK, and Cash App Afterpay in the US.
When the total amount of the order is outside the range of accepted transaction amounts,
the Afterpay/Clearpay payment button is not displayed in
Unified Checkout
.
These are the accepted transaction amounts:
Minimum transaction amount
: 1 (CAD, AUD, NZD, USD, and GBP)
Maximum transaction amount
: Not applicable
Opt in to Afterpay on
Unified Checkout
Follow these steps to opt in to the Afterpay/Clearpay payment method in
Unified Checkout
:
Add Afterpay to your integration by adding
AFTERPAY
to the
allowedPaymentTypes
field within the capture context
request. The default field value is
AFTERPAY
even if you want
to support Cash App Afterpay in the US or Clear Pay in the UK.
Set the
completeMandate.type
field value to
AUTH
,
CAPTURE
or
PREFER_AUTH
.
You can perform a sale and capture the
funds immediately if you include the
completeMandate.type
field in the capture context request and set the value to
CAPTURE
.
You can capture the funds later if you
include the
completeMandate.type
field in the capture
context request and set the value to
AUTH
. When you capture
the funds later, you must perform a capture using the payments API. See
Captures.
If you accept
more than one payment type and must perform an authorization where funds are
collected at a later time, set the
completeMandate.type
field to
PREFER_AUTH
. You must perform a capture using the
payments API when an authorization is performed. A capture is performed
automatically if an authorization is not allowed by the payment type.
Include these required fields in the capture context request:
data.orderInformation.billTo.email
data.orderInformation.billTo.firstName
data.orderInformation.billTo.lastName
data.orderInformation.billTo.address1
data.orderInformation.billTo.locality
data.orderInformation.billTo.postalCode
data.orderInformation.billTo.administrativeArea
data.orderInformation.billTo.country
Include these optional fields in the capture context request:
IMPORTANT
These fields are required when the
requestShipping
field is set to
true
.
data.orderInformation.shipTo.firstName
data.orderInformation.shipTo.lastName
data.orderInformation.shipTo.address1
data.orderInformation.shipTo.locality
data.orderInformation.shipTo.postalCode
data.orderInformation.shipTo.administrativeArea
data.orderInformation.shipTo.country
Verify Status for Afterpay
When the status of your payment request is
PENDING
, you can verify
the status by sending a POST request to the URL that is included in the
You can also send a request to this endpoint to verify the status:
Production:
POST
https://api.cybersource.com
/pts/v2/refresh-payment-status/
{id}
Test:
POST
https://apitest.cybersource.com
/pts/v2/refresh-payment-status/
{id}
The
{id}
is ID that is returned in the webhook response. For
more information, see Webhooks Support.
Handle Responses
When
Unified Checkout
automatically processes a payment with
autoProcessing
is set to
true
or you have set
autoProcessing
to
false
and are using
checkout.Complete()
, you must handle both successful responses
and various errors. After the payment is complete, the
completeResponse
field object contains information about the
transaction outcome.
When a payment is processed successfully, you must parse the response to confirm the
payment status, update their order records, and trigger any post-payment workflows.
Post-payment workflows include sending confirmation emails or updating inventory. See
JavaScript Example: Processing a Payment.
Your error handling should account for specific cases such as
COMPLETE_TRANSACTION_CANCELED
and
COMPLETE_TRANSACTION_FAILED
.
COMPLETE_TRANSACTION_CANCELED
occurs when the user cancels the
transaction and
COMPLETE_TRANSACTION_FAILED
indicates that the
consumer’s transaction failed.
Captures
When you set the
completeMandate.type
field value to
AUTH
or
PREFER_AUTH
, you must send a request to capture an authorized
payment. Full and partial captures are supported.
Endpoint
Production:
POST
https://api.cybersource.com
/pts/v2/payments/
{id}
/captures
Test:
POST
https://apitest.cybersource.com
/pts/v2/payments/
{id}
/captures
The
{id}
is the transaction ID
returned in the authorization response.
responds to your capture request with one of these statuses:
FAILED
: The capture request failed.
PENDING
: The capture request is accepted but not captured.
Send a request to the check status service to retrieve status updates.
SETTLED
: The capture request is settled for the amount
requested.
Post-Pay Reference Payments
Post-pay reference payments provide an alternative way for your customers to complete
online purchases using cash. During checkout, customers select a voucher payment option
and receive a unique code or payment slip. To finalize their purchase, they visit a
designated offline location, such as a convenience store or payment kiosk, and pay the
required amount in person. Once the payment is made, the merchant receives a
notification that they can process the order.
Post-pay reference payments are widely used in countries where cash transactions are
common or where many customers don’t have access to credit or debit cards.
IMPORTANT
Before you can enroll in these alternative payment method on
Unified Checkout
, you must first be enabled for the alternative
payment platform. Contact your portfolio administrator for more information.
This is how post-pay reference payments work:
The customer selects a convenience store/voucher payment method during
checkout.
The customer receives their payment code/voucher or QR code.
The customer presents the payment code/voucher or QR in-store to complete the
payment.
The customer receives a notification that the payment is complete.
Unified Checkout
supports the Konbini voucher-based payment option:
Post-Pay Reference Payment Support
Payment Method
Capture Context
allowedPaymentTypes
Capture Context
completeMandate.type
Separate Capture?
Payment Confirmation
Customer Country (Country Code)
Customer ISO Currency Code
Konbini
KONBINI
CAPTURE
or
PREFER_AUTH
No
Immediate
Japan (JP)
JPY
Konbini
Konbini is used to make cash payments in Japan. Konbini payments enable your customers to
pay for bills and online purchases at convenience stores in Japan.To complete a
transaction, your customers receive payment codes for specific convenience stores and a
confirmation number. Customers must then bring the information to a convenience store to
make a cash payment. Your customers can pay at these convenience stores in Japan:
7-Eleven
Family Mart
Lawson
Ministop
Seicomart
You receive the payment confirmation immediately and the funds are available after 4
business days.
When the total amount of the order is outside the range of accepted transaction amounts,
the Konbini payment button is not displayed in
Unified Checkout
. These are
the accepted transaction amounts:
Minimum transaction amount
: JPY 1
Maximum transaction amount
: Not applicable
Opt in to Konbini on
Unified Checkout
Follow these steps to opt in to the Konbini payment method in
Unified Checkout
:
Add Konbini to your integration by adding
KONBINI
to the
allowedPaymentTypes
field within the capture context
request.
Set the
completeMandate.type
field value to
AUTH
,
CAPTURE
or
PREFER_AUTH
.
You can perform a sale and capture the
funds immediately if you include the
completeMandate.type
field in the capture context request and set the value to
CAPTURE
.
If you accept more than one payment type
and must perform an authorization where funds are collected at a later time,
set the
completeMandate.type
field to
PREFER_AUTH
. You must perform a capture using the
payments API when an authorization is performed. A capture is performed
automatically if an authorization is not allowed by the payment type.
Include these required fields in the capture context request:
data.orderInformation.billTo.country
data.orderInformation.billTo.firstName
data.orderInformation.billTo.lastName
data.orderInformation.billTo.phoneNumber
Include these optional fields in the capture context request:
IMPORTANT
These fields are required when the
requestShipping
field is set to
true
.
data.orderInformation.billTo.address1
data.orderInformation.billTo.email
Verify Status for Post-Pay Reference
When the status of your payment request is
PENDING
, you can verify the status by sending a POST request to the URL
that is included in the
You can also send a request to this endpoint to verify the status:
Production:
GET
https://api.cybersource.com
/tss/v2/transactions/
{id}
Test:
GET
https://apitest.cybersource.com
/tss/v2/transactions/
{id}
The
{id}
is the ID that is returned in the webhook response. For
more information, see Webhooks Support.
Handle Responses
When
Unified Checkout
automatically processes a payment with
autoProcessing
is set to
true
or you have set
autoProcessing
to
false
and are using
checkout.Complete()
, you must handle both successful responses
and various errors. After the payment is complete, the
completeResponse
field object contains information about the
transaction outcome.
When a payment is processed successfully, you must parse the response to confirm the
payment status, update their order records, and trigger any post-payment workflows.
Post-payment workflows include sending confirmation emails or updating inventory. See
JavaScript Example: Processing a Payment.
Your error handling should account for specific cases such as
COMPLETE_TRANSACTION_CANCELED
which is returned when the user
cancels the transaction.
For PPRO-enabled online bank transfers, only cancellation errors are returned. For
information about possible errors that can occur when calling the complete API see
UnifiedCheckoutError in Handle Errors.
Alternative Payment Wallets
Digital wallets are secure applications or services that enable users to store payment
details, such as debit or credit cards electronically.
For online transactions, the wallet securely passes a payment token to the merchant or
payment processor. This means that you do not handle sensitive customer data directly.
This reduces friction at checkout, improves conversion rates, and enhances security
through built‑in authentication and tokenization.
Wallets are best suited for one‑time online purchases and express checkout experiences.
Support for subscriptions and recurring payments varies by wallet, so you must ensure
compatibility if future charges or merchant‑initiated transactions are required.
PayPal is a secure and convenient payment service that your customers can use to make
payments without directly using their bank accounts or credit cards. PayPal gives yours
customers the option to pay in installments over time with PayPal Pay Later while also
giving you the full payment immediately. These installments are available:
Pay in 3
: Pay in three installments. Available in the UK.
Pay in 4
: Pay in four installments. Available in the US.
Pay Monthly
: Pay in monthly recurring installments.
Opt in to Paypal on
Unified Checkout
You can enable Paypal from the
Unified Checkout
merchant experience
section in the
Business Center
. For information about how to enable Paypal
using the
API. Follow these steps to opt in to the Paypal payment
method using the API:
Add Paypal to your integration by adding
PAYPAL
to the
allowedPaymentTypes
field within the capture context
request.
Set the
completeMandate.type
field value to
AUTH
,
CAPTURE
or
PREFER_AUTH
.
You can perform a sale and capture the
funds immediately if you include the
completeMandate.type
field in the capture context request and set the value to
CAPTURE
.
You can capture the funds later if you
include the
completeMandate.type
field in the capture
context request and set the value to
AUTH
. When you capture
the funds later, you must perform a capture using the payments API. See
Captures.
If you accept
more than one payment type and must perform an authorization where funds are
collected at a later time, set the
completeMandate.type
field to
PREFER_AUTH
. You must perform a capture using the
payments API when an authorization is performed. A capture is performed
automatically if an authorization is not allowed by the payment type.
Include these required fields in the capture context request:
orderInformation.amountDetails.currency
orderInformation.amountDetails.taxAmount
This field is the sum of all
orderInformation.lineItems[].taxAmount
values.
orderInformation.amountDetails.totalAmount
This field is the sum of
(
orderInformation.lineItems[].quantity
×
orderInformation.lineItems[].unitPrice
)
+
orderInformation.lineItems[].taxAmount
for all line items.
orderInformation.lineItems[].productDescription
orderInformation.lineItems[].productName
orderInformation.lineItems[].productSKU
orderInformation.lineItems[].quantity
orderInformation.lineItems[].taxAmount
IMPORTANT
This field is
required for all line items when you include
orderInformation.lineItems[].taxAmount
for one line item.
You can set this field value to
0.00
.
orderInformation.lineItems[].typeOfSupply
orderInformation.lineItems[].unitPrice
Include these optional fields in the capture context request:
buyerInformation.dateOfBirth
buyerInformation.language
buyerInformation.personalIdentification[].id
buyerInformation.personalIdentification[].type
clientReferenceInformation.reconciliationId
merchantInformation.merchantDescriptor.name
This field affects the name that the customers see on their
card statement. If the merchant is Candy Shop and passes
this as their name - customer will see
Venmo is a mobile payment service that is owned by PayPal and enables your customers to
make payments from their Venmo mobile application. Customers link their Venmo accounts
to their bank accounts, debit cards, and credit cards to send and receive payments.
Venmo is a secure and convenient payment service for your customers to make payments
without directly using their bank accounts or credit cards.
Opt in to Venmo on
Unified Checkout
You can enable Venmo from the
Unified Checkout
merchant experience
section in the
Business Center
. For information about how to enable Venmo
using the
API. Follow these steps to opt in to the Venmo payment
method using the API:
Add Venmo to your integration by adding
VENMO
to the
allowedPaymentTypes
field object within the capture
context request:
Set the
completeMandate.type
field value to
CAPTURE
or
PREFER_AUTH
.
You can capture
the funds immediately if you include the
completeMandate.type
field in the capture context
request and set the value to
CAPTURE
.
If you accept
more than one payment type and must perform an authorization where funds are
collected at a later time, set the
completeMandate.type
field to
PREFER_AUTH
. The funds are captured immediately
for the online bank transfer.
Include these required fields for online bank transfers in the capture context
request:
orderInformation.amountDetails.currency
orderInformation.amountDetails.taxAmount
This field is the sum of all
orderInformation.lineItems[].taxAmount
values.
orderInformation.amountDetails.totalAmount
This field is the sum of
(
orderInformation.lineItems[].quantity
×
orderInformation.lineItems[].unitPrice
) +
orderInformation.lineItems[].taxAmount
for all line items.
orderInformation.lineItems[].productDescription
orderInformation.lineItems[].productName
orderInformation.lineItems[].productSKU
orderInformation.lineItems[].quantity
orderInformation.lineItems[].taxAmount
IMPORTANT
This field is required
for all line items when you include
orderInformation.lineItems[].taxAmount
for one line item.
You can set this field value to
0.00
.
orderInformation.lineItems[].unitPrice
Include these optional fields in the capture context request:
buyerInformation.dateOfBirth
buyerInformation.language
buyerInformation.personalIdentification[].id
buyerInformation.personalIdentification[].type
clientReferenceInformation.reconciliationId
merchantInformation.merchantDescriptor.name
This field affects the name that the customers see on their card
statement. If the merchant is Candy Shop and passes this as
their name - customer will see
You can also send a request to this endpoint to verify the status:
Production:
POST
https://api.cybersource.com
/pts/v2/refresh-payment-status/
{id}
Test:
POST
https://apitest.cybersource.com
/pts/v2/refresh-payment-status/
{id}
The
{id}
is ID that is returned in the webhook response. For
more information, see Webhooks Support.
Handle Responses
When
Unified Checkout
automatically processes a payment with
autoProcessing
is set to
true
or you have set
autoProcessing
to
false
and are using
checkout.Complete()
, you must handle both successful responses
and various errors. After the payment is complete, the
completeResponse
field object contains information about the
transaction outcome.
When a payment is processed successfully, you must parse the response to confirm the
payment status, update their order records, and trigger any post-payment workflows.
Post-payment workflows include sending confirmation emails or updating inventory. See
JavaScript Example: Processing a Payment.
Your error handling should account for specific cases such as
COMPLETE_TRANSACTION_CANCELED
and
COMPLETE_TRANSACTION_FAILED
.
COMPLETE_TRANSACTION_CANCELED
occurs when the user cancels the
transaction and
COMPLETE_TRANSACTION_FAILED
indicates that the
consumer’s transaction failed.
For wallet based payments, only cancellation errors are returned. For information about
possible errors that can occur when calling the complete API, see UnifiedCheckoutError in Handle Errors.
Captures
When you set the
completeMandate.type
field value to
AUTH
or
PREFER_AUTH
, you must send a request to capture an authorized
payment. Full and partial captures are supported.
Endpoint
Production:
POST
https://api.cybersource.com
/pts/v2/payments/
{id}
/captures
Test:
POST
https://apitest.cybersource.com
/pts/v2/payments/
{id}
/captures
The
{id}
is the transaction ID
returned in the authorization response.
You can use these token types to pay with a token in
Unified Checkout
:
Customer Tokens
When you include the customer token, your UI displays the default payment
instrument that is inked to a customer. To display a customer token, you
must include the
paymentConfigurations.TMS_TOKEN.customer.id
field
in your Sessions API request.
IMPORTANT
When you include a customer token ID here with
tokenCreate
for a
paymentInstrument
or
instrumentIdentifier
, the complete mandate
creates a new payment instrument or instrument identifier within the
level of the customer token that you provide.
When you include an instrument identifier token, your UI displays the
payment credential that is associated with the specified instrument
identifier. To display an instrument identifier token, you must include the
When you include a payment instrument, your UI displays the payment
instrument that is associated with the specified payment instrument token
identifier. To display a payment instrument, you must include the
When you meet these requirements, a new payment instrument or instrument
identifier is created under the specified customer token.
Server-Side Set Up
This section contains the information you need to
set up your server. Initializing
Unified Checkout
within your webpage
begins with a server-to-server call to the Sessions API. This step authenticates your
merchant credentials, and establishes how the
Unified Checkout
frontend
components will function. The Sessions API request contains parameters that define how
Unified Checkout
performs.
The server-side component provides this information:
A transaction-specific public key is used by the customer's browser to protect
the transaction.
An authenticated context description package that manages the payment experience on
the client side. It includes available payment options such as card networks,
payment interface styling, and payment methods.
The functions are compiled in a JSON Web Token (JWT) object referred to as the
This section contains the information you need to set up your server. Initializing
Unified Checkout
within your webpage begins with a server-to-server call to
the Sessions API. This step authenticates your merchant credentials, and establishes
how the frontend components will function. The Sessions API request contains
parameters that define how
Unified Checkout
performs.
The server-side component provides this information:
A transaction-specific public key is used by the customer's browser to protect the
transaction.
An authenticated context description package that manages the payment experience on
the client side. It includes available payment options such as card networks,
payment interface styling, and payment methods.
The functions are compiled in a JSON Web Token (JWT) object referred to as the
The capture context request is a signed JSON Web Token
(JWT) that includes all of the merchant-specific parameters. This request tells the
frontend JavaScript library how to behave within your payment experience. The
request provides authentication, one-time keys, the target origin to the
Unified Checkout
integration in addition to allowed card networks and
payment types.
Browser Support
Unified Checkout
supports these browser versions:
Safari 16
Firefox 121
Google Chrome/Chium-based browsers 118
Microsoft Edge 118
Capture Context Example
Use the
targetOrigins
and the
allowedPaymentTypes
fields to define the target origin and
the accepted digital payment methods in your capture context. Use the
completeMandate
to orchestrate follow-on services such as
Payments,
: breaking changes that require code modifications
MINOR
: new features that are backwards compatible
PATCH
: bug fixes and improvements that are backwards compatible
The server controls which SDK version is loaded for each session that you request.
When your server creates a session, the response JWT includes a
clientLibrary
field that contains the full URL to the correct
version of the SDK. Your server parses the JWT, extracts the URL, and passes it to
the frontend to load dynamically.
IMPORTANT
The
clientVersion
field in the session
request is optional. When you do not include this field, the server
automatically resolves the appropriate version for every session. This ensures
that the client-side library and server-side features are compatible.
Cybersource
recommends that you do not include the
clientVersion
field in your request and that you use the
most recent version. When you do this, your integration benefits from new
features, payment methods, and improvements and there are no code changes
required.
Pin to a Version
If you must set your integration to a specific version, you can set the
clientVersion
field to a
MAJOR
version such as
1
, or a
MAJOR.MINOR
version such as
1.2
. The server uses the latest compatible patch release within
that range. This ensures that you continue to receive security fixes and bug
fixes.
IMPORTANT
You cannot pin to a specific patch version
(
MAJOR.MINOR.PATCH
). This ensures that all integrations
receive critical patches.
Cybersource
recommends omitting
clientVersion
from your request unless you have a
specific need for pinned behavior.
Below is a list of client versions and the features that are included in each
version.
IMPORTANT
Cybersource
recommends that you use the most recent client version in your integration.
0.23
Accepts these card networks in the
allowedCardNetworks
field for manual card entry:
Carnet
Cartes Bancaires
China UnionPay with card verification value (CVV)
EFTPOS
ELO
JCrew PLCC
mada
Meeza
Ordering controls for the
allowedPaymentTypes
button.
De-coupling of PANENTRY from other payment types in the
allowedPaymentTypes
field.
0.24
Support for enabling combo cards in the capture context.
Support for eight-digit BINs.
Support for enabling card save in the capture context.
0.25
Addition of
Skip Verification next time
in the
Click to Pay
payment flow.
Support for CPF in the capture context.
0.26
Support for auto-lookup in
Click to Pay
when an email is
included in the capture context.
Inclusion of the
cardDetails
field object in the
transient token response.
Support for the
cardholderAuthenticationStatus
field
object in the transient token response.
Support for the complete mandate.
0.28
Complete mandate enhancement to support
Payer Authentication
for
manual card entry for Visa, Mastercard, American Express, Discover, JCB,
Cartes Bancaires, China UnionPay, and ELO card brands.
Support for Afterpay as an
allowedPaymentType
.
Support for PayPak as an
allowedCardNetwork
.
Auto-enrollment for
Click to Pay
in supported
markets.
Removal of the confirm or continue screen for specific use cases.
Static button for
Click to Pay
flows.
0.30
Support for iDeal, Multibanco, and Przelewy24|P24.
Complete mandate enhancement to support
Payer Authentication
for
Google Pay and
Click to Pay
.
Support for Pakistan locales (en_PK and ur_PK).
New look and feel of
Unified Checkout
in line with EMVCO best
practices.
0.31
Addition of the
data
object of the
orderInformation
field object and pass-through
fields.
Support for
tokenCreate
in the complete mandate.
Support of pass-through fields, including challenge codes and data only, for
Payer Authentication
.
Support for Jaywan as an
allowedCardNetwork
.
Updated the payment details response to return detected card types. Multiple
card types are shown when more than one card type is detected.
Support for Bancontact, Dragonpay, MyBank, and Tink Pay By
Bank.
0.32
Support for KCP and UATP in the
allowedCardNetwork
field.
Support for Konbini as a post-pay reference payment
method.
A radio button in the UI for Cartes Bancaires
dual-branded cards.
0.33
Support for mobile as identity for
Click to Pay
accounts.
Japanese language translation updates.
UX captures billing and shipping information when they are not included in
the capture context.
0.34
Iframes are used instead of pop-ups to reduce pop-up blocking and
streamlining mobile deployment.
Additional BIN range for Jaywan card types.
0.35
Look and feel customization.
1.0
Configure payment options.
Configure customer data and payment flow.
Client-Side Set Up
This section contains the information you need to set up the client side. You use the
Unified Checkout
JavaScript library to add the payment interface to
your e-commerce site. It has two primary components:
The button widget, which lists the payment methods available to the customer.
The payment acceptance page, which captures payment information from the cardholder.
You can set up the payment acceptance page to be embedded with your webpage or added
as a sidebar.
Follow these steps to set up the client:
Load the JavaScript library.
Initialize the accept object, the capture context JWT. For information JSON Web
Tokens, see JSON Web Tokens.
Initialize the unified payment object with optional parameters.
Show the button list or payment acceptance page or both.
Process the payment request using the instructions included within the capture
mandate.
The response to these interactions is a transient token that you can use to retrieve the
payment information captured by the UI.
For information about handling the errors that may occur on the client-side, see Handle Errors.
Loading the JavaScript Library
Use the client library asset path and client library integrity value that is returned by
the capture context response to invoke
Unified Checkout
on your page.
You must retrieve these values from the
clientLibrary
and
clientLibraryIntegrity
fields that are returned in the JWT from
https://apitest.cybersource.com
/uc/v1/sessions
. You can
use these values to create your script tags.
You must perform this process for each transaction, as these values are unique for each
transaction. You must avoid hard-coding values for the
clientLibrary
and
clientLibraryIntegrity
fields to prevent client-side errors.
For example, a response from
https://apitest.cybersource.com
/uc/v1/sessions
would
include:
"data": {
"clientLibrary":"[EXTRACT clientLibrary VALUE from here]",
"clientLibraryIntegrity": "[EXTRACT clientLibraryIntegrity VALUE from here]"
}
Below is an example script
tag:
<script src="[INSERT clientLibrary VALUE HERE]"
integrity=”[INSERT clientLibraryIntegrity VALUE HERE]”
crossorigin=”anonymous”></script>
IMPORTANT
Use the
clientLibrary
and
clientLibraryIntegrity
parameter values in the capture context
response to obtain the
Unified Checkout
JavaScript library URL and the
integrity value. This ensures that you are always using the most up-to-date library and
protects against fraud. Do not hard-code the
Unified Checkout
JavaScript
library URL or integrity value.
When you load the library, the capture context from your initial server-side request is
used to invoke the accept function.
object, you can add the
payment application and payment acceptance pages to your webpage. You can attach the
embedded
Unified Checkout
tool and payment acceptance pages to any
named element within your HTML. Typically, they are attached to explicit named
components that are replaced with
Unified Checkout
’s iframes.
// Sidebar
const result = await checkout.mount('#buttons');
// Embedded
const result = await checkout.mount({
paymentSelection: '#buttons',
paymentScreen: '#form'
});
JavaScript Example: Client-Defined Trigger for
Click to Pay
or PAN
Entry
When you display
CLICKTOPAY
or
PANENTRY
as allowed
payment types, you can load the UI without displaying the
Unified Checkout
checkout button. You can do this by creating a trigger
that defines what event loads the UI.
// Automatic (default when completeMandate is in session)
const checkout = await client.createCheckout({ autoProcessing: true });
const result = await checkout.mount('#buttons');
// result is the completed transaction — no need to call complete()
// Manual - similar to v0
const checkout = await client.createCheckout({ autoProcessing: false });
const token = await checkout.mount('#buttons');
const result = await checkout.complete(token);
JavaScript Example: Authorization
Collect payment information and process an authorization. You must initiate a
separate capture request to move funds and complete the transaction.
async function launchCheckout() {
try {
const client = await VAS.UnifiedCheckout(sessionJWT);
const checkout = await client.createCheckout();
const result = await checkout.mount('#payment-buttons');
// result contains the completed payment result JWT
// Send result to your server for verification
sendToServer(result);
} catch (error) {
if (error.name === 'UnifiedCheckoutError') {
handleError(error.reason, error.message);
}
} finally {
checkout.destroy();
client.destroy();
}
}
launchCheckout();
Because the session includes
completeMandate
,
autoProcessing
defaults to
true
and
mount()
returns the completed payment result directly.
JavaScript Example: Sale
Collect payment information and process a sale. A sale is a combined authorization
and capture in a single step.
async function launchCheckout() {
try {
const client = await VAS.UnifiedCheckout(sessionJWT);
const checkout = await client.createCheckout();
const result = await checkout.mount('#payment-buttons');
// result contains the completed payment result JWT
// Send result to your server for verification
sendToServer(result);
} catch (error) {
if (error.name === 'UnifiedCheckoutError') {
handleError(error.reason, error.message);
}
} finally {
checkout.destroy();
client.destroy();
}
}
launchCheckout();
JavaScript Example: Sale with
Decision Manager
Collect payment information and process a sale while running
Decision Manager
fraud screening before the payment is initiated.
async function launchCheckout() {
try {
const client = await VAS.UnifiedCheckout(sessionJWT);
const checkout = await client.createCheckout();
const result = await checkout.mount('#payment-buttons');
// result contains the completed payment result JWT
// Send result to your server for verification
sendToServer(result);
} catch (error) {
if (error.name === 'UnifiedCheckoutError') {
handleError(error.reason, error.message);
}
} finally {
checkout.destroy();
client.destroy();
}
}
launchCheckout();
JavaScript Example: No Service Orchestration
Collect payment information and receive a transient token. Your server handles
payment authorization and any follow-on services directly.
async function launchCheckout() {
try {
const client = await VAS.UnifiedCheckout(sessionJWT);
const checkout = await client.createCheckout({ autoProcessing: false });
const transientToken = await checkout.mount('#payment-buttons');
// transientToken is a JWT — send it to your server
// Your server uses the transient token to authorize the payment
sendToServer(transientToken);
} catch (error) {
if (error.name === 'UnifiedCheckoutError') {
handleError(error.reason, error.message);
}
} finally {
checkout.destroy();
client.destroy();
}
}
launchCheckout();
Without a
completeMandate
,
autoProcessing
defaults to
false
and the
mount()
call returns a transient token
that you pass to your server for payment authorization. For information about how to use the
transient token in an authorization request, see Transient Tokens.
JavaScript Example: Setting Up with Full Sidebar
<html>
<head>
<script
src="[INSERT clientLibrary VALUE HERE]"
integrity="[INSERT clientLibraryIntegrity VALUE HERE]”
crossorigin=”anonymous"
></script>
</head>
<body>
<h1>Unified Checkout Integration</h1>
<input
type="hidden"
name="sessionJWT"
value="[INSERT sessionJWT HERE]"
/>
<script type="text/javascript">
const sessionJWT = document.getElementById("sessionJWT").value;
async function launchCheckout() {
try {
const client = await VAS.UnifiedCheckout(sessionJWT);
const checkout = await client.createCheckout();
const result = await checkout.mount('#payment-buttons');
// result contains the completed payment result JWT
// Send result to your server for verification
sendToServer(result);
} catch (error) {
if (error.name === 'UnifiedCheckoutError') {
handleError(error.reason, error.message);
}
} finally {
checkout.destroy();
client.destroy();
}
}
launchCheckout();
</script>
</body>
</html>
JavaScript Example: Setting Up with the Embedded Component
The main difference between using an embedded component and the sidebar is that the
VAS.UnifiedCheckout(sessionJWT)
object is set to
false
, and the location of the payment screen is passed in the
containers argument.
IMPORTANT
If you do not specify a location for the payment acceptance page, it
is placed in the side bar.
<html>
<head>
<script
src="[INSERT clientLibrary VALUE HERE]"
integrity="[INSERT clientLibraryIntegrity VALUE HERE]"
crossorigin="anonymous"
></script>
</head>
<body>
<h1>Unified Checkout Integration</h1>
<input
type="hidden"
id="sessionJWT"
name="sessionJWT"
value="[INSERT sessionJWT HERE]"
/>
<script type="text/javascript">
const sessionJWT = document.getElementById("sessionJWT").value;
async function launchCheckout() {
let client;
let checkout;
try {
client = await VAS.UnifiedCheckout(sessionJWT);
checkout = await client.createCheckout();
const result = await checkout.mount('#payment-buttons');
// result contains the completed payment result JWT
// Send result to your server for verification
sendToServer(result);
} catch (error) {
if (error.name === 'UnifiedCheckoutError') {
handleError(error.reason, error.message);
}
} finally {
if (checkout) {
checkout.destroy();
}
if (client) {
client.destroy();
}
}
}
launchCheckout();
</script>
</body>
</html>
Complete Integration Examples
These examples show how to integrate
Unified Checkout
with different payment
scenarios. Each example includes the session configuration and client-side
JavaScript.
For information about session fields, see Sessions API.
Configuration
This section contains the information required to configure
Unified Checkout
.
Configure the
Unified Checkout
Merchant Experience
The
Unified Checkout
merchant experience interface provides complete
control over your checkout experience by using dedicated configuration screens
accessible through the
Business Center
:
Figure:
Unified Checkout
Customer Experience
This option is low-code and provides a user-friendly approach to customization of your
Unified Checkout
UI.
Configure each of these components of the checkout experience:
You can also manage permissions as a direct merchant or as a portfolio administrator. For
information about managing permissions, see Manage Permissions.
Enable
Unified Checkout
To begin using
Unified Checkout
, you must first ensure that your
merchant ID (MID) is configured to use the service and that any payment methods you
intend to use are properly set up.
If you are unable to access this page, contact your sales
representative.
In the
Business Center
, go to the left navigation panel and choose
Payment Configuration
>
Unified
Checkout
. The
Unified Checkout
customer experience
page appears:
Figure:
Unified Checkout
Customer Experience
The
Unified Checkout
configuration interface provides complete
low-code control over your checkout experience by using dedicated configuration
screens accessible through the
Business Center
. The configuration
interface is organized into separate screens, each accessible from the
My
customer experience
page. Configure each of these components of the
checkout experience:
Payment Options
: Add, remove, and arrange payment methods. For
information about configuring payment methods, see Configure Payment Options.
enable you to control which payment
methods appear in your checkout and in what order. Follow these steps to customize
the available payment options in
If you are unable to access this page, contact your sales
representative.
In the
Business Center
, go to the left navigation panel and choose
Payment Configuration
>
Unified
Checkout
. The
Unified Checkout
customer experience
page appears:
Figure:
Unified Checkout
Payment Options Merchant
Experience
In the Payment Options section, click
Manage
. The Payment Options page
appears.
Under Payment options, click the checkbox next to each payment method that you
want to display in your checkout UI. Click the drag icon (
) to rearrange the order of the payment options.
IMPORTANT
Some payment options are set at the portfolio level and
cannot be reordered. When you see a pin icon next to a payment option, you
cannot move that payment option in the list of available methods. You must
contact your portfolio administrator if you want to reorder the list of
available payment options.
next to each payment type that you want to configure. The
configuration page for the selected payment type appears.
Under card brands, slide the toggle (
) to display the card brand logos in your button
list.
Click the checkbox next to each card brand that you want to display in your
checkout UI. Click the drag icon (
) to rearrange the order of the card brands.
Click
Save and publish
to save your payment options configuration
settings.
If you are unable to access this page, contact your sales
representative.
In the
Business Center
, go to the left navigation panel and choose
Payment Configuration
>
Unified
Checkout
. The
Unified Checkout
customer experience
page appears:
Figure:
Unified Checkout
Look and Feel Merchant
Experience
In the Look & Feel section, click
Configure
. The Look and feel page
appears.
If you want to use AI to determine the look and feel, under AI brand studio,
click
Browse
the upload a screenshot of your website. These components
are updated using the colors from the screenshot you provide:
Button list background color
Card checkout outline and text colors
Header and checkout font background colors
Proceed to the next steps to manually customize these and other components
of the
Unified Checkout
appearance.
Under Button customizations, select the options for your button list. These
customizations are available:
Universal Button Shape
Use the Button shape drop-down menu to select if you want a sharp
corner, rounded corner, or pill button:
Figure:
Unified Checkout
Button Shapes
Button List
Use the color selector or enter a HEX code in the Button list
background color text box to customize the background color of your
button list. To review the button list preview, see Button List.
If you uploaded a screenshot in the AI brand studio section, a color
is entered in this space based on the colors present in your
screenshot.
Card Checkout and
Click to Pay
Button
Use the card checkout button label drop-down menu to select the text
that appears on the checkout button. These text options are available:
Pay with card
Card payment
Checkout with card (default)
Debit/Credit payment
Donate with card
Subscribe with card
Card Checkout Buttons
Use the button style drop-down menu to select if you want an
outlined or filled checkout button. Select the button fill and text
colors using the color selector or HEX code:
Figure:
Unified Checkout
Button Style
If you uploaded a screenshot in the AI brand studio section, a color
is entered in this space based on the colors present in your
screenshot.
Under Checkout customizations, select the options for your checkout experience.
These customizations are available:
Font
Use the font drop-down menu to select the font you want to use.
These fonts are available:
Inter
Monserrat
Open Sans
Raleway
Roboto Slab
Figure:
Unified Checkout
Fonts
Select the background color using the color selector or HEX
code.
If you uploaded a screenshot in the AI brand studio section, a color
is entered in this space based on the colors present in your
screenshot.
Header Customization
Select the color you want to use in your header using the color
selector or HEX code.
If you uploaded a screenshot in the AI brand studio section, a color
is entered in this space based on the colors present in your
screenshot.
Click
Save and publish
to save your look and feel customization. The
Ready to publish popup window appears.
If you are done editing, click
Publish now
to publish your changes. If
you need to make more changes, click
Keep editing
to return to the Look
and feel page. To review your changes, click through the example screens. For
more information about the UI previews, see Look and Feel UI Examples.
Look and Feel UI Examples
These examples show the different preview screens for each look and feel customization
feature:
Button List
This example shows the button list:
Figure:
Screen 1: Button List
Contact Details
This example shows the contact details that appear during checkout:
Figure:
Screen 2: Contact Details
Saved Cards
This example shows the saved card payment details that appear during checkout:
Figure:
Screen 3: Saved Cards
Card Entry
This example shows the card entry payment details that appear during checkout:
Figure:
Screen 4: Card Entry
Review Details
This example shows the review contact details that appear at the end of checkout:
Figure:
Screen 5: Review
Configure Customer Data and Payment Flow
Use the Customer data and payment flow section of the
Business Center
to
configure the information that you want to collect during checkout. Follow these
steps to customize the appearance of
If you are unable to access this page, contact your sales
representative.
In the
Business Center
, go to the left navigation panel and choose
Payment Configuration
>
Unified
Checkout
. The
Unified Checkout
customer experience
page appears:
Figure:
Unified Checkout
Customer Data and Payment Flow
Merchant Experience
In the Customer data and payment flow section, click
Manage
. The
Customer information and payment flow page appears.
Under Contact details, slide the toggle (
) next to Email address and Mobile phone number
to collect the customer email address and phone number during checkout.
Under Payment details, slide the toggle (
) next to Billing address to collect the
cardholder billing address.
Under Payment details, in the Billing address drop-down menu, select the
billing address information for payment verification:
ADDITIONAL INFORMATION
Full address
: Request the full cardholder billing address during
checkout.
Zip code only
: Request only the zip code of the cardholder
billing address during checkout.
Under Payment details, slide the toggle (
) next to Shipping address to collect the
cardholder shipping address.
Under Payment details, in the Shipping address drop-down menu, select the
countries that you ship to.
Under Checkout review step, slide the toggle (
) to display a review page for the customer to
confirm the payment and shipping address.
Under payment processing and & service orchestration, slide the toggle
(
) in the Payment processing section to control
how to process transactions:
You can turn payment processing on or off:
Payment Processing ON
:
Unified Checkout
handles the
complete payment for you automatically. When payment processing is on,
you can select how transactions are processed:
Preferred auth
: Choose this option to authorize the
payment when possible.
Sale
: Choose this option to capture the funds
immediately.
Payment Processing OFF
: You must complete the payment
independently using VISA or another selected gateway.
For information about enabling or disabling payment processing in
Under save customer information in payment processing and & service
orchestration, slide the toggle to the right to prompt the user to save their
payment information for future use.
Saving customer payment details can significantly improve the checkout
experience for returning customers. There are two approaches that you can use:
Ask for consent to save payment information for future use
:
This option displays a checkbox during checkout that asks customers
if they want their payment details saved. You can enable this option
regardless of if payment processing is enabled at any time.
Store payment details securely in your
TMS
vault
: This option saves payment information using secure
encryption and links directly to your
TMS
vault. This enables faster checkout for returning customers by using
tokens rather than raw card data.
IMPORTANT
If you already have cardholder consent (for example,
if it was obtained during account creation or through another verified
process) or consent is not required for your flow, you should not
display or request consent again in the UI.
Under Fraud detection in payment processing and & service orchestration,
use the drop-down menu to turn fraud detection with
Decision Manager
or
Fraud Management Essentials
On
or
Skip
.
Under Localized payment settings, slide the toggle (
) to enable these features:
ADDITIONAL INFORMATION
Combo cards
: Enable cardholders to decide how to process their
payments.
Brazil tax ID
: Collect a customer's CPF or CNPJ at checkout.
IMPORTANT
Combo cards and tax IDs are only available in
Brazil.
Click
Save and publish
to save your customer payment settings.
Capture Context Fields in the
Business Center
There are some components of
Unified Checkout
that are available in the
API, the
Business Center
or both. This section describes which components of the
Sessions API capture context object can be configured using the
Business Center
. For
a complete list of fields that are available, see the API Reference in the
Cybersource
Developer Center.
API Parameters
Parameter
Business Center
API
Notes
allowedCardNetworks
Yes
Override
Optional. This is the override priority
order:
API
Merchant experience profile
Portfolio profile
allowedPaymentTypes
Yes
Override
Optional. This is the priority order:
API (payment types that are not enabled are removed)
Merchant experience profile (payment types that are not enabled
are removed)
Portfolio profile (all payment types are enabled at the profile
level)
IMPORTANT
SRCVISA
,
SRCMASTERCARD
, and
SRCAMEX
are
not supported. You must use
CLICKTOPAY
.
paymentConfigurations
Partial
Yes
Allows per-transaction payment type
configuration overrides. This is available only in
This payment configuration is part of the
merchant experience.
Capture Mandate
Capture Mandate Parameters
Parameter
Business Center
API
Default Value
showConfirmationStep
Yes
Override
billingType
Yes
Override
requestEmail
Yes
Override
requestPhone
Yes
Override
requestShipping
Yes
Override
shipToCountries
Yes
Override
showAcceptedNetworkIcons
Yes
Override
comboCard
Yes
Override
requestSaveCredentials
Yes
Override
cpf
Yes
Override
cpf.required
Yes
Override
Complete Mandate
Complete Mandate Parameters
Parameter
Business Center
API
Default Value
type
Yes
Override
SALE
decisionManager
Yes
Override
true
consumerAuthentication
Yes
Override
NONE
tms
Yes
Optional
tms.tokenCreate
Yes
Override
true
Appearance Variables
Top-Level Appearance Parameters and Variables
Parameter / Variable
Business Center
API
Default Value
Example
buttonType
Yes
Override
CHECKOUT
"CHECKOUT"
variables
Partial
Override
backgroundColor
Yes
Override
"#FFFFFF"
textColor
Yes
Override
"#000000"
headerBackground
Yes
Override
"#1A237E"
headerForeground
Yes
Override
"#FFFFFF"
buttonBackground
Yes
Override
"#E0E0E0"
buttonForeground
Yes
Override
"#333333"
buttonBorderRadius
Yes
Override
"4px"
fontFamily
Yes
Override
"Roboto Slab, serif"
paymentSelectionBackground
Yes
Override
"#F5F5F5"
Manage Permissions
Portfolio administrators
can set permissions for new or existing
Business Center
user roles for
Unified Checkout
.
Administrators retain full read and write permissions. They enable you to regulate
access to specific pages and specify who can access, view, or amend digital products
within
Unified Checkout
.
Portfolio administrators
must apply the appropriate user role
permission for any existing or newly created
If you are a transacting merchant, you might find that your permissions are restricted.
If your permissions are restricted, a message appears indicating that you do not have
access, or buttons might appear gray. To make changes to your digital products within
Unified Checkout
that have restricted permissions, contact
your portfolio administrator's customer support
representative
Follow these steps to configure and manage user permissions in the
Business Center
for
Unified Checkout
as a direct merchant:
On the left navigation panel, navigate to
Account
Management
.
Click
Roles
to display a list of your user roles.
Click the pencil icon next to the user role that you want to update.
Click
Payment Configuration Permission
.
Select the relevant permission for the specific user role you are editing. You
can select from these
Unified Checkout
permissions:
Unified Checkout View
Unified Checkout Manage
IMPORTANT
If you are a transacting merchant without view permissions,
Unified Checkout
will
still appear on the navigation bar, however, a
no access
message
appears when you access
Unified Checkout
.
If you are a transacting merchant
with view permissions but not management permissions, you can access the
Unified Checkout
screens and view the different
payment methods configurations, however, you cannot edit or enroll new
products.
Managing Permissions as
a Portfolio Administrator
Follow these steps to configure and manage user permissions in the
Business Center
for
Unified Checkout
as a portfolio
administrator:
On the left navigation panel, navigate to
Account
Management
.
Click
Roles
to see a list of your user roles.
Click the pencil icon next to the user role that you want to update.
Click
Payment Configuration Permission
.
Select the relevant permission for the specific user role you are editing. You
can choose from these
Unified Checkout
permissions:
Unified Checkout View
Unified Checkout Manage
Unified Checkout Portfolio View (available for portfolio users
only)
Unified Checkout Portfolio Manage (available for portfolio users
only)
IMPORTANT
If all permissions are left unselected, the user has restricted permission. A
no access
message appears when the user tries to access the
Unified Checkout
digital product enablement pages. The user is
advised to contact a customer representative.
If a portfolio user has view permissions and does not have a
management role, they can access the
Unified Checkout
pages, but they cannot modify toggles for different digital
payments.
Process Payments with
Unified Checkout
Payment processing is a payment completion option in your merchant configuration. Your
configuration determines if your checkout system automatically handles and finalizes
customer payments. When payment processing is enabled,
Unified Checkout
handles the complete payment for you automatically. When payment processing not enabled,
you complete payments independently using your selected gateway.
Payment Processing Enabled
Cybersource
recommends that you enable payment processing if you meet
these requirements:
Your integration is configured with the payment completion step. For more
information about
You do not have a designated technical team to process payments.
Your integration includes any of these features:
Fraud checks with
Decision Manager
or
Fraud Management Essentials
3-D Secure
/
Payer Authentication
Stored customer credentials with the
Token Management Service
(
TMS
)
Multiple payment methods
When payment processing is enabled, you can choose how payments should be handled:
Preferred Authorization
: The payment is authorized first and captured
at a later time. This method works well for businesses that ship products to
their customers. For example, you authorize the payment when the customer
places and order and capture the payment when you ship it.
Sale
: The payment is captured immediately. This method works well for
service businesses, digital products, and immediate purchases.
IMPORTANT
Not all payment methods are compatible with all processing
types. Different payment methods work with different payment processing types.
You must configure your payment processing settings to be compatible with your
integration and review which payment methods are compatible. For information
about payment methods and their processing compatibility, see Payment Methods.
Payment Processing Disabled
Cybersource
recommends
that you disable payment processing if you meet these requirements:
You want to process payments on
our platform
using your own API
requests instead of relying on the automatic payment completion step.
You want full control over your checkout and payment orchestration flow.
You only use
Unified Checkout
to collect encrypted payment
information and you handle the completion phase through
our platform
APIs or your custom back-end. The completion phase
includes authorization, sale, fraud checks,
3-D Secure
and card
storage.
When disable payment processing, the checkout system will collect payment
information from your customers but you will need to process the actual payment on
your end. When payment processing is disabled, you must consider the following:
Customer payments are not completed automatically.
Fraud checks and
3-D Secure
using automatic orchestration are
disabled.
Saved credentials and token management using automatic processing are
disabled.
You must handle payment completion yourself.
Webhooks Support
Unified Checkout
supports webhooks. You can use webhooks to obtain the
complete response from the
completeMandate
call. To receive a webhook
notification, you must first subscribe to the webhook.
Prerequisite
Webhook payloads are encrypted. In order to receive a
Unified Checkout
webhook notification, you must enabled message-level encryption (MLE). For
information about enabling MLE, see Enable Message-Level Encryption in the
Getting Started with REST Developer Guide
.
Integration
Follow these steps to set up your system to support the Webhooks REST API. Some of
these steps are dependent on your system's security policy.
Set up a server with a URL to receive webhook notifications.
Configure your server security to receive webhooks notifications. For
more information, see
field object contains the same fields as the response
from a direct payment authorization request. Use the
id
field for
capture requests or to look up a transaction.
Sessions API
Use the Sessions API to generate a capture context. The capture context contains all of the
merchant-specific parameters that tell the front-end JavaScript library what to do
within your payment experience.
Capture Context
The capture context is a signed JSON Web Token (JWT) containing this information:
Merchant-specific parameters that dictate the customer payment experience for the
current payment transaction.
A one-time public key that secures the information flow during the current payment
transaction.
recommends that you dynamically parse the response
for the fields that you are looking for when you integrate with
Cybersource
APIs.
Cybersource
may add additional
fields in the future.
You must ensure that your integration can handle new fields that are returned in
the response. Even though the underlying data structures do not change, you must
also ensure that your integration can handle changes to the order in which the
data is returned.
Cybersource
uses semantic versioning
practices, which enables you to retain backwards compatibility as new fields are
introduced in minor version updates.
To support dual-branded or co-badged cards, you must list your supported
card type values for the
allowedCardNetworks
field
based on your preference for processing card numbers. For example, if a
card is dual-branded as Visa and Cartes Bancaires, and Cartes Bancaires
is listed first, the card type is set to Cartes Bancaires after the card
number is entered in your
Unified Checkout
card collection
form. For information on dual-branded or co-badged cards, see Dual-Branded Cards.
IMPORTANT
Some card types, such as KCP and UATP, do not have security codes
(CVV or CVN). If you include only card types that do not have
security codes in the
allowedCardNetworks
field,
Unified Checkout
does not display the
security code field in the UI.
If you include card types that do not have security codes and cards types
that do have security codes in the
allowedCardNetworks
field,
Unified Checkout
displays the security code field in
the UI. The field is disabled in the UI when the cardholder enters a card
number for a card type with no security code
Domestic Scheme Rules
For markets where domestic routing, network preference, or co-badging regulations
apply, you are responsible for ensuring that domestic payment schemes are
prioritized appropriately within the
allowedCardNetworks
configuration.
In these scenarios, domestic schemes must be listed ahead of international networks
such as Visa or Mastercard where required by local regulations or scheme rules.
If network preference varies by transaction, the order of networks should be
dynamically configured when you create the capture context request using the
Sessions API.
You are responsible for reviewing and complying with all applicable local regulatory,
scheme, and acquirer requirements relating to domestic routing and network
selection.
Target Origins
The target origin is defined by
the scheme (protocol), hostname (domain), and port number (if used).
You must use the https:// protocol. Sub domains must also be included in
the target origin.
Any valid top-level domains, such as .com, .co.uk, and .gov.br, are
supported. Wildcards are not supported.
For example, if you are launching
Unified Checkout
on
example.com, the target origin could be any of the following:
recommends that you do no include this field in your
uc/v1/sessions
API request. When you do not include this field,
Unified Checkout
automatically uses the latest available version.
This ensures access to the most recent enhancements and updates without requiring
integration changes.
When you include this field, the value must be provided in
MAJOR.MINOR
format (for example,
1.1
or
1.2
). For information about semantic versioning, see Versioning.
IMPORTANT
This field cannot be configured through the merchant
experience screens in the
Business Center
.
Auto-check Enrollment
You can have the
Click to Pay
box pre-checked when a user is
manually entering their card details and
Click to Pay
is
enabled. The customer can uncheck the box if necessary, which means the request is
processed as a one-time manual PAN transaction. This is available when you set the
billingType
field to
PARTIAL
or
FULL
in the capture context. This ensures that the customer's
billing country can be validated in the UI.
Click to Pay
enrollment pre-check is available in these countries:
loads, the payment buttons displayed are based on
what you include in the
allowedPaymentTypes
object in the capture
context.
Unified Checkout
enables you to customize the text on the
payment buttons. You can do this by setting the
buttonType
field
object in the capture context to one of these values:
ADD_CARD
CARD_PAYMENT
CHECKOUT_AND_CONTINUE
DEBIT_CREDIT
DONATE
PAY
PAY_WITH_CARD
SUBSCRIBE_WITH_CARD
If you do not include the
buttonType
field in your request, the
payment button text defaults to
Checkout with card
. For example:
Customize Button Text
Use the
buttonType
field to customize the text on payment
buttons:
Button Text Options
buttonType
Value
Button Display Text
ADD_CARD
Add card
CARD_PAYMENT
Card payment
CHECKOUT_AND_CONTINUE
Checkout and continue
DEBIT_CREDIT
Debit or credit
DONATE
Donate
PAY
Pay
PAY_WITH_CARD
Pay with card
SUBSCRIBE_WITH_CARD
Subscribe with card
When you do not include this field in your request, the default button text is
“Checkout with card.”
Complete Mandate
The complete mandate feature provides service orchestration within
Unified Checkout
and simplifies your integration. Service orchestration
enables
Unified Checkout
to orchestrate services on your behalf. The
complete mandate feature provides instructions to the
unifiedPayment.complete()
method in the JavaScript. You must
include both the
unifiedPayment.complete()
object in the
Javascript and the
completeMandate
field object in your capture
context to enable
Unified Checkout
to initiate services on your behalf
from the browser.
IMPORTANT
If you are updating an existing
Unified Checkout
configuration to use the complete mandate, you must update your JavaScript to
include the
unifedPayment.complete()
function.
IMPORTANT
When the
billingType
field is set to
NONE
you must include the required fields within the capture
context request to ensure that the required fields are included for payment
processing. For information about the fields that are required for payment services,
see the Payments Developer Guide.
completeMandate.type
This field is required to run the complete mandate and is used to indicate how a
payment should be processed.
Possible values:
AUTH
: Authorize the payment and capture the funds
at a later date.
CAPTURE
: Perform a sale. A sale is a combined
authorization and capture in a single request.
PREFER_AUTH
: Perform an authorization if possible.
If a payment method requires the funds to be captured immediately,
then
Unified Checkout
captures the payment.
completeMandate.decisionManager
This field determines whether
Decision Manager
is run. Set this field to
true
and include
completeMandate.type
in
your request to run
Decision Manager
and device fingerprinting services.
When
Decision Manager
runs, it uses the associated
Decision Manager
configuration based on the merchant ID that is included in the request.
When this field is set to
false
or is not
included in the request,
Decision Manager
and device
fingerprinting services do not run.
completeMandate.consumerAuthentication
This field determines how a consumer is authenticated. You can authenticate a consumer using
3-D Secure
.
You can set this field to one of these values:
NONE
: Consumer authentication does not run.
3DS
:
3-D Secure
authentication through
Payer Authentication
runs
To initiate a passkey request for
Unified Checkout
, you must
include these additional fields in your request:
When you meet these requirements, a new payment instrument or instrument
identifier is created under the specified customer token.
completeMandate.tms.tokenTypes
: This is an optional
field that you can use to indicate the token type for the token that is
created. When this field is not included in the request, a token is
created based on your
TMS
vault configuration.
You can set this field to these values:
customer
instrumentIdentifier
paymentInstrument
shippingAddress
If you want
Unified Checkout
to capture the
cardholder's consent to save the card before a request to create a
token is completed, then you must set
captureMandate.requestSaveCredentials
to
true
. When this field is set to
true
,
Unified Checkout
presents a
Save card for future payments
checkbox within the UI and
enables the cardholder to give consent. Do not include
captureMandate.requestSaveCredentials
in your
request if you have already gained cardholder consent to create a
TMS
token or do not require
consent.
This table indicates if a token is created given the requested payment
method:
Payment Method
Capture Context
Result
PAN Entry and
Click to Pay
completeMandate.tms.tokenCreate
=
true
TMS
token
is created at the token level(s) specified in the request or
based on the default for the token vault.
completeMandate.tms.tokenCreate
=
true
and
captureMandate.requestSaveCredentials
=
true
Cardholder can check
Save
Payment Information
in
Unified Checkout
.
The request to create a token is made when the cardholder checks
this field in the UI. When it is not checked, ni token is
created.
Apple Pay, Google
Pay
, and Paze
completeMandate.tms.tokenCreate
=
true
TMS
token
is created at the token level(s) specified in the request or
based on the default for the token vault.
completeMandate.tms.tokenCreate
=
true
and
captureMandate.requestSaveCredentials
=
true
Unified Checkout
cannot obtain consent to create a token and no token is created
when the customer completes the payment.
Echeck
completeMandate.tms.tokenCreate
=
true
TMS
token
is created at the token level(s) specified in the request or
based on the default for the token vault.
completeMandate.tms.tokenCreate
=
true
and
captureMandate.requestSaveCredentials
=
true
Unified Checkout
cannot obtain consent to create a token and no token is created
when the customer completes the payment.
Capture Mandate
The capture mandate enables you to define which fields are captured within
Unified Checkout
. You must include the fields and set the values in the
capture context based on the information that you want
Unified Checkout
to collect. This enables the cardholder to review and edit their details where
the UI includes these fields. When the UI is used to capture cardholder information,
all captured information is available within the Payment Details API response. When
you want the cardholder to review existing address data, you can include the known
customer data in the capture context and this information is pre-filled in the
A combo card is a single card in Brazil that functions as both a debit and a credit
card.
Unified Checkout
enables the cardholder to choose whether to pay
for a transaction using a debit or credit card. The cardholder can choose the card
that they want to use when they enter their card details or when they choose a
stored Visa card from their
Click to Pay
wallet during checkout.
While in the card details section of the payment form, the cardholder is prompted
for a debit or credit card. Credit is the default option.
To enable combo cards during checkout, you must include the
comboCard
field in your capture context request and set the
field value to
true
. When the
comboCard
field
value is set to
true
, the option to use a debit or credit card
appears for all Visa cards that are entered in
Unified Checkout
and for all
cards that are already stored in
Click to Pay
. If you do not
want to offer a combo card at checkout, do not include the
comboCard
field in your capture context
request:
"captureMandate" : {
"comboCard": true
}
IMPORTANT
This feature is available only in
Brazil.
captureMandate.CPF
The Cadastro de Pessoas Físicas (CPF) Brazilian tax ID feature is for customers in
Brazil and provides your customers with a way to include their Consumer National
Identifier when it is requested at checkout. Include this field in the capture
context to display this field within the flow for manual card entry and
, you
can remove the final summary confirmation screens from the checkout experience. When
the UI displays cardholder data, the cardholder can review and, if necessary, edit
their payment details before checkout is complete.
: Only the billing postal code and billing country are
collected in the UI. Set to this value when you use relaxed address verification
services (AVS). This includes markets where postal code and billing country are
enough for successful payment processing.
NONE
: No fields are shown in the UI to capture cardholder billing
details. If you are using the Complete Mandate, you must provide billing details in
the capture context. All information that is collected from these fields is
tokenized in the transient token and sent for payment processing. For information
about which fields are required for payment processing, see the Payments Developer Guide.
FULL
: These fields are shown in the UI to capture cardholder billing
details. When you include the billing details in the capture context, these details
are pre-filled in the
Unified Checkout
UI. All information that is
collected from these fields are tokenized in the transient token and sent for
payment processing where the Complete Mandate is used.
captureMandate.requestEmail
false
: No email address is shown in the UI. If you are using
Click to Pay
, this email address is used to find the
cardholder's
Click to Pay
account and it appears in the UI when
requestEmail
is set to
false
.
true
: The email address is shown and captured in the UI. If you are
using
Click to Pay
, this email address is used to find the
cardholder's
Click to Pay
account.
captureMandate.requestPhone
false
: No phone number is shown or captured in the UI.
true
: The phone number is shown and captured in the UI.
captureMandate.requestShipping
false
: No shipping information is captured in the UI. When shipping
details are required for payment processing and are used for follow on services such
as
Decision Manager
, you can include these fields in the capture context.
These details are tokenized and passed through.
true
: Shipping fields are shown in the UI and are collected by
Unified Checkout
. When you include the shipping details in the
capture context, the information appears prefilled in the UI.
captureMandate.shipToCountries
When the
requestShipping
field is set to
true
,
only the countries that are included in this field can be selected by the cardholder for
their shipping address.
Include Card Prefix
You can control the length of the card number prefix to be received in the
response to the capture context
/sessions
request:
Six digits
Eight digits
No prefix
To specify your preferred card number prefix length, include or exclude the
transientTokenResponseOptions.includeCardPrefix
field in the
capture context
/sessions
request.
To receive a six-digit card
number prefix in the response, follow this step:
Do not
include the
transientTokenResponseOptions.includeCardPrefix
field in the
capture context
/sessions
request.
This example shows how a six-digit card number prefix
, an automatic email lookup occurs when an
email address is included in the capture context request. If the user has a
Click to Pay
account but is not on a recognized device, a one-time
password (OTP) screen appears and the user is prompted to enter their OTP. If the user
does not have a
Click to Pay
account, the user must enter their card
information manually. They will have the option to create a
Click to Pay
account.
To enable email autolookup, you must include
CLICKTOPAY
as a value in the
allowedPaymentTypes
field and include an email address in the
capture context.
IMPORTANT
When the
captureMandate.requestEmail
and
captureMandate.requestPhone
fields are set to
false
, the contact details section is not displayed in the UI.
Mobile as Identity for
Click to Pay
Click to Pay
supports mobile numbers as way to identify
a user. This enables cardholders to use their mobile number instead of their
email address in certain markets for Visa and Mastercard transactions.
When the
requestEmail
field is set to
false
and the
requestPhone
field is
set to
true
, the cardholder is identified using the
provided mobile number. When the
requestEmail
field is
set to
true
and the
requestPhone
field
is set to
false
, the cardholder is identified using the
provided email address. When the
requestEmail
field is
set to
true
and the
requestPhone
field
is also set to
true
, the cardholder is identified using the
provided email address first and then the mobile number if there is no
match.
The capture context that you generate is a JSON Web Token (JWT) data object. The JWT is
digitally signed using a public key and confirms the validity of the JWT and that it
comes from
Cybersource
. When you do not have a key in the JWT header,
Cybersource
recommends that you follow cryptography best practices
and validate the capture context signature.
To validate a JWT, you must obtain its public key. This public RSA key is in JSON Web Key
(JWK) format. The public key is associated with the capture context on the
Cybersource
domain.
To get the public key of a capture context from the header of the capture context itself,
you must retrieve the key ID associated with the public key and then pass the key ID to
the
/flex/v2/public-keys
endpoint:
From the header of the capture context, get the key ID
(
kid
):
{
    "kid": "3g",
    "alg": "RS256"
}
Send a GET request to the
/flex/v2/public-keys
endpoint and
include the key ID. For example:
Test:
GET
https://apitest.cybersource.com
/flex/v2/public-keys/{3g}
Production:
GET
https://api.cybersource.com
/flex/v2/public-keys/{3g}
Production in
Saudi Arabia:
GET
https://api.sa.cybersource.com
/flex/v2/public-keys/{3g}
Test in Saudi
Arabia:
GET
https://apitest.sa.cybersource.com
/flex/v2/public-keys/{3g}
Depending on the cryptographic method you use to validate the public key, you
might need to convert the key to privacy-enhanced mail (PEM) format.
The session JWT is digitally signed using RS256. You must confirm that it was issued by
Cybersource
and has not been tampered with. Follow these steps to
validate the signature:
Parse the session JWT header to extract the key ID
(
kid
):
{
"kid": "3g",
"alg": "RS256"
}
Retrieve the public key by sending a request to the
/flex/v2/public-keys/{kid}
endpoint:
Test
: GET
apitest.cybersource.com
flex/v2/public-keys/{kid}
Production
: GET
api.cybersource.com
flex/v2/public-keys/{kid}
Use the returned RSA public key in JSON Web Key format to verify the JWT
signature.
IMPORTANT
Depending on the cryptographic library that tou use, you
may need to convert the key to Privacy-Enhanced Mail (PEM) format.
Transient Tokens
The response to a successful customer interaction with
Unified Checkout
is
a transient token. This is returned in the response from the
checkout.mount()
function. The transient token is a reference to
the payment data collected on your behalf. Transient tokens allow secure card payments
to occur without risk of exposure to sensitive payment information. The transient token
is a short-term token that expires after 15 minutes. This reduces your PCI
burden/responsibility and ensures that sensitive information is not exposed to your
back-end systems.
Transient tokens can be included requests sent to the Payment Details API for the
customer payment data that is collected.
Transient Token Format
The transient token is issued as a JSON Web Token (JWT) (RFC 7519).
For information on JSON Web Tokens, see JSON Web Tokens.
The payload portion of the token is a Base64URL-encoded JSON string and contains various
claims. For more information, see JSON Web Tokens.
Example: Transient Token Format
Transient Token Payload
IMPORTANT
The empty field values in the transient token
indicate which fields were captured by the application without exposing you to
personally identifiable information directly.
object, including the PAN BIN, is included in the
transient token
metadata
when a
Click to Pay
network token is used as a payment method. This allows you to display information about
the card on invoices and see the BIN details that are linked to the underlying card.
and enables you to determine if the payload is
fully authenticated. When
cardholderAuthenticationStatus
is
set to
true
, the payload is fully authenticated. When
cardholderAuthenticationStatus
is set to
false
, the transaction is not authenticated.
If you
are using
Unified Checkout
with
unifiedPayment.complete()
and
consumerAuthentication
is set to
3DS
or
PASSKEY
in the complete mandate request, then
Payer Authentication
is called automatically if it is available for the
selected payment method and card network. If you use a transient token to
request follow-on services directly, the value of this field indicates if the
transaction has been
authenticated.
When you receive the transient token, you should cryptographically verify its integrity
using the public key embedded within the capture context. Doing so verifies that
Cybersource
issued the token and that the data has not been tampered
with in transit. Verifying the transient token JWT involves verifying the signature and
various claims within the token. Programming languages each have their own specific
libraries to assist.
accepts dual-branded cards. To use this feature, you must
include the card networks that have overlapping BIN ranges in the capture context
request. For
example:
When a card number within an overlapping BIN range is entered, the network that is listed
first in the value array for the
allowedCardNetworks
field is used.
Based on the previous example, if the card number 403550XXXXXXXXXX is entered, the
payment network for payment processing is Visa.
During the transaction, the card type is populated with the first network in the list,
and the
detectedCardTypes
field returned in the transient token includes all of
the detected card types in the transient token.
The
detectedCardTypes
field is returned in the transient token
response only when more than one card type is detected.
If you include Cartes Bancaires as a supported dual-branded card type,
Unified Checkout
displays a radio button with Visa and Mastercard options at
checkout. This enables the customer to select which payment scheme they want to use to
process the payment. The radio button defaults to the card type that you specify in the
capture context request, but the payment is processed using the option selected by the
customer during checkout.
Domestic Scheme Rules
For markets where domestic routing, network preference, or co-badging regulations
apply, you are responsible for ensuring that domestic payment schemes are
prioritized appropriately within the
allowedCardNetworks
configuration.
In these scenarios, domestic schemes must be listed ahead of international networks
such as Visa or Mastercard where required by local regulations or scheme rules.
If network preference varies by transaction, the order of networks should be
dynamically configured when you create the capture context request using the
Sessions API.
You are responsible for reviewing and complying with all applicable local regulatory,
scheme, and acquirer requirements relating to domestic routing and network
selection.
Authorizations with a Transient Token
This section provides the information required in order to perform a successful authorization
with a
Unified Checkout
transient token. You can use this method to construct
more complex payment scenarios that are not supported by the
unifiedPayments.complete()
payment method.
IMPORTANT
When you process payments through
Unified Checkout
using
unifiedPayments.complete()
,
Unified Checkout
invokes
service orchestration directly. When you send an authorization request using a transient
token, you must request the follow-on services that you want to use. For information about
the required fields for the payment services that you request, see the Payments Developer Guide.
The transient token is a short-term token that expires after 15 minutes. Doing so eliminates
the need to send sensitive payment data along with the request. For more information on
transient tokens, see Transient Tokens.
To send the transient token with a request, use the
tokenInformation.transientTokenJwt
field.
This example shows a transient token in the context of an authorization
request:
endpoint. This data includes cardholder name and billing and shipping details. For more information, see Payment Details API.
IMPORTANT
Fields supplied directly in an API request supersede those that are also present in the transient token. For example, in the request below, the total amount might have been overridden because of a tax calculation.
Endpoint
Production:
POST
https://api.cybersource.com
/pts/v2/payments
Test:
POST
https://apitest.cybersource.com
/pts/v2/payments
Production in Saudi
Arabia:
POST
https://api.sa.cybersource.com
/pts/v2/payments
Test in Saudi
Arabia:
POST
https://apitest.sa.cybersource.com
/pts/v2/payments
Required Field for an Authorization with a Transient Token
A Google device must be used with biometric authentication for
Google authentication.
A user authenticates themselves on a Google device with a
tokenized Google Pay credential. The returned payload from Google is
authenticated.
Google Pay
Payer Authentication
through
Unified Checkout
Authorization and
Payer Authentication
You must use a device, such as a web browser, that does not
authenticate the cardholder as part of the authorization
process.
Google returns an un-authenticated payload to
Unified Checkout
.
Unified Checkout
processes
authentication via
Payer Authentication
when the complete
mandate function is used with
consumerAuthentication
.
Handle Errors
The
Unified Checkout
SDK uses a structured error object for all error
scenarios. Errors are returned as exceptions from asynchronous methods and are also
returned as events for centralized handling.
UnifiedCheckoutError
All SDK errors are instances of
UnifiedCheckoutError
with these
properties:
UnifiedCheckoutError
Properties
Property
Type
Description
correlationId
string?
The correlation ID from an underlying API
call, when applicable.
details
unknown?
Additional error-specific information. This
is often an array of objects.
informationLink
string?
The URL linked to the online documentation
for this error.
message
string
This property is a human-readable
description of the error.
name
string
The value is always
"UnifiedCheckoutError"
.
reason
string
This property is a machine-readable error
code, such as
recommends that you do this as it catches errors from all
checkouts, triggers, and buttons created from this client instance.
Error Codes
Initialization Errors
These errors are returned during
VAS.UnifiedCheckout(sessionJWT)
:
Initialization Reason Values
Reason
Description
CAPTURE_CONTEXT_EXPIRED
The supplied JWT has expired. Generate
a new session.
CAPTURE_CONTEXT_INVALID
The session JWT is not valid. For
example, it has a bad signature or is malformed.
UNUSED_TARGET_ORIGINS
One or more
targetOrigins
in the session do not match the
current page origin. The
details
array lists the
unused origins.
Mount Errors
These errors are returned during
checkout.mount()
or
trigger.mount()
:
Mount Reason Values
Reason
Description
CHECKOUT_ALREADY_MOUNTED
The checkout or trigger is already
mounted. Call
unmount()
first, or create a new
instance.
MOUNT_CONTAINER_SELECTOR
The CSS selector does not match any
Document Object Model (DOM) element. Check that the container exists
before calling
mount()
.
MOUNT_ERROR
A problem occurred loading the payment
iframe.
MOUNT_INVALID_CONTAINER
The supplied container parameter is not
a valid CSS selector string or
HTMLElement
.
MOUNT_PAYMENT_TIMEOUT
A payment method timed out during
initialization.
MOUNT_PAYMENT_UNAVAILABLE
No payment types could be presented to
the customer. This may be due to browser or device support, or
errors during checkout initialization.
MOUNT_SIDEBAR_OPTIONS
The supplied container parameter is
invalid for sidebar mode.
MOUNT_TOKEN_TIMEOUT
Token creation timed out during mount.
This may indicate a network issue.
MOUNT_TOKEN_XHR_ERROR
A network error occurred during token
creation. Check the customer’s connectivity.
Complete Errors
These errors are returned during
checkout.complete()
or
trigger.complete()
:
Complete Reason Values
Reason
Description
COMPLETE_AUTHENTICATION_CANCELED
The customer cancelled the
3-D Secure
authentication step-up.
COMPLETE_AUTHENTICATION_FAILED
The
3-D Secure
authentication step-up failed.
COMPLETE_ERROR
A general error occurred during
transaction completion.
COMPLETE_IN_PROGRESS
complete()
has
already been called and has not yet finished. Wait for the current
call to resolve.
COMPLETE_NOT_ALLOWED
Complete is not allowed for this
transaction, such as when
autoProcessing
is set to
true
.
COMPLETE_TRANSACTION_CANCELLED
The customer cancelled the
transaction.
COMPLETE_TRANSACTION_FAILED
The transaction failed during
processing.
COMPLETE_VALIDATION_ERROR
The parameters supplied to
complete()
have a validation error. Check the
details
for specifics
Checkout Errors
Checkout Reason Values
Reason
Description
CHECKOUT_ERROR
A general checkout error
occurred.
CHECKOUT_PAYMENT_PARAMETERS
One or more payment parameters have a
validation error.
CHECKOUT_VALIDATION_PARAMS
One or more checkout parameters have a
validation error.
Trigger Errors
Trigger Reason Values
Reason
Description
TRIGGER_PAYMENT_TYPE_NOT_SUPPORTED
The specified payment type cannot be
used with a trigger. Only
PANENTRY
and
CLICKTOPAY
values are supported.
Payment-Specific Errors
Payment-Specific Reason Values
Reason
Description
CLICK_TO_PAY_SDK_LOAD_ERROR
The
Click to Pay
SDK
failed to load.
ENCRYPT_CARD_FOR_SRC_ENROLMENT_ERROR
Card encryption for
Click to Pay
enrollment failed.
GOOGLEPAY_CHECKOUT_ERROR
A Google Pay checkout error
occurred.
LAUNCH_SRC_CHECKOUT_ERROR
Launching the
Click to Pay
checkout failed.
TRIGGER_PAYMENT_TYPE_NOT_SUPPORTED
The payment type is not supported for
triggers.
General Errors
Reason Code
Description
UNKNOWN_ERROR
An unknown error has
occurred.
Reason Codes
This section describes the server-side HTTP status codes and reason values that are
returned when you send requests to
Unified Checkout
. For information
about client-side SDK error codes, see Handle Errors.
HTTP Status Codes
Code
Description
200
Request processed successfully
201
Session created
400
Bad request. The response body contains a reason value with
details
404
Resource not found
500
Unexpected server error
Reason Values (HTTP
400
)
When the API returns a status code value of
400
, the response body
includes the
reason
field. This section lists all possible values
for the
reason
field:
Initialization Reason Values
Reason
Description
CAPTURE_CONTEXT_EXPIRED
The session JWT is expired. Generate a new session.
CAPTURE_CONTEXT_INVALID
The session JWT is not valid. For example, it has a bad signature
or is malformed.
INVALID_APIKEY
The API key is not valid.
Checkout Reason Values
Reason
Description
CHECKOUT_ERROR
A general checkout error occurred.
UNIFIED_PAYMENTS_ALREADY_SHOWN
The checkout is already displayed.
UNIFIED_PAYMENTS_PAYMENT_PARAMETERS
One or more payment parameters have a validation error.
UNIFIED_PAYMENTS_VALIDATION_FIELDS
One or more fields have a validation error.
UNIFIED_PAYMENTS_VALIDATION_PARAMS
One or more checkout parameters have a validation error.
Mount Reason Values
Reason
Description
SHOW_LOAD_CONTAINER_SELECTOR
The CSS selector does not match any element.
SHOW_LOAD_ERROR
A problem occurred loading the payment iframe.
SHOW_LOAD_INVALID_CONTAINER
The container parameter is not valid.
SHOW_LOAD_SIDEBAR_OPTIONS
The container parameter is not valid for sidebar mode.
SHOW_PAYMENT_TIMEOUT
A payment method timed out during initialization.
SHOW_PAYMENT_UNAVAILABLE
No payment types could be presented to the customer.
SHOW_TOKEN_TIMEOUT
Token creation timed out during mount.
SHOW_TOKEN_XHR_ERROR
A network error occurred during token creation.
Complete Reason Values
Reason
Description
COMPLETE_AUTHENTICATION_CANCELED
The customer cancelled
3-D Secure
authentication.
COMPLETE_AUTHENTICATION_FAILED
3-D Secure
authentication failed.
COMPLETE_ERROR
A general error occurred during completion.
COMPLETE_IN_PROGRESS
A complete call is already in progress.
COMPLETE_NOT_ALLOWED
Complete is not allowed, such as when auto-processing is
enabled.
COMPLETE_TRANSACTION_CANCELLED
The customer cancelled the transaction.
COMPLETE_TRANSACTION_FAILED
The transaction failed during processing.
COMPLETE_VALIDATION_ERROR
Parameters supplied to complete have a validation error.
Tokenization Reason Values
Reason
Description
CREATE_TOKEN_TIMEOUT
Token creation request timed out.
CREATE_TOKEN_XHR_ERROR
A network error occurred during token creation.
SDK_XHR_ERROR
A general SDK network error occurred.
TOKENIZATION_ERROR
Tokenization of payment data failed.
Payment-Specific Reason Values
Reason
Description
CLICK_TO_PAY_SDK_LOAD_ERROR
The
Click to Pay
SDK failed to load.
ENCRYPT_CARD_FOR_SRC_ENROLMENT_ERROR
Card encryption for
Click to Pay
enrollment
failed.
GOOGLEPAY_CHECKOUT_ERROR
A Google Pay checkout error occurred.
LAUNCH_SRC_CHECKOUT_ERROR
Launching the
Click to Pay
checkout
failed.
TRIGGER_PAYMENT_TYPE_NOT_SUPPORTED
The payment type is not supported for triggers.
Payment Details API
This section contains the information you need to retrieve the non-sensitive data associated
with a
Unified Checkout
transient token and the Payment Details API. This
API can be used to retrieve personally identifiable information, such as the cardholder
name and billing and shipping details, without retrieving payment credentials, which
helps ease the PCI compliance burden.
There are two methods of authentication, and they are described in the
recommends that you dynamically parse the response
for the fields that you are looking for when you integrate with
Cybersource
APIs.
Cybersource
may add additional
fields in the future.
You must ensure that your integration can handle new fields that are returned in
the response. Even though the underlying data structures do not change, you must
also ensure that your integration can handle changes to the order in which the
data is returned.
Cybersource
uses semantic versioning
practices, which enables you to retain backwards compatibility as new fields are
introduced in minor version updates.
Endpoint
Production:
GET
https://api.cybersource.com
/flex/v2/payment-details/
{jti}
Test:
GET
https://apitest.cybersource.com
/flex/v2/payment-details/
{jti}
Production in Saudi Arabia:
GET
https://api.sa.cybersource.com
/flex/v2/payment-details/
{jti}
Test in Saudi Arabia:
GET
https://apitest.sa.cybersource.com
/flex/v2/payment-details/
{jti}
The
{jti}
is the ID of the
JWT within the transient token that is returned by
Unified Checkout
.
The transient token is a JWT object that you retrieved as part of a successful
capture of payment information from a cardholder.
The version 1 (v1) SDK simplifies your integration with fewer lines of code, a
streamlined API, and enhancements such as auto-processing and a full event system. The core
flow is the same in v1, and migrating to v1 involves only straightforward method
renames.
Summary of Changes
Summary of Version 1 Changes
Aspect
v0
v1
Initialization
new Accept(session).unifiedPayments()
VAS.UnifiedCheckout(session)
Display the payment UI
up.show(options)
checkout.mount(target)
Completing transactions
up.complete(token)
checkout.complete(token)
or automatic using
autoProcessing
Events
None
Full event system on client and checkout
Cleanup
up.dispose()
checkout.destroy()
+
client.destroy()
Hide UI
up.hide()
checkout.unmount()
Target Origin (Sessions API)
Multiple non-usable URLs can be included in the request.
If any origins are absent or mismatched, for example, they are
not presented in
Unified Checkout
, the system prevents
Unified Checkout
from loading and displays a
client-side error message.
v1 Complete Transactions Manually or Automatically
// Automatic (default when completeMandate is in session)
const checkout = await client.createCheckout({ autoProcessing: true });
const result = await checkout.mount('#buttons');
// result is the completed transaction — no need to call complete()
// Manual - similar to v0
const checkout = await client.createCheckout({ autoProcessing: false });
const token = await checkout.mount('#buttons');
const result = await checkout.complete(token);
Events
Unified Checkout
v0 does not include an event system, as the
integration resolution or rejection from
show()
and
complete()
. v1 includes a full event system as the client and
integration levels.
const trigger = client.createTrigger('CLICKTOPAY');
const result = await trigger.mount('#screen');
Update Reason Codes
Some reason codes were renamed in v1. This table shows the v0 reason code name and the
corresponding name in the v1 client-side SDK:
v0 Reason Code
v1 Reason Code
SHOW_LOAD_CONTAINER_SELECTOR
MOUNT_CONTAINER_SELECTOR
SHOW_LOAD_ERROR
MOUNT_ERROR
SHOW_LOAD_INVALID_CONTAINER
MOUNT_INVALID_CONTAINER
SHOW_LOAD_SIDEBAR_OPTIONS
MOUNT_SIDEBAR_OPTIONS
SHOW_PAYMENT_TIMEOUT
MOUNT_PAYMENT_TIMEOUT
SHOW_PAYMENT_UNAVAILABLE
MOUNT_PAYMENT_UNAVAILABLE
SHOW_TOKEN_TIMEOUT
MOUNT_TOKEN_TIMEOUT
SHOW_TOKEN_XHR_ERROR
MOUNT_TOKEN_XHR_ERROR
UNIFIED_PAYMENTS_ALREADY_SHOWN
CHECKOUT_ALREADY_MOUNTED
UNIFIED_PAYMENTS_PAYMENT_PARAMETERS
CHECKOUT_PAYMENT_PARAMETERS
UNIFIED_PAYMENTS_VALIDATION_PARAMS
CHECKOUT_VALIDATION_PARAMS
IMPORTANT
The server-side API continues to return these v0 reason
codes. The v1 reason codes listed here are used only in the client-side SDK. For
all v1 client-side error codes, see Handle Errors.
Version 1 Update Checklist
You must complete these tasks before you can complete your migration from
Add event listeners for observability. For example,
client.on('error')
and
checkout.on('ready')
.
Appendix
This section contains supplementary information for
Unified Checkout
.
JSON Web Tokens
JSON Web Tokens (JWTs) are digitally signed JSON objects based on the open standard RFC 7519. These tokens provide a compact, self-contained
method for securely transmitting information between parties. These tokens are
signed with an RSA-encoded public/private key pair. The signature is calculated
using the header and body, which enables the receiver to validate that the content
has not been tampered with.
A JWT takes the form of a string, and consists of three parts separated by dots:
<Header>.<Payload>.<Signature>
The header and payload is
Base64-encoded JSON
and contains these claims:
Header
: The algorithm and token type. For
example:
{
  "kid": "zu",
  "alg": "RS256"
}
Payload
: The claims of what the token represents. For
example:
: The signature is computed from the header and payload using a
secret or private key.
IMPORTANT
When working with JWTs,
Cybersource
recommends that you use a well- maintained JWT library to ensure proper decoding
and parsing of the JWT.
IMPORTANT
When parsing the JWT’s JSON payload, you must ensure that you
implement a robust solution for transversing JSON. Additional elements can be
added to the JSON in future releases. Follow JSON parsing best practices to
ensure that you can handle the addition of new data elements in the future.
Supported Countries for Digital Payments
Supported Countries for Digital Payments A-D
Supported Countries (A through D)
Country
Apple
Pay
Click to Pay
eCheck
Google
Pay
Afghanistan
Albania
Algeria
Andorra
Angola
Antigua and
Barbuda
Argentina
Armenia
Australia
Austria
Azerbaijan
Bahamas
Bahrain
Bangladesh
Barbados
Belarus
Belgium
Brazil
Belize
Benin
Bhutan
Bolivia
Bosnia and
Herzegovina
Botswana
Brunei
Darussalam
Bulgaria
Burkina
Faso
Burundi
Cambodia
Cameroon
Canada
Cape
Verde
Central
African Republic
Chad
Chile
China
Colombia
Comoros
Costa
Rica
Côte
d'Ivoire
Croatia
Cyprus
Czech
Republic
Democratic
Republic of the Congo
Denmark
Djibouti
Dominica
Dominican
Republic
Supported Countries for Digital Payments E-K
Supported Countries (E through K)
Country
Apple Pay
Click to Pay
Google Pay
Ecuador
Egypt
El Salvador
Equatorial Guinea
Eritrea
Estonia
Eswatini
Ethiopia
Faroe Islands
Fiji
Finland
France
Gabon
Gambia
Georgia
Germany
Ghana
Gibraltar
Greece
Greenland
Guernsey
Grenada
Guatemala
Guinea
Guinea-Bissau
Guyana
Haiti
Honduras
Hong Kong
Hungary
Iceland
Indonesia
Iraq
Ireland
Isle of Man
Israel
Italy
Jamaica
Japan
Jersey
Jordan
Kazakhstan
Kenya
Kiribati
Kuwait
Kyrgyzstan
Supported Countries for Digital Payments L-R
Supported Countries (L through R)
Country
Apple Pay
Click to Pay
Google Pay
Laos
Latvia
Lebanon
Lesotho
Liberia
Libya
Liechtenstein
Lithuania
Luxembourg
Macau
Madagascar
Malawi
Malaysia
Maldives
Mali
Malta
Marshall Islands
Mauritania
Mauritius
Mexico
Micronesia, Federated States of
Moldova
Monaco
Mongolia
Montenegro
Morocco
Mozambique
Myanmar
Namibia
Nauru
Nepal
Netherlands
New Zealand
Nicaragua
Niger
Nigeria
North Macedonia
Norway
Oman
Pakistan
Palau
Palestinian Territories
Panama
Papua New Guinea
Paraguay
Peru
Philippines
Poland
Portugal
Qatar
Republic of the Congo
Romania
Rwanda
Supported Countries for Digital Payments S-Z
Supported Countries (S through Z)
Country
Apple
Pay
Click to Pay
eCheck
Google
Pay
Paze
Saint Kitts
and Nevis
Saint
Lucia
Saint
Vincent and the Grenadines
Samoa
San
Marino
Sao Tome and
Principe
Saudi
Arabia
Senegal
Serbia
Seychelles
Sierra
Leone
Singapore
Slovakia
Slovenia
Solomon
Islands
Somalia
South
Africa
Korea,
Republic of (South)
South
Sudan
Spain
Sri
Lanka
Sudan
Suriname
Sweden
Switzerland
Switzerland
-Italian
Taiwan
Tajikistan
Tanzania
Thailand
Timor-Leste
Togo
Tonga
Trinidad and
Tobago
Tunisia
Turkey
Turkmenistan
Tuvalu
Uganda
Ukraine
United Arab
Emirates
United
Kingdom
United
States
Uruguay
Uzbekistan
Vanuatu
Vatican City
(Holy See)
Venezuela
Vietnam
Yemen
Zambia
Zimbabwe
Supported Locales
The locale field within the capture context request consists of an ISO 639 language
code, an underscore (_), and an ISO 3166 region code. Set the
locale
field in your session request to display the checkout
UI in the customer's language.
IMPORTANT
When the chosen language is Arabic,
Unified Checkout
supports right-to-left languages in the UI for
this locale.
Unified Checkout
supports these locales:
Supported Locales
Locale
ISO Language
ISO Region
ar_AE
Arabic
United Arab Emirates
ar_JO
Arabic
Jordan
ar_QA
Arabic
Qatar
bg_BG
Bulgarian
Bulgaria
ca_ES
Catalan
Spain
zh_CN
Chinese
China
zh_HK
Chinese
Hong Kong
zh_MO
Chinese
Macao
zh_SG
Chinese
Singapore
zh_TW
Chinese
Taiwan
hr_HR
Croatian
Croatia
cs_CZ
Czech
Czechia
da_DK
Danish
Denmark
nl_NL
Dutch
Netherlands
en_AE
English
United Arab Emirates
en_AU
English
Australia
en_CA
English
Canada
en_GB
English
United Kingdom
en_IE
English
Ireland
en_NZ
English
New Zealand
en_PK
English
Pakistan
en_QA
English
Qatar
en_US
English
United States
en_LK
English
Sri Lanka
fi_FI
Finnish
Finland
fr_CA
French
Canada
fr_FR
French
France
de_AT
German
Austria
de_DE
German
Germany
el_GR
Greek
Greece
he_IL
Hebrew
Israel
hu_HU
Hungarian
Hungary
id_ID
Indonesian
Indonesia
it_IT
Italian
Italy
ja_JP
Japanese
Japan
km_KH
Khmer
Cambodia
ko_KR
Korean
South Korea
lo_LA
Lao
Laos
ms_MY
Malay
Malaysia
nb_NO
Norwegian Bokmål
Norway
pl_PL
Polish
Poland
pt_BR
Portuguese
Brazil
ro_RO
Romanian
Romania
ru_RU
Russian
Russia
si_LK
Sinhala
Sri Lanka
sk_SK
Slovak
Slovakia
sl_SI
Slovenian
Slovenia
es_AR
Spanish
Argentina
es_CL
Spanish
Chile
es_CO
Spanish
Colombia
es_ES
Spanish
Spain
es_MX
Spanish
Mexico
es_PE
Spanish
Peru
es_US
Spanish
United States
sv_SE
Swedish
Sweden
tl_PH
Tagalog
Philippines
ta_LK
Tamil
Sri Lanka
th_TH
Thai
Thailand
tr_TR
Turkish
Türkiye
uk_UA
Ukrainian
Ukraine
ur_PK
Urdu
Pakistan
vi_VN
Vietnamese
Vietnam
Security Recommendations
Unified Checkout
is compliant with Payment Card Industry (PCI)
Self-Assessment Questionnaire A (SAQ-A).
Cybersource
recommends that
you consider these security policies so you can maintain a secure integration.
Content Security Policy
Implement a Content Security Policy (CSP) to mitigate cross-site scripting (XSS)
attacks. Add these directives for
Unified Checkout
:
CSP Directives
Directive
Test
Production
connect-src
https://apitest.cybersource.com
https://api.cybersource.com
frame-src
https://apitest.cybersource.com
https://api.cybersource.com
child-src
https://apitest.cybersource.com
https://api.cybersource.com
script-src
https://apitest.cybersource.com
https://api.cybersource.com
These directives enable the SDK to load secure iframes and communicate with
Cybersource
services.
IMPORTANT
When you use additional payment methods such as Google Pay or
PayPal, you must also add their respective domains to your CSP
directives.
Iframe Isolation
Unified Checkout
renders all payment UI inside cross-origin iframes
hosted by
Cybersource
. This architecture provides several security benefits:
Data isolation
: Your page cannot access payment data within the
iframe due to the browser’s same-origin policy.
Reduced attack surface
: Attackers cannot extract card data from the
isolated iframe if your merchant page is compromised.
Origin verification
: The SDK validates that the hosting page origin
matches the
targetOrigins
that is declared in the session
before displaying any UI.
Do not attempt to access or manipulate the contents of the payment iframes. The
browser blocks cross-origin access by design.
Token Security
A session is a signed JWT with a short lifespan.
Cybersource
recommends that you follow these practices:
Generate a new session for each checkout. Do not reuse sessions across
checkouts or customers.
Keep the session server-side until needed. Pass it to the client only when
the customer is ready to pay.
Set
targetOrigins
to only the domains that host the SDK. Do
not use wildcard origins or include domains that do not need access.
The transient token returned by
mount()
or
complete()
expires after 15 minutes.
Cybersource
recommends that you follow these practices:
Send the transient token to your server immediately after receiving it.
Verify the token signature using the public key from the session before
authorizing the payment. For verification details, see Transient Tokens.
Do not store transient tokens in browser storage
(
localStorage
,
sessionStorage
, or
cookies). Process them server-side and discard.
Immutable API
The client interface that is returned by
VAS.UnifiedCheckout()
is
frozen with
Object.freeze()
. This prevents runtime tampering, which
means that no properties can be added, removed, or modified on the client, checkout,
trigger, or button objects. Do not attempt to modify or extend the SDK objects. If
you need custom behavior, use the event system to react to SDK state changes.
Cleanup
You must always call
destroy()
on the client when the payment flow
is complete or the customer navigates away. This removes all iframes and clears
internal state:
checkout.destroy();
client.destroy();
If you do not destroy the client, you could leave payment iframes in the page after
they are no longer needed.
PCI Compliance
The least burdensome level of Payment Card Industry (PCI) compliance is Self-Assessment Questionnaire A (SAQ-A). To be compliant
with SAQ-A, you must securely capture sensitive payment data with a validated
payment provider.
Unified Checkout
meets this requirement by rendering
secure iframes hosted by
Cybersource
. Payment data is submitted
directly to
Cybersource
and never touches your systems.
Security Architecture
Unified Checkout
uses many layers of protection to be compliant with
PCI SAQ-A guidelines:
Iframe isolation
: All payment UI renders inside cross-origin iframes
hosted by
Cybersource
. Your page cannot access payment data
within the iframe due to the browser’s same-origin policy.
Origin verification
: The SDK validates that the hosting page origin
matches the
targetOrigins
declared in the session.
Immutable API
: The client interface returned by
VAS.UnifiedCheckout()
is frozen with
Object.freeze()
. This prevents runtime tampering.
Closure-based privacy
: The internal SDK state is not accessible from
outside the SDK. There are no public properties that expose session data or
credentials.
Short-lived tokens
: The session and transient tokens expire after a
short period, limiting the window for misuse
Because
Unified Checkout
handles payment data capture within secure
iframes, your page never receives, processes, or stores cardholder data. This means
that you qualify for SAQ-A over the more burdensome SAQ A-EP or SAQ D and your PCI
audit scope is significantly reduced compared to direct API integrations.
Even with all that
Unified Checkout
handles, you must still do the
following to remain SAQ-A compliant:
All pages that load the SDK must use Transport Layer Security (TLS).
You must restrict which domains can load scripts and frames. For information
about the required directives, see Security Recommendations.
You must generate a new session for each checkout and restrict
targetOrigins
to only your domains.
You must send transient tokens to your server over HTTPS and verify their
signatures before authorizing payments.
Introduction to
the
Click to Pay Drop-In UI
Click to Pay Drop-In UI
powered by
Unified Checkout
provides an interface for easy acceptance of
Click to Pay
payments from Visa, Mastercard, and American Express cards.
The
Click to Pay Drop-In UI
handles manual card entry
for the non-
Click to Pay
payment schemes called out in this guide.
Throughout this guide we refer to both
Click to Pay Drop-In UI
and
Unified Checkout
.
Click to Pay Drop-In UI
consists of a set of server-side APIs
and a client-side JavaScript library.
The server-side APIs authenticate your merchant identity, instruct the system to
act within your payment environment, and provide a way to retrieve the payment data
following a successful
Click to Pay Drop-In UI
interaction.
The provided JavaScript library enables you to place a payment application within your
e-commerce environment. This embedded component offers
Click to Pay
and card entry to your customers.
Whether a customer uses a stored
Click to Pay
card or enters their
payment information manually,
the
Click to Pay Drop-In UI
handles all user interactions and provides a
response to your e-commerce system. All UI / UX must follow the UI/UX guidelines. For
information about configuring your UI/UX, see Click to Pay UI Examples.
The
Click to Pay Drop-In UI
enables a portfolio to
receive an encrypted payload and send a request to the API to retrieve the payment
details. The format of the decrypted payment details are determined by the transaction
type. The details are either a network token and cryptogram or the PAN, expiration
details, and card verification value (CVV).
The figures below shows the
Click to Pay Drop-In UI
for a recognized user.
Figure:
Unified Checkout
UI with Card Payment Button
Figure:
Unified Checkout
UI without Card Payment Button
IMPORTANT
Each request that you send to
Cybersource
requires header information. For information about constructing the headers for your
request, see the
is designed to provide customers with a
friction-free payment experience across many payment experiences. The user experience
has been optimized for mobile use and performs equally well on mobile and desktop
devices.
Click to Pay
recognizes customers as follows:
The customer is a recognized
Click to Pay
customer.
The customer is not recognized but is a
Click to Pay
customer.
The customer is a guest at checkout.
These workflows show you the pages a customer encounters based on their status:
recognized
experience. This interaction occurs when a customer’s device is recognized by the
Click to Pay Drop-In UI
.
A customer's device is recognized under these conditions:
When the customer has used
Click to Pay
on their device
through any
Click to Pay
channel.
If the customer chose to have their device remembered during a previous
transaction or when they enter their one-time password (OTP).
The cardholder is presented with their stored
Click to Pay
cards
in the UI when they are on a recognized device:
Figure:
Recognized
Click to Pay
Customer UI
Unrecognized
Click to Pay
Customer
This section provides an overview of the
Click to Pay Drop-In UI
unrecognized
experience. This interaction occurs when a customer's device is not recognized by the
Click to Pay Drop-In UI
. This condition occurs when the customer has a
Click to Pay
account but has not opted to have their details
stored on the device. In this flow, the customer receives an OTP on their registered
mobile device or their email address. The OTP can be received from any of the supported
card networks, but will return cards that are stored in
Click to Pay
across all of the user's supported card networks. A Visa cardholder will receive an OTP
to their registered email address and phone number to authenticate their identity. A
Mastercard cardholder will receive an OTP on their registered phone number. After the
user's identity is authenticated, their stored
Click to Pay
credentials are shown:
Figure:
Unrecognized
Click to Pay
Customer on a Recognized Device
UI
Guest Customer
This section provides an overview of the
Click to Pay Drop-In UI
guest
experience. This interaction occurs when the customer has not previously created a
Click to Pay
account, or their issuer has not provisioned their
card into
Click to Pay
.
In the guest experience,
Click to Pay Drop-In UI
captures the PAN details and the
cardholder chooses to create a
Click to Pay
account or to check out
as a guest. In both cases, the payment credentials are available for processing
transactions using your payment gateway.
The cardholder can make a one-time payment or complete the payment and choose to create a
Click to Pay
account for future use using their chosen email
address and phone number combination. A user can select
Switch ID
or
Edit
within the contact details tab in order to look up new
payment details:
Figure:
Guest UI
Click to Pay Drop-In UI
Flow
To integrate
Click to Pay Drop-In UI
into your platform, you must follow
several integration steps. This section gives a high-level overview of how to
integrate and launch
Click to Pay Drop-In UI
on your webpage and process a
transaction. You can find the detailed specifications of the APIs later in this
document.
You send a server-to-server API request for a capture context.
This request is fully authenticated and returns a JSON Web Token (JWT)
that is necessary to invoke the frontend JavaScript library.
For information on setting up the server side, see
Server-Side Set Up.
You invoke the
Unified Checkout
JavaScript library using the JWT
response from the capture context request. For information on setting up the
client side, see Client-Side Set Up.
You use the response from
the
Click to Pay Drop-In UI
to retrieve
payment credentials for payment processing or other steps.
This figure illustrates the system's payment flow.
Figure:
Click to Pay
Payment Flow
For more information on the specific APIs referenced, see these topics:
to add a
transacting merchant to an existing merchant organization.
Click
Next
.
If you are adding a transacting organization to an existing merchant account,
search for the merchant account in the Boarding Presets section.
If you have more than one boarding package, choose a boarding package from the
drop-down menu, or enter text in the search field to find one. Click
Next
. If you have only one boarding package, the Boarding Package section
does not display.
Click
Start
in the Merchant Account Information section to enter account
information. For more information, see Add Merchant Account Information.
Optional: click
Skip
in the Hierarchy Details section to skip
the hierarchy step.
Click
Start
in the Transacting Organization and
Products section to set up a transacting organization and configure products for
it. The Transacting Organization and Products page appears.
Under Transacting Organization Details, enter the transacting organization
name and the organization ID.
Under Product Enablement, find
Unified Checkout
and select
Enabled
under the Enablement drop-down
menu.
Click
Configure
to configure
Unified Checkout
.
Under Payment methods, select
Click to Pay
.
Under Card Brands, select the card brands you want to enable in
Unified Checkout
. These card brands are supported by
Click to Pay
:
American Express
Mastercard
Visa
You can select
Allow All
to enable all card brands for your
merchants. When you select
Allow All
, future additions to supported card
brands are automatically available.
IMPORTANT
You must select at least one card brand to support.
Under Integrated services, select
Retrieve Sensitive Information at
Portfolio Level
.
Click
Apply
to save your configuration.
Enable
Click to Pay
To enable
Click to Pay
on
Unified Checkout
, you must
first register
Click to Pay
. This process sends the appropriate
information to the digital payment systems and registers your page with each system.
Follow these steps to enable
Click to Pay
for
Unified Checkout
using the API or in the
Business Center
. You must
follow these steps for each transacting merchant for which you want to enable
Click to Pay
.
Enabling
Click to Pay Drop-In UI
Using the API
This section shows you how to enable
Click to Pay Drop-In UI
using the Boarding
Registration Service (BRS) API.
To enable
Click to Pay
3DS authentication, you must include these
fields in your request:
This section contains the information you need to set up your server. Initializing
Click to Pay Drop-In UI
within your webpage begins with a server-to-server
call to the sessions API. This step authenticates your merchant credentials, and
establishes how the frontend components will function. The sessions API request contains
parameters that define how the
Click to Pay Drop-In UI
performs.
The server-side component provides this information:
A transaction-specific public key that is used by the customer's browser to protect
the transaction.
An authenticated context description package that manages the payment experience on
the client side. It includes available payment options such as card networks,
payment interface styling, and interaction methods.
The functions are compiled in a JSON Web Token (JWT) object referred to as the
This section contains the information you need to set up your server. Initializing
Unified Checkout
within your webpage begins with a server-to-server call to
the Sessions API. This step authenticates your merchant credentials, and establishes
how the frontend components will function. The Sessions API request contains
parameters that define how
Unified Checkout
performs.
The server-side component provides this information:
A transaction-specific public key is used by the customer's browser to protect the
transaction.
An authenticated context description package that manages the payment experience on
the client side. It includes available payment options such as card networks,
payment interface styling, and payment methods.
The functions are compiled in a JSON Web Token (JWT) object referred to as the
The capture context request is a signed JSON Web Token (JWT)
that includes all of the merchant-specific parameters. This request tells the frontend
JavaScript library how to behave within your payment experience. The request provides
authentication, one-time keys, the target origin to the
Unified Checkout
integration in addition to allowed card networks and payment types. The capture context
request includes these elements:
allowedCardNetworks
allowedPaymentTypes
clientVersion
targetOrigin
Use the
targetOrigins
and the
allowedPaymentTypes
fields to define the target origin and the accepted digital payment methods in your capture
context.
When you configure the merchant settings using the Merchant Experience section of the
Business Center
, your request to the
sessions
API must
include these required fields. All other values are determined from the settings
that are configured in the
This section contains the information you need to set up the client side. You use the
Unified Checkout
JavaScript library to integrate with your e-commerce
website. It has two primary components:
The button widget, which presents
Click to Pay
to the customer.
There are different options available to display this to your customers. See these
topics: XXX
The payment acceptance page, which captures payment information from the cardholder.
You can embed the payment acceptance page
within your webpage or add it as a sidebar.
The
Unified Checkout
JavaScript library supports
Click to Pay
and manual card entry payment methods.
Follow these steps to set up the client:
Load the JavaScript library.
Initialize the accept object the capture context JWT. For information JSON Web
Tokens, see JSON Web Tokens.
Initialize the unified payment object with optional parameters.
Show the button list or payment acceptance page or both.
The response to these interactions is a transient token that you use to retrieve the
payment information captured by the UI.
Loading the JavaScript Library and Invoking the Accept Function
Use the client library asset path and client library integrity value that is returned by
the capture context response to invoke
Unified Checkout
on your page.
You can retrieve these values from the
clientLibrary
and
clientLibraryIntegrity
fields that are returned in the JWT from
POST
https://api.cybersource.com
/uc/v1/sessions
. You can use
these values to create your script tags.
You must perform this process for each transaction, as these values may be unique for
each transaction. You must avoid hard-coding values for the
clientLibrary
and
clientLibraryIntegrity
fields to prevent client-side errors.
For example, a response from
https://apitest.cybersource.com
/uc/v1/sessions
would
include:
"data": {
"clientLibrary":"[EXTRACT clientLibrary VALUE from here]",
"clientLibraryIntegrity": "[EXTRACT clientLibraryIntegrity VALUE from here]"
}
Below is an example script
tag:
<script src="[INSERT clientLibrary VALUE HERE]"
integrity=”[INSERT clientLibraryIntegrity VALUE HERE]”
crossorigin=”anonymous”></script>
IMPORTANT
Use the
clientLibrary
and
clientLibraryIntegrity
parameter values in the capture context
response to obtain the
Unified Checkout
JavaScript library URL and the
integrity value. This ensures that you are always using the most up-to-date library and
protects against fraud. Do not hard-code the
Unified Checkout
JavaScript
library URL or integrity value.
When you load the library, the capture context from your initial server-side request is
used to invoke the accept function.
JavaScript Example: Initializing the SDK
async function launchCheckout() {
try {
const client = await VAS.UnifiedCheckout(sessionJWT);
const checkout = await client.createCheckout({ autoProcessing: false });
const token = await checkout.mount('#buttons');
// result contains the Transient Token
// Send result to your server for retrieval of payment information
sendToServer(token);
} catch (error) {
if (error.name === 'UnifiedCheckoutError') {
handleError(error.reason, error.message);
}
} finally {
checkout.destroy();
client.destroy();
}
}
launchCheckout();
In this example,
sessionJWT
refers to the capture context JWT.
JavaScript Example: Displaying the Button List
After you initialize the
Unified Checkout
object, you can add the
payment application and payment acceptance pages to your webpage. You can attach the
embedded
Unified Checkout
tool and payment acceptance pages to any
named element within your HTML. Typically, they are attached to explicit named
components that are replaced with
Unified Checkout
’s iframes.
// Sidebar
const result = await checkout.mount('#buttons');
// Embedded
const result = await checkout.mount({
paymentSelection: '#buttons',
paymentScreen: '#form'
});
JavaScript Example: Client-Defined Trigger for
Click to Pay
or PAN
Entry
When you display
CLICKTOPAY
or
PANENTRY
as allowed
payment types, you can load the UI without displaying the
Unified Checkout
checkout button. You can do this by creating a trigger
that defines what event loads the UI.
Adding the Payment Application and Payment Acceptance
After you initialize the
Unified Checkout
object, you can add the payment
application and payment acceptance pages to your webpage. You can attach the
Unified Checkout
embedded tool and payment acceptance pages to any named
element within your HTML. Typically, they are attached to explicit named
<div>
components that are replaced with
Click to Pay Drop-In UI
iframes
.
IMPORTANT
If you do not specify a location for the payment acceptance page, it
is placed in the sidebar.
JavaScript Example: Setting Up with Full Sidebar
<html>
<head>
<script
src="[INSERT clientLibrary VALUE HERE]"
integrity="[INSERT clientLibraryIntegrity VALUE HERE]”
crossorigin=”anonymous"
></script>
</head>
<body>
<h1>Unified Checkout Integration</h1>
<input
type="hidden"
name="sessionJWT"
value="[INSERT sessionJWT HERE]"
/>
<script type="text/javascript">
const sessionJWT = document.getElementById("sessionJWT").value;
async function launchCheckout() {
try {
const client = await VAS.UnifiedCheckout(sessionJWT);
const checkout = await client.createCheckout();
const result = await checkout.mount('#payment-buttons');
// result contains the completed payment result JWT
// Send result to your server for verification
sendToServer(result);
} catch (error) {
if (error.name === 'UnifiedCheckoutError') {
handleError(error.reason, error.message);
}
} finally {
checkout.destroy();
client.destroy();
}
}
launchCheckout();
</script>
</body>
</html>
JavaScript Example: Setting Up with the Embedded Component
The main difference between using an embedded component and the sidebar is that
the
VAS.UnifiedCheckout(sessionJWT)
object is set to
false
, and the location of the payment screen is passed in the
containers argument.
IMPORTANT
If you do not specify a location
for the payment acceptance page, it is placed in the side bar.
<html>
<head>
<script
src="[INSERT clientLibrary VALUE HERE]"
integrity="[INSERT clientLibraryIntegrity VALUE HERE]"
crossorigin="anonymous"
></script>
</head>
<body>
<h1>Unified Checkout Integration</h1>
<input
type="hidden"
id="sessionJWT"
name="sessionJWT"
value="[INSERT sessionJWT HERE]"
/>
<script type="text/javascript">
const sessionJWT = document.getElementById("sessionJWT").value;
async function launchCheckout() {
let client;
let checkout;
try {
client = await VAS.UnifiedCheckout(sessionJWT);
checkout = await client.createCheckout();
const result = await checkout.mount('#payment-buttons');
// result contains the completed payment result JWT
// Send result to your server for verification
sendToServer(result);
} catch (error) {
if (error.name === 'UnifiedCheckoutError') {
handleError(error.reason, error.message);
}
} finally {
if (checkout) {
checkout.destroy();
}
if (client) {
client.destroy();
}
}
}
launchCheckout();
</script>
</body>
</html>
Sessions API - Capture Context
This section contains the information you need to request the capture context using the
sessions
API.
The capture context request contains all of the merchant-specific parameters that tell the
frontend JavaScript library how to behave within your payment experience.
The capture context is a signed JSON Web Token (JWT) containing this information:
Merchant-specific parameters that dictate the customer payment experience for the
current payment transaction.
A one-time public key that secures the information flow during the current payment
transaction.
The capture context request includes these elements:
insists that you dynamically parse
the response for the fields that you are looking for. Additional fields may be added in
the future.
You must ensure that your integration can handle new fields that are
returned in the response. While the underlying data structures will not change, you must
also ensure that your integration can handle changes to the order in which the data is
returned.
Features
This section includes information on the features that are supported in
Click to Pay
.
Allowed Card Networks
Use the
allowedCardNetworks
field to define the card types.
These card networks are available for card entry:
American Express (supported on
Click to Pay
)
Cartes Bancaires
Carnet
China UnionPay
Diners Club
Discover
EFTPOS
ELO
Jaywan
JCB
JCrew
KCP
mada
Maestro
Mastercard (supported on
Click to Pay
)
Meeza
PayPak
UATP
Visa (supported on
Click to Pay
)
To support dual-branded or co-badged cards, you must list your supported card type
values for the
allowedCardNetworks
field based on your preference
for processing card numbers. For example, if a card is dual-branded as Visa and
Cartes Bancaires, and Cartes Bancaires is listed first, the card type is set to
Cartes Bancaires after the card number is entered in your
Unified Checkout
card collection form. For information on dual-branded or
co-badged cards, see Dual-Branded Cards.
IMPORTANT
Some card types, such as KCP and UATP, do not have security codes (CVV or
CVN). If you include only card types that do not have security codes in the
allowedCardNetworks
field,
Unified Checkout
does not display the security code field in the
UI.
If you include card types that do not have security codes and cards types
that do have security codes in the
allowedCardNetworks
field,
Unified Checkout
displays the security code field in
the UI. The field is disabled in the UI when the cardholder enters a card
number for a card type with no security code
Domestic Scheme Rules
For markets where domestic routing, network preference, or co-badging regulations
apply, you are responsible for ensuring that domestic payment schemes are
prioritized appropriately within the
allowedCardNetworks
configuration.
In these scenarios, domestic schemes must be listed ahead of international networks
such as Visa or Mastercard where required by local regulations or scheme rules.
If network preference varies by transaction, the order of networks should be
dynamically configured when you create the capture context request using the
Sessions API.
You are responsible for reviewing and complying with all applicable local regulatory,
scheme, and acquirer requirements relating to domestic routing and network
selection.
Target Origins
The target origin is defined by the scheme
(protocol), hostname (domain), and port number (if used).
You must use the https:// protocol. Sub domains must also be included in the target
origin.
Any valid top-level domains, such as .com, .co.uk, and .gov.br, are supported.
Wildcards are not supported.
For example, if you are launching
Unified Checkout
on example.com, the
target origin could be any of the following:
box pre-checked when a user is
manually entering their card details and
Click to Pay
is
enabled. The customer can uncheck the box if necessary, which means the request is
processed as a one-time manual PAN transaction. This is available when you set the
billingType
field to
PARTIAL
or
FULL
in the capture context. This ensures that the customer's
billing country can be validated in the UI.
Click to Pay
enrollment pre-check is available in these
countries:
loads, the payment buttons displayed are based on
what you include in the
allowedPaymentTypes
object in the capture
context.
Unified Checkout
enables you to customize the text on the
payment buttons. You can do this by setting the
buttonType
field
object in the capture context to one of these values:
ADD_CARD
CARD_PAYMENT
CHECKOUT_AND_CONTINUE
DEBIT_CREDIT
DONATE
PAY
PAY_WITH_CARD
SUBSCRIBE_WITH_CARD
If you do not include the
buttonType
field in your request, the
payment button text defaults to
Checkout with card
. For example:
Customize Button Text
Use the
buttonType
field to customize the text on payment
buttons:
Button Text Options
buttonType
Value
Button Display Text
ADD_CARD
Add card
CARD_PAYMENT
Card payment
CHECKOUT_AND_CONTINUE
Checkout and continue
DEBIT_CREDIT
Debit or credit
DONATE
Donate
PAY
Pay
PAY_WITH_CARD
Pay with card
SUBSCRIBE_WITH_CARD
Subscribe with card
When you do not include this field in your request, the default button text is
“Checkout with card.”
Capture Mandate
The capture mandate enables you to define which fields are captured within
Unified Checkout
. You must include the fields and set the values in the
capture context based on the information that you want
Unified Checkout
to collect. This enables the cardholder to review and edit their details where
the UI includes these fields. When the UI is used to capture cardholder information,
all captured information is available within the payment details API response. When
you want the cardholder to review existing address data, you can include the known
customer data in the capture context and this information is pre-filled in the
A combo card is a single card in Brazil that functions as both a debit and a credit
card.
Unified Checkout
enables the cardholder to choose whether to pay
for a transaction using a debit or credit card. The cardholder can choose the card
that they want to use when they enter their card details or when they choose a
stored Visa card from their
Click to Pay
wallet during checkout.
While in the card details section of the payment form, the cardholder is prompted
for a debit or credit card. Credit is the default option.
To enable combo cards during checkout, you must include the
comboCard
field in your capture context request and set the
field value to
true
. When the
comboCard
field
value is set to
true
, the option to use a debit or credit card
appears for all Visa cards that are entered in
Unified Checkout
and for all
cards that are already stored in
Click to Pay
. If you do not
want to offer a combo card at checkout, do not include the
comboCard
field in your capture context
request:
"captureMandate" : {
"comboCard": true
}
IMPORTANT
This feature is
available only in Brazil.
captureMandate.CPF
The Cadastro de Pessoas Físicas (CPF) Brazilian tax ID feature is for customers in
Brazil and provides your customers with a way to include their Consumer National
Identifier when it is requested at checkout. Include this field in the capture
context to display this field within the flow for manual card entry and
, you
can remove the final summary confirmation screens from the checkout experience. When
the UI displays cardholder data, the cardholder can review and, if necessary, edit
their payment details before checkout is complete.
: Only the billing postal code and billing country are
collected in the UI. Set to this value when you use relaxed address verification
services (AVS). This includes markets where postal code and billing country are
enough for successful payment processing.
NONE
: No fields are shown in the UI to capture cardholder billing
details. If you are using the Complete Mandate, you must provide billing details in
the capture context. All information that is collected from these fields is
tokenized in the transient token and sent for payment processing. For information
about which fields are required for payment processing, see the Payments Developer Guide.
FULL
: These fields are shown in the UI to capture cardholder billing
details. When you include the billing details in the capture context, these details
are pre-filled in the
Unified Checkout
UI. All information that is
collected from these fields are tokenized in the transient token and sent for
payment processing where the Complete Mandate is used.
captureMandate.requestEmail
false
: No email address is shown in the UI. If you are using
Click to Pay
, this email address is used to find the
cardholder's
Click to Pay
account and it appears in the UI when
requestEmail
is set to
false
.
true
: The email address is shown and captured in the UI. If you are
using
Click to Pay
, this email address is used to find the
cardholder's
Click to Pay
account.
captureMandate.requestPhone
false
: No phone number is shown or captured in the UI.
true
: The phone number is shown and captured in the UI.
captureMandate.requestShipping
false
: No shipping information is captured in the UI. When shipping
details are required for payment processing and are used for follow on services such
as
Decision Manager
, you can include these fields in the capture context.
These details are tokenized and passed through.
true
: Shipping fields are shown in the UI and are collected by
Unified Checkout
. When you include the shipping details in the
capture context, the information appears prefilled in the UI.
captureMandate.shipToCountries
When the
requestShipping
field is set
to
true
, only the countries that are included in this field can be
selected by the cardholder for their shipping address.
Include Card Prefix
You can control the length of the card number prefix to
be received in the response to the capture context
/sessions
request:
Six digits
Eight digits
No prefix
To specify your preferred card number prefix length, include or exclude the
transientTokenResponseOptions.includeCardPrefix
field in the
capture context
/sessions
request.
To receive a six-digit card
number prefix in the response, follow this step:
Do not
include the
transientTokenResponseOptions.includeCardPrefix
field in the
capture context
/sessions
request.
This example shows how a six-digit card number prefix
, an automatic email lookup occurs when an
email address is included in the capture context request in the
data.billTo.email
field.. If the user has a
Click to Pay
account but is not on a recognized device, a one-time
password (OTP) screen appears and the user is prompted to enter their OTP. If the
user does not have a
Click to Pay
account, the user must enter
their card information manually. They will have the option to create a
Click to Pay
account.
Mobile as Identity for
Click to Pay
Click to Pay
supports mobile numbers as way to identify a user.
This enables cardholders to use their mobile number instead of their email address
in certain markets for Visa and Mastercard transactions.
When the
requestEmail
field is set to
false
and
the
requestPhone
field is set to
true
, the
cardholder is identified using the provided mobile number. When the
requestEmail
field is set to
true
and the
requestPhone
field is set to
false
, the
cardholder is identified using the provided email address. When the
requestEmail
field is set to
true
and the
requestPhone
field is also set to
true
, the
cardholder is identified using the provided email address first and then the mobile
number if there is no match.
UI/UX Customization Look and Feel
Click to Pay Drop-In UI
supports appearance customization using the
appearance
field object. You can customize the theme, button
configuration, color styling, input states, and typography. All customization fields are
optional and can be configured in the API in the
appearance.variables
field object. For a complete list of customizable fields, see Customization Matrix.
Decrypted Capture Context Body with Selected Fields
{
"flx": {
// filled with token metadata
},
"ctx": [
{
// filled with data related to your capture context request parameters
"data": {
"clientLibrary": // taken dynamically from response ,
"clientLibraryIntegrity": //taken dynamically from response: "sha256-cQ1t6GQcN5El4ml1H10eaSV+TuS/hFryblLLl9s/xjY="
},
"type": "gda-0.10.0"
}
],
"iss": "Flex API",
"exp": 1765827144,
"iat": 1765826244,
"jti": "k7oy3rhyKnLr44pf"
}
Transient Tokens
The response to a successful customer interaction with
Unified Checkout
is
a transient token. This is returned in the response from the
checkout.mount()
function. The transient token is a reference to
the payment data collected on your behalf. Transient tokens allow secure card payments
to occur without risk of exposure to sensitive payment information. The transient token
is a short-term token that expires after 15 minutes. This reduces your PCI
burden/responsibility and ensures that sensitive information is not exposed to your
back-end systems.
Transient tokens can be included requests sent to the Payment Details API for the
customer payment data that is collected.
Transient Token Format
The transient token is issued as a JSON Web Token (JWT) (RFC
7519). The payload portion of the token is a Base64URL-encoded JSON string
and contains various claims. For more information, see JSON Web Tokens.
When you receive the transient token, you should cryptographically verify its integrity
using the public key embedded within the capture context. Doing so verifies that
Cybersource
issued the token and that the data has not been tampered
with in transit. Verifying the transient token JWT involves verifying the signature and
various claims within the token. Programming languages each have their own specific
libraries to assist.
object, including the PAN BIN, is included in the
transient token
metadata
when a
Click to Pay
network token is used as a payment method. This allows you to display information
about the card on invoices and see the BIN details that are linked to the underlying
card.
accepts dual-branded cards. To use this feature, you must
include the card networks that have overlapping BIN ranges in the capture context
request. For
example:
When a card number within an overlapping BIN range is entered, the network that is listed
first in the value array for the
allowedCardNetworks
field is used.
Based on the previous example, if the card number 403550XXXXXXXXXX is entered, the
payment network for payment processing is Visa.
During the transaction, the card type is populated with the first network in the list,
and the
detectedCardTypes
field returned in the transient token
includes all of the detected card types in the transient token.
The
detectedCardTypes
field is returned in the transient token
response only when more than one card type is detected.
If you include Cartes Bancaires as a supported dual-branded card
type,
Unified Checkout
displays a radio button with Visa and Mastercard
options at checkout. This enables the customer to select which payment scheme they want
to use to process the payment. The radio button defaults to the card type that you
specify in the capture context request, but the payment is processed using the option
that the customer selects during checkout.
Dual-Branded Cards
Unified Checkout
accepts dual-branded cards. To use this feature, you must
include the card networks that have overlapping BIN ranges in the capture context
request. For
example:
When a card number within an overlapping BIN range is entered, the network that is listed
first in the value array for the
allowedCardNetworks
field is used.
Based on the previous example, if the card number 403550XXXXXXXXXX is entered, the
payment network for payment processing is Visa.
During the transaction, the card type is populated with the first network in the list,
and the
detectedCardTypes
field returned in the transient token
includes all of the detected card types in the transient token.
The
detectedCardTypes
field is returned in the transient token
response only when more than one card type is detected.
If you include Cartes Bancaires as a supported dual-branded card
type,
Unified Checkout
displays a radio button with Visa and Mastercard
options at checkout. This enables the customer to select which payment scheme they want
to use to process the payment. The radio button defaults to the card type that you
specify in the capture context request, but the payment is processed using the option
that the customer selects during checkout.
Domestic Scheme Rules
For markets where domestic routing, network preference, or co-badging regulations
apply, you are responsible for ensuring that domestic payment schemes are
prioritized appropriately within the
allowedCardNetworks
configuration.
In these scenarios, domestic schemes must be listed ahead of international networks
such as Visa or Mastercard where required by local regulations or scheme rules.
If network preference varies by transaction, the order of networks should be
dynamically configured when you create the capture context request using the
Sessions API.
You are responsible for reviewing and complying with all applicable local regulatory,
scheme, and acquirer requirements relating to domestic routing and network
selection.
Payment Details API
This section contains the information you need to retrieve the non-sensitive data
associated with a
Unified Checkout
transient token and the payment details
API. This API can be used to retrieve personally identifiable information, such as the
cardholder name and billing and shipping details, without retrieving payment
credentials, which helps ease the PCI compliance burden.
There are two methods of authentication, and they are described in the
recommends that you dynamically parse the response
for the fields that you are looking for when you integrate with
Cybersource
APIs.
Cybersource
may add additional
fields in the future.
You must ensure that your integration can handle new fields that are returned in
the response. Even though the underlying data structures do not change, you must
also ensure that your integration can handle changes to the order in which the
data is returned.
Cybersource
uses semantic versioning
practices, which enables you to retain backwards compatibility as new fields are
introduced in minor version updates.
Endpoint
Production:
GET
https://api.cybersource.com
/flex/v2/payment-details/
{jti}
Test:
GET
https://apitest.cybersource.com
/flex/v2/payment-details/
{jti}
Production in Saudi Arabia:
GET
https://api.sa.cybersource.com
/flex/v2/payment-details/
{jti}
Test in Saudi Arabia:
GET
https://apitest.sa.cybersource.com
/flex/v2/payment-details/
{jti}
The
{jti}
is the ID of the
JWT within the transient token that is returned by
Unified Checkout
.
The transient token is a JWT object that you retrieved as part of a successful
capture of payment information from a cardholder.
Required Field for Retrieving Transient Token Payment Details
Your payment details request must include this field:
This section contains the information you need to retrieve the full payment credentials
collected by
Click to Pay Drop-In UI
using the payment credentials API. The
payment information is returned in a redundantly signed and encrypted payment object. It
uses the JSON Web Tokens (JWTs) as the data standard for communicating this sensitive
data.
IMPORTANT
Payment information returned by the
payment-credentials
endpoint will contain Personal Identifiable
Information (PII). Retrieving this sensitive information requires your system to comply
with PCI security standards. For more information on PCI security standards, see: https://www.pcisecuritystandards.org/
The response is returned using a JWE data object that is encrypted with your public key
created during the
To decrypt the JWE response, use your private key created during the
Unified Checkout
tool's integration. The decrypted content is a JWS data
object containing a JSON payload. This payload can be validated with the
Unified Checkout
public signature key.
IMPORTANT
Cybersource
recommends that you dynamically parse the
response for the fields that you are looking for when you integrate with
Cybersource
APIs.
Cybersource
may add
additional fields in the future.
You must ensure that your integration can handle new fields that are returned
in the response. Even though the underlying data structures do not change,
you must also ensure that your integration can handle changes to the order
in which the data is returned.
Returned Credentials
A payment account number (PAN) or network token is returned on your request depending
on your payment method and
Click to Pay
account status:
Payment Credentials Returned by Card Type and
Click to Pay
Account Status
Click to Pay
Account Status
American Express
Mastercard
Visa
New card not saved in
Click to Pay
PAN
PAN
PAN
New card saved in
Click to Pay
PAN
Network Token
Network Token
Existing card stored in
Click to Pay
PAN
Network Token
Network Token
When you retrieve PAN information from the Payment Credentials API, the
response includes the PAN, card expiration date, and the card verification value
(CVV). When you retrieve network token information, the response includes the
network token and network token cryptogram.
IMPORTANT
Visa and Mastercard always attempt to provision a network
token. A PAN is returned when a network token is not provisioned before checkout
or when the cardholder did not request to enroll the card in
Click to Pay
.
Network tokens are generated in the wallet of
the
Click to Pay
token requestor ID (TRID). When tokenization is
successful, Visa and Mastercard can also complete authentication during the
This reference provides details about the JavaScript API for creating the
Click to Pay Drop-In UI
payment form.
Class: Accept
Accept
Returns
Type: Promise.<Accept>
Example
Basic Setup
<script src="[INSERT clientLibrary VALUE HERE]" integrity=”[INSERT clientLibraryIntegrity VALUE HERE]” crossorigin=”anonymous”></script>
//Note: Script location and integrity value should be sourced from the capture context response clientLibrary and clientLibraryIntegrity values.
<script> Accept('header.payload.signature').then(function(accept) {
// use accept object
});
</script>
Methods
dispose()
→ {void}
Dispose of this Accept instance.
Returns
Type: void
unifiedPayments(sidebar)
→
{Promise.<UnifiedPayments>}
Create a Unified Payments integration.
Parameters
Name
Type
Attributes
Description
sidebar
Boolean
<optional>
Set the option to
false
to enable embedded functionality of
Unified Checkout. This will configure Unified Checkout to place the
Payment Entry form inline. If this value is not set, the default is
true
and Unified Checkout will open the Payment
Entry form in the sidebar configuration.
The response to a successful customer interaction with Unified Checkout is a
transient token. The transient token is a reference to the payment data collected on
your behalf. Tokens allow secure card payments to occur without risk of exposure to
sensitive payment information. The transient token is a short-term token that lasts
15 minutes. This reduces your PCI burden and responsibility and ensures that
sensitive information is not exposed to your backend systems.
It is in a JSON Web Token format. The payload of the transient token may contain
useful metadata in relation to the stored sensitive info. However , all of this info
is safe to use and store on your systems.
The transient token can be used to complete a payment or other services, after which
the transient data will be evicted from the token store.
platform by
invoking the Payment Credentials API. This API retrieves all of the data captured by
Unified Checkout
. This information is transmitted in an encrypted
format to ensure the security of the payment information while in transit.
You must generate an encryption key pair to retrieve this encrypted payment information,
and the public encryption key must uploaded to the
Unified Checkout
system.
Generate a Public Private Key Pair
You must generate a public-private key pair to upload to the
Unified Checkout
system. The public key is uploaded to the
Unified Checkout
platform and
is used to encrypt sensitive information in transit. The private key is used to decrypt
the sensitive payment information on your server. Only the private key can properly
decrypt the payment information.
IMPORTANT
You must secure your private decryption key. This key must never be
exposed to any external systems or it will risk the integrity of the secure
channel.
Unified Checkout
accepts only keys that meet these requirements:
Only RSA keys are supported. Elliptical curves are not supported.
The minimum accepted RSA key size is 2048 bits.
RSA keys must be in JWK format. More information on JWK format is available
here:
When you have generated your encryption key pairs, you can upload your key to the
Unified Checkout
platform. Keys can be loaded at any hierarchy that is
enabled for them and are used for all child entities that do not have keys loaded. You
can upload a key at parent and child levels, but child keys override parent
keys.
Follow these steps to upload your key pair:
Navigate to
Payment Configuration > Unified Checkout
.
The
Unified Checkout
configuration page opens.
Click
Enabled
. You can upload your key in the
appropriate section.
Upload the public encryption key in JWK format, and click
Save
.
Enable
Click to Pay
To enable
Click to Pay
on
Unified Checkout
, you must
first register
Click to Pay
. This process sends the appropriate
information to the digital payment systems and registers your page with each system.
Enable
Click to Pay
for
Unified Checkout
in the
Business Center
.
Click to Pay
is listed as an available
digital payment method offered by
Unified Checkout
.
Click to Pay
Customer Authentication
When you enable customer authentication through
Click to Pay
, you give
Cybersource
permission to request that Visa and Mastercard provide
an authenticated payload for each transaction. Authentication takes place within the
authentication service of each card type. You must inspect the payload that is returned
to you to determine if the transaction is authenticated.
For information about enabling customer authentication through
If you are unable to access this page, contact your sales
representative.
In the
Business Center
, go to the left navigation panel
and choose
Payment Configuration
>
Unified
Checkout
.
You must have
Click to Pay
enabled as a digital payment method in order to
use this method of authentication. Click
Manage
to view the digital
payment methods that you have enabled.
If
Click to Pay
is not enabled, click
On
next to
Click to Pay
.
Click
Set up
under Value Added Solutions. The Value Added Solutions
page appears.
Click
Set up
to set up
3-D Secure
. The 3DS page
appears.
Enter the required information in the Merchant Details section. You must enter
the information that is provided to you by
your acquirer or processor
.
Step Result
This completes the authentication setup for the entered acquirer
merchant ID and BIN. If you do not know what these values are, you must contact
your acquirer
. Completing this information
enables
Cybersource
to send Visa the information that is
required for authentication.
IMPORTANT
Charges for
3-D Secure
may apply. You must speak with
your acquirer
for more information
about the charges associated with
3-D Secure
.
Authentication Methods
Cybersource
recommends that you review the response in the transient
token and compare it with the information below in order to determine the authentication
status.
For more information about transient
tokens, see Transient Tokens.
This table
describes the possible authentication results and the associated
If you are unable to access this page, contact your sales
representative.
In the
Business Center
, go to the left navigation panel and choose
Payment Configuration
>
Unified Checkout
.
You must have
Click to Pay
enabled as a digital payment
method in order to use this method of authentication. Click
Manage
to
view the digital payment methods that you have enabled.
If
Click to Pay
is not enabled, click
On
next to
Click to Pay
.
Click
Set up
under Value Added Solutions. The Value Added Solutions page
appears.
Click
Set up
to set up
3-D Secure
. The 3DS page
appears.
Enter the required information in the Merchant Details section. You must enter
the information that is provided to you by
your acquirer or processor
.
Step Result
This completes the authentication setup for the entered acquirer
merchant ID and BIN. If you do not know what these values are, you must contact
your acquirer
. Completing this information
enables
Cybersource
to send Visa and Mastercard the information
that is required for authentication.
IMPORTANT
Charges for
3-D Secure
may apply. You must speak with
your acquirer
for more information
about the charges associated with
3-D Secure
.
Upload Your Encryption Key
Payment information can be retrieved from the
Unified Checkout
platform by
invoking the Payment Credentials API. This API retrieves all of the data captured by
Unified Checkout
. This information is transmitted in an encrypted
format to ensure the security of the payment information while in transit.
You can retrieve payment information from the
Click to Pay Drop-In UI
platform
from the checkout response payloads. This information is transmitted in an encrypted
format to ensure that sensitive data is secure. To retrieve and decrypt this
information, you must set up message-level encryption. For information about enabling
MLE, see
You must generate an encryption key pair to retrieve this encrypted payment information,
and the public encryption key must uploaded to the
Unified Checkout
system.
Generate a Public Private Key Pair
You must generate a public-private key pair to upload to the
Unified Checkout
system. The public key is uploaded to the
Unified Checkout
platform and
is used to encrypt sensitive information in transit. The private key is used to decrypt
the sensitive payment information on your server. Only the private key can properly
decrypt the payment information.
IMPORTANT
You must secure your private decryption key.
This key must never be exposed to any external systems or it will risk the integrity of
the secure channel.
Unified Checkout
accepts only keys that meet these requirements:
Only RSA keys are supported. Elliptical curves are not supported.
The minimum accepted RSA key size is 2048 bits.
RSA keys must be in JWK format. More information on JWK format is available
here:
When you have generated your encryption key pairs, you can
upload your key to the
Unified Checkout
platform. Keys can be loaded at
any hierarchy that is enabled for them and are used for all child entities that do not
have keys loaded. You can upload a key at parent and child levels, but child keys
override parent keys.
SDK uses a structured error object for all error
scenarios. Errors are returned as exceptions from asynchronous methods and are also
returned as events for centralized handling.
Error Codes
Initialization Errors
These errors are returned during
VAS.UnifiedCheckout(sessionJWT)
:
Initialization Reason Values
Reason
Description
CAPTURE_CONTEXT_EXPIRED
The supplied JWT has expired. Generate a new session.
CAPTURE_CONTEXT_INVALID
The session JWT is not valid. For example, it has a bad signature
or is malformed.
UNUSED_TARGET_ORIGINS
One or more
targetOrigins
in the session do not
match the current page origin. The
details
array
lists the unused origins.
Mount Errors
These errors are returned during
checkout.mount()
or
trigger.mount()
:
Mount Reason Values
Reason
Description
CHECKOUT_ALREADY_MOUNTED
The checkout or trigger is already mounted. Call
unmount()
first, or create a new
instance.
MOUNT_CONTAINER_SELECTOR
The CSS selector does not match any Document Object Model (DOM)
element. Check that the container exists before calling
mount()
.
MOUNT_ERROR
A problem occurred loading the payment iframe.
MOUNT_INVALID_CONTAINER
The supplied container parameter is not a valid CSS selector
string or
HTMLElement
.
MOUNT_PAYMENT_TIMEOUT
A payment method timed out during initialization.
MOUNT_PAYMENT_UNAVAILABLE
No payment types could be presented to the customer. This may be
due to browser or device support, or errors during checkout
initialization.
MOUNT_SIDEBAR_OPTIONS
The supplied container parameter is invalid for sidebar
mode.
MOUNT_TOKEN_TIMEOUT
Token creation timed out during mount. This may indicate a
network issue.
MOUNT_TOKEN_XHR_ERROR
A network error occurred during token creation. Check the
customer’s connectivity.
Checkout Errors
Checkout Reason Values
Reason
Description
CHECKOUT_ERROR
A general checkout error occurred.
CHECKOUT_PAYMENT_PARAMETERS
One or more payment parameters have a validation error.
CHECKOUT_VALIDATION_PARAMS
One or more checkout parameters have a validation error.
Trigger Errors
Trigger Reason Values
Reason
Description
TRIGGER_PAYMENT_TYPE_NOT_SUPPORTED
The specified payment type cannot be used with a trigger. Only
PANENTRY
and
CLICKTOPAY
values
are supported.
Payment-Specific Errors
Payment-Specific Reason Values
Reason
Description
CLICK_TO_PAY_SDK_LOAD_ERROR
The
Click to Pay
SDK failed to load.
ENCRYPT_CARD_FOR_SRC_ENROLMENT_ERROR
Card encryption for
Click to Pay
enrollment
failed.
GOOGLEPAY_CHECKOUT_ERROR
A Google Pay checkout error occurred.
LAUNCH_SRC_CHECKOUT_ERROR
Launching the
Click to Pay
checkout
failed.
TRIGGER_PAYMENT_TYPE_NOT_SUPPORTED
The payment type is not supported for triggers.
General Errors
Reason Code
Description
UNKNOWN_ERROR
An unknown error has occurred.
Reason Codes
A
Unified Checkout
request response returns one of the following reason
codes:
Reason Codes
Reason Code
Description
200
Successful response.
201
Capture
context created.
400
- Capture Context API
Bad request.
Possible
reason
values:
CAPTURE_CONTEXT_EXPIRED
This reason is returned when the capture context JWT has passed
its expiration time of 900 seconds (15 minutes).
Example decrypted JWT fields include
"exp":
"1762894371"
and
"iat":
"1762893471"
.
CAPTURE_CONTEXT_INVALID
The
Unified Checkout
configuration rejected the request due to invalid values.
This
reason is returned when the minimum required fields are missing
or invalid or the capture context contradicts which products are
enabled.
CHECKOUT_ERROR
Checkout failed.
This reason is
returned when a general, non‑payment‑method‑specific error
occurs during the
UnifiedPayments
checkout
flow. When the checkout failure is specifically related to
tokenization,
Click to Pay
SDK, SRC launch,
Google Pay, etc., the SDK returns a more specific
error
CLICK_TO_PAY_SDK_LOAD_ERROR
This reason is returned when the UI
cannot be successfully rendered. For example:
Network failures (CDN unavailable, blocked, or timed
out)
Browser or device restrictions are preventing the SDK from
loading.
Incorrect or missing configuration causes
Unified Checkout
not to request the SDK asset.
The merchant site
CSP
is blocking the SDK.
Any runtime error that prevents
Click to Pay
JS initialization.
CREATE_TOKEN_TIMEOUT
The token creation timed out. This
reason is returned when the
Unified Checkout
JavaScript SDK cannot generate the transient token within the
expected time-frame.
CREATE_TOKEN_XHR_ERROR
This reason is returned when the system
attempts to create a token, but a network /
XHR-level
failure occurs before the token can be created. This is a
client-side SDK network failure, not a timeout or back-end
validation error.
ENCRYPT_CARD_FOR_SRC_ENROLMENT_ERROR
Encrypt card for
SRC
enrollment failed. This reason is returned when
Unified Checkout
attempts to encrypt a card to enroll it in
the SRC /
Click to Pay
system and the encryption
step fails. This causes the SRC enrolment to abort.
GOOGLEPAY_CHECKOUT_ERROR
Checkout failed. This reason is
returned when
Unified Checkout
attempts to complete a
Google Pay checkout, but the Google Pay–based transaction fails
internally in the
Unified Checkout
checkout
flow.
INVALID_APIKEY
Returned when the API key that is used
in the server‑side capture context request is invalid.
LAUNCH_SRC_CHECKOUT_ERROR
The launch SRC checkout failed. This
reason is returned by the
Unified Checkout
JavaScript
SDK when it cannot initialize or open the SRC checkout flow.
SDK_XHR_ERROR
SDK failed to load. This reason is
returned when the JavaScript SDK fails to load due to an XHR/network
error during
Unified Checkout
initialization.
SHOW_LOAD_CONTAINER_SELECTOR
The
specified DOM element cannot be found. Returned when the DOM element
specified in the
show()
configuration cannot be
found. This is a client-side JavaScript SDK error thrown during
rendering of the payment selection UI.
SHOW_LOAD_ERROR
There was a problem encountered when
loading the payment screen. Returned when the Unified Payments UI
fails to load the payment selection screen (iframe/UI) during the
.show()
step
SHOW_LOAD_INVALID_CONTAINER
The supplied container parameter is
invalid. Returned when the container provided to
up.show()
exists but is invalid—wrong type, not
suitable to host UC UI, unsupported context, or malformed in
configuration
SHOW_LOAD_SIDEBAR_OPTIONS
The supplied container parameter is
invalid when sidebar is selected. Returned when
sidebar =
true
and the
containers
supplied to
up.show()
are not valid for the sidebar layout
(wrong type, unsupported container, or structurally
incompatible).
SHOW_PAYMENT_TIMEOUT
Occurs when an error is encountered
during the handling of a payment option. Returned when UC cannot
progress the user’s selected payment option in time:
SHOW_PAYMENT_UNAVAILABLE
No payment types could be presented to
the customer. This could be due to browser/device support or errors
encountered during the checkout. Returned when
zero
payment
methods can be presented in the
.show()
phase —
typically due to browser/device incompatibility, disabled payment
types, or internal errors while loading payment options.
SHOW_TOKEN_TIMEOUT
Occurs when the createToken call was
unable to proceed. Returned when the
createToken
call cannot proceed within the expected time while rendering the
payment selection UI
SHOW_TOKEN_XHR_ERROR
Occurs when a network error is
encountered while attempting to create a token. Returned when the
createToken
step within
.show()
fails due to an actual network/XHR
error (blocked request, CORS/CSP violation, extension interference,
unreachable endpoint).
TOKENIZATION_ERROR
Tokenization failed. Returned when
tokenization of the selected payment method fails — due to invalid
payment data, a failed internal tokenization call, network issues,
or an unsupported/blocked payment environment.
TRIGGER_PAYMENT_TYPE_NOT_SUPPORTED
Trigger is not supported for this
payment type. Returned when
up.trigger(paymentType)
is called with a payment method that does not support trigger mode,
is not enabled, not available on the device/browser, or not
recognized by UC.
UNIFIED_PAYMENTS_ALREADY_SHOWN
Occurs if you attempt to show a Unified
Payments instance multiple times. Returned when
.show()
is invoked more than once on the same
UnifiedPayments
instance. Create a new instance
(
accept.unifiedPayments()
) if you need to show
UC again.
UNIFIED_PAYMENTS_PAYMENT_PARAMETERS
Occurs when no valid payment parameters
exist when initializing button. Returned when the merchant calls
accept.unifiedPayments()
without providing
valid payment parameters — meaning the SDK cannot initialize the
payment buttons because the supplied configuration is missing,
empty, or malformed.
UNIFIED_PAYMENTS_VALIDATION_FIELDS
A validation error occurred. Missing or
invalid values in required fields
UNIFIED_PAYMENTS_VALIDATION_PARAMS
Trigger is not supported for this
payment type. Returned when
up.trigger(paymentType)
is called with a payment method that does not support trigger mode,
is not enabled, not available on the device/browser, or not
recognized by UC.
400
-
Complete API
COMPLETE_AUTHENTICATION_CANCELED
Occurs when the user cancels the
authentication process during Cardinal step‑up.
This value is
returned when the customer cancels or prematurely exits the 3‑D
Secure (Cardinal) step‑up authentication flow during
unifiedPayments.complete()
.
COMPLETE_AUTHENTICATION_FAILED
Occurs when the complete authentication
process fails during Cardinal Step‑Up.
Returned when the 3‑D
Secure (Cardinal) authentication attempt fails—typically due to
incorrect OTP, issuer decline, timeout interpreted as failure,
or ACS technical error—during
unifiedPayments.complete()
.
COMPLETE_ERROR
Occurs when an error occurs whilst
attempting to complete the transaction.
Returned when an
unexpected or uncategorized error occurs during
unifiedPayments.complete()
—typically caused
by internal processing exceptions or failures that cannot be
classified as authentication failure, user cancellation,
validation error, or processor decline.
COMPLETE_IN_PROGRESS
Returned when
unifiedPayments.complete()
is invoked again
while a previous Complete operation is still running. This is caused
by duplicate submissions, race conditions, or UI re-renders that
trigger multiple Complete calls.
COMPLETE_NOT_ALLOWED
Occurs if complete is not allowed for
this transaction.
Returned when the merchant calls
unifiedPayments.complete()
in a state where
the transaction is not permitted to be completed—typically due
to missing/invalid Complete Mandate, calling complete() before
the customer has completed the UC UI flow, using an unsupported
payment type, or invoking complete() at the wrong time in the
lifecycle.
COMPLETE_TRANSACTION_CANCELLED
Occurs when the user cancels the
transaction.
Returned when the user (or the payment provider
on behalf of the user) cancels the transaction during the
Complete phase — including cancellations on the UC UI,
cancellations during redirect/step‑up, or cancellation states
returned by APMs such as PPRO or Tink.
COMPLETE_TRANSACTION_FAILED
Consumer transaction has
failed.
Returned when the payment attempt reaches the
processor or APM provider and is returned as a
failure
—
such as card declines, failed 3DS outcomes, APM failures, or
downstream processor rejections.
COMPLETE_VALIDATION_ERROR
Occurs when there is a validation issue
relating to the parameters you have supplied in your complete
call.
Returned when the merchant sends invalid, missing,
malformed, or inconsistent parameters to the
unifiedPayments.complete()
call — typically
a bad trust token or a mismatched/incorrect payload.
404
The
specified resource not found in the system.
500
Unexpected server error.
Supported Countries for
Click to Pay
Click to Pay
is supported in these countries:
Argentina
Australia
Austria
Brazil
Bulgaria
Canada
China
Colombia
Costa Rica
Czech Republic
Denmark
Dominican Republic
Ecuador
El Salvador
Finland
France
Germany
Greece
Honduras
Hong Kong
Hungary
Indonesia
Ireland
Italy
Japan
Jordan
Kuwait
Malaysia
Mexico
Netherlands
New Zealand
Nicaragua
Norway
Panama
Paraguay
Peru
Poland
Qatar
Romania
Saudi Arabia
Singapore
Slovakia
Slovenia
South Africa
Spain
Sweden
Switzerland
Thailand
Ukraine
United Arab Emirates
United Kingdom
United States
Uruguay
Vietnam
Supported Locales
The locale field within the capture context request consists of an ISO 639 language
code, an underscore (_), and an ISO 3166 region code. Set the
locale
field in your session request to display the checkout
UI in the customer's language.
IMPORTANT
When the chosen language is Arabic,
Unified Checkout
supports right-to-left languages in the UI for
this locale.
These locales are supported:
Supported Locales
Locale
ISO Language
ISO Region
ar_AE
Arabic
United Arab Emirates
ar_JO
Arabic
Jordan
ar_QA
Arabic
Qatar
bg_BG
Bulgarian
Bulgaria
ca_ES
Catalan
Spain
zh_CN
Chinese
China
zh_HK
Chinese
Hong Kong
zh_MO
Chinese
Macao
zh_SG
Chinese
Singapore
zh_TW
Chinese
Taiwan
hr_HR
Croatian
Croatia
cs_CZ
Czech
Czechia
da_DK
Danish
Denmark
nl_NL
Dutch
Netherlands
en_AE
English
United Arab Emirates
en_AU
English
Australia
en_CA
English
Canada
en_GB
English
United Kingdom
en_IE
English
Ireland
en_NZ
English
New Zealand
en_PK
English
Pakistan
en_QA
English
Qatar
en_US
English
United States
fi_FI
Finnish
Finland
fr_CA
French
Canada
fr_FR
French
France
de_AT
German
Austria
de_DE
German
Germany
el_GR
Greek
Greece
he_IL
Hebrew
Israel
hu_HU
Hungarian
Hungary
id_ID
Indonesian
Indonesia
it_IT
Italian
Italy
ja_JP
Japanese
Japan
km_KH
Khmer
Cambodia
ko_KR
Korean
South Korea
lo_LA
Lao
Laos
ms_MY
Malay
Malaysia
nb_NO
Norwegian Bokmål
Norway
pl_PL
Polish
Poland
pt_BR
Portuguese
Brazil
ro_RO
Romanian
Romania
ru_RU
Russian
Russia
sk_SK
Slovak
Slovakia
sl_SI
Slovenian
Slovenia
es_AR
Spanish
Argentina
es_CL
Spanish
Chile
es_CO
Spanish
Colombia
es_ES
Spanish
Spain
es_MX
Spanish
Mexico
es_PE
Spanish
Peru
es_US
Spanish
United States
sv_SE
Swedish
Sweden
tl_PH
Tagalog
Philippines
th_TH
Thai
Thailand
tr_TR
Turkish
Türkiye
uk_UA
Ukrainian
Ukraine
ur_PK
Urdu
Pakistan
vi_VN
Vietnamese
Vietnam
Client Version History
Below is a list of client versions and the features that are included in each
version.
IMPORTANT
Cybersource
recommends that you use the most recent client version in your integration.
0.23
Accepts these card networks in the
allowedCardNetworks
field for manual card entry:
Carnet
Cartes Bancaires
China UnionPay with card verification
value (CVV)
EFTPOS
ELO
mada
Meeza
Ordering controls for the
allowedPaymentTypes
button.
De-coupling of PANENTRY from other payment types in the
allowedPaymentTypes
field.
0.24
Support for enabling combo cards in the capture context.
Support for eight-digit BINs.
Support for enabling card save in the capture context.
0.25
Addition of
Skip Verification next time
in the
Click to Pay
payment flow.
Support for CPF in the capture context.
0.26
Support for auto-lookup in
Click to Pay
when an email is
included in the capture context.
Inclusion of the
cardDetails
field object in the
transient token response.
0.28
Support for PayPak as an
allowedCardNetwork
.
Auto-enrollment for
Click to Pay
in supported
markets.
Removal of the confirm or continue screen for specific use cases.
Static button for
Click to Pay
flows.
0.30
Support for Pakistan locales (en_PK and ur_PK).
New look and feel of
Unified Checkout
in line with EMVCO best
practices.
0.31
Addition of the
data
object of the
orderInformation
field object and pass-through
fields.
Support for Jaywan as an
allowedCardNetwork
.
Updated the payment details response to return detected card types. Multiple
card types are shown when more than one card type is detected.
0.32
Support for KCP and UATP in the
allowedCardNetwork
field.
A radio button in the UI for Cartes Bancaires
dual-branded cards.
0.33
Support for Mobile as Identity
Click to Pay
lookup.
0.34
Additional BIN range for Jaywan card types.
1.0
Configure payment options.
Configure customer data and payment flow.
Customization Matrix
Top-Level Appearance
Top-Level Appearance
Field Name
Data Type
Description
appearance
Object
Control checkout UI appearance
theme
Enum (String)
Theme selection (LIGHT, DARK, seasonal)
buttonType
Enum (String)
Button label/type
variables
Object
UI customisation variables container
Base
Base
Field Name
Data Type
Description
backgroundColor
Hex Colour
Main background colour
textColor
Hex Colour
Main text colour
Header
Header
Field Name
Data Type
Description
headerBackground
Hex Colour
Header background colour
headerForeground
Hex Colour
Header text/icon colour
headerAvatarBackgroundColor
Hex Colour
Header avatar background
headerAvatarForegroundColor
Hex Colour
Header avatar foreground
Input Default
Input Default
Field Name
Data Type
Description
inputBackground
Hex Colour
Input background
inputColor
Hex Colour
Input text colour
inputPlaceholderColor
Hex Colour
Placeholder text colour
inputBorderColor
Hex Colour
Border colour
inputBorderStyle
String
Border style
inputBorderRadius
CSS Size
Border radius
Input Hover State
Input Hover State
Field Name
Data Type
Description
inputHoverBackground
Hex Colour
Background when hover
inputHoverColor
Hex Colour
Text colour when hover
inputHoverPlaceholderColor
Hex Colour
Placeholder colour when hover
inputHoverBorderColor
Hex Colour
Border colour when hover
inputHoverBorderStyle
String
Border style when hover
Input Focused State
Input Focused State
Field Name
Data Type
Description
inputFocusedBackground
Hex Colour
Background when focused
inputFocusedColor
Hex Colour
Text colour when focused
inputFocusedPlaceholderColor
Hex Colour
Placeholder colour when focused
inputFocusedBorderColor
Hex Colour
Border colour when focused
inputFocusedBorderStyle
String
Border style when focused
Input Active State
Input Active State
Field Name
Data Type
Description
inputActiveBackground
Hex Colour
Background when active
inputActiveColor
Hex Colour
Text colour when active
inputActivePlaceholderColor
Hex Colour
Placeholder colour when active
inputActiveBorderColor
Hex Colour
Border colour when active
inputActiveBorderStyle
String
Border style when active
Input Pressed State
Input Pressed State
Field Name
Data Type
Description
inputPressedBackground
Hex Colour
Background when pressed
inputPressedColor
Hex Colour
Text colour when pressed
inputPressedPlaceholderColor
Hex Colour
Placeholder colour when pressed
inputPressedBorderColor
Hex Colour
Border colour when pressed
inputPressedBorderStyle
String
Border style when pressed
Input Error State
Input Error State
Field Name
Data Type
Description
inputErrorBackground
Hex Colour
Background when error
inputErrorColor
Hex Colour
Text colour when error
inputErrorPlaceholderColor
Hex Colour
Placeholder colour when error
inputErrorBorderColor
Hex Colour
Border colour when error
inputErrorBorderStyle
String
Border style when error
Input Valid State
Input Valid State
Field Name
Data Type
Description
inputValidBackground
Hex Colour
Background when valid
inputValidColor
Hex Colour
Text colour when valid
inputValidPlaceholderColor
Hex Colour
Placeholder colour when valid
inputValidBorderColor
Hex Colour
Border colour when valid
inputValidBorderStyle
String
Border style when valid
Button Default
Button Default
Field Name
Data Type
Description
buttonBackground
Hex Colour
Button background
buttonForeground
Hex Colour
Button text/icon colour
buttonShape
String
Button shape
buttonBorderColor
Hex Colour
Border colour
buttonBorderStyle
String
Border style
buttonBorderRadius
CSS Size
Border radius
Button Hover State
Button Hover State
Field Name
Data Type
Description
buttonHoverBackground
Hex Colour
Background when hover
buttonHoverForeground
Hex Colour
Text colour when hover
buttonHoverBorderColor
Hex Colour
Border colour when hover
buttonHoverBorderStyle
String
Border style when hover
Button Focus State
Button Focus State
Field Name
Data Type
Description
buttonFocusBackground
Hex Colour
Background when focus
buttonFocusForeground
Hex Colour
Text colour when focus
buttonFocusBorderColor
Hex Colour
Border colour when focus
Button Active State
Button Active State
Field Name
Data Type
Description
buttonActiveBackground
Hex Colour
Background when active
buttonActiveForeground
Hex Colour
Text colour when active
buttonActiveBorderColor
Hex Colour
Border colour when active
buttonActiveBorderStyle
String
Border style when active
Button Disabled State
Button Disabled State
Field Name
Data Type
Description
buttonDisabledBackground
Hex Colour
Background when disabled
buttonDisabledForeground
Hex Colour
Text colour when disabled
buttonDisabledBorderColor
Hex Colour
Border colour when disabled
Typography & Other
Typography & Other
Field Name
Data Type
Description
fontFamily
String
Font family
borderRadius
CSS Size
Global border radius
paymentSelectionBackground
Hex Colour
Payment list background
JSON Web Tokens
JSON Web Tokens (JWTs) are digitally signed JSON objects based on the open standard
RFC 7519. These tokens provide a compact, self-contained
method for securely transmitting information between parties. These tokens are
signed with an RSA-encoded public/private key pair. The signature is calculated
using the header and body, which enables the receiver to validate that the content
has not been tampered with.
A JWT takes the form of a string, and consists of three parts separated by dots:
<Header>.<Payload>.<Signature>
The header and payload is
Base64-encoded JSON
and contains these claims:
Header
: The algorithm and token type. For
example:
{
  "kid": "zu",
  "alg": "RS256"
}
Payload
: The claims of what the token represents. For
example:
: The signature is computed from the header and payload using a
secret or private key.
IMPORTANT
When working with JWTs,
Cybersource
recommends that you use a well- maintained JWT library to
ensure proper decoding and parsing of the JWT.
IMPORTANT
When parsing the JWT’s JSON payload,
you must ensure that you implement a robust solution for transversing JSON.
Additional elements can be added to the JSON in future releases. Follow JSON
parsing best practices to ensure that you can handle the addition of new data
elements in the future.
Reason Codes
A
Unified Checkout
request response returns one of the following reason
codes:
Reason Codes
Reason Code
Description
200
Successful response.
201
Capture
context created.
400
- Capture Context API
Bad request.
Possible
reason
values:
CAPTURE_CONTEXT_EXPIRED
This reason is returned when the capture context JWT has passed
its expiration time of 900 seconds (15 minutes).
Example decrypted JWT fields include
"exp":
"1762894371"
and
"iat":
"1762893471"
.
CAPTURE_CONTEXT_INVALID
The
Unified Checkout
configuration rejected the request due to invalid values.
This
reason is returned when the minimum required fields are missing
or invalid or the capture context contradicts which products are
enabled.
CHECKOUT_ERROR
Checkout failed.
This reason is
returned when a general, non‑payment‑method‑specific error
occurs during the
UnifiedCheckout
checkout
flow. When the checkout failure is specifically related to
tokenization,
Click to Pay
SDK, SRC launch,
Google Pay, etc., the SDK returns a more specific
error
CLICK_TO_PAY_SDK_LOAD_ERROR
This reason is returned when the UI
cannot be successfully rendered. For example:
Network failures (CDN unavailable, blocked, or timed
out)
Browser or device restrictions are preventing the SDK from
loading.
Incorrect or missing configuration causes
Unified Checkout
not to request the SDK asset.
The merchant site
CSP
is blocking the SDK.
Any runtime error that prevents
Click to Pay
JS initialization.
CREATE_TOKEN_TIMEOUT
The token creation timed out. This
reason is returned when the
Unified Checkout
JavaScript SDK cannot generate the transient token within the
expected time-frame.
CREATE_TOKEN_XHR_ERROR
This reason is returned when the system
attempts to create a token, but a network /
XHR-level
failure occurs before the token can be created. This is a
client-side SDK network failure, not a timeout or back-end
validation error.
ENCRYPT_CARD_FOR_SRC_ENROLMENT_ERROR
Encrypt card for
SRC
enrollment failed. This reason is returned when
Unified Checkout
attempts to encrypt a card to enroll it in
the SRC /
Click to Pay
system and the encryption
step fails. This causes the SRC enrolment to abort.
INVALID_APIKEY
Returned when the API key that is used
in the server‑side capture context request is invalid.
LAUNCH_SRC_CHECKOUT_ERROR
The launch SRC checkout failed. This
reason is returned by the
Unified Checkout
JavaScript
SDK when it cannot initialize or open the SRC checkout flow.
SDK_XHR_ERROR
SDK failed to load. This reason is
returned when the JavaScript SDK fails to load due to an XHR/network
error during
Unified Checkout
initialization.
SHOW_LOAD_CONTAINER_SELECTOR
The
specified DOM element cannot be found. Returned when the DOM element
specified in the
show()
configuration cannot be
found. This is a client-side JavaScript SDK error thrown during
rendering of the payment selection UI.
SHOW_LOAD_ERROR
There was a problem encountered when
loading the payment screen. Returned when the Unified Payments UI
fails to load the payment selection screen (iframe/UI) during the
.show()
step
SHOW_LOAD_INVALID_CONTAINER
The supplied container parameter is
invalid. Returned when the container provided to
up.show()
exists but is invalid—wrong type, not
suitable to host UC UI, unsupported context, or malformed in
configuration
SHOW_LOAD_SIDEBAR_OPTIONS
The supplied container parameter is
invalid when sidebar is selected. Returned when
sidebar =
true
and the
containers
supplied to
up.show()
are not valid for the sidebar layout
(wrong type, unsupported container, or structurally
incompatible).
SHOW_PAYMENT_TIMEOUT
Occurs when an error is encountered
during the handling of a payment option. Returned when UC cannot
progress the user’s selected payment option in time:
SHOW_PAYMENT_UNAVAILABLE
No payment types could be presented to
the customer. This could be due to browser/device support or errors
encountered during the checkout. Returned when
zero
payment
methods can be presented in the
.show()
phase —
typically due to browser/device incompatibility, disabled payment
types, or internal errors while loading payment options.
SHOW_TOKEN_TIMEOUT
Occurs when the createToken call was
unable to proceed. Returned when the
createToken
call cannot proceed within the expected time while rendering the
payment selection UI
SHOW_TOKEN_XHR_ERROR
Occurs when a network error is
encountered while attempting to create a token. Returned when the
createToken
step within
.show()
fails due to an actual network/XHR
error (blocked request, CORS/CSP violation, extension interference,
unreachable endpoint).
TOKENIZATION_ERROR
Tokenization failed. Returned when
tokenization of the selected payment method fails — due to invalid
payment data, a failed internal tokenization call, network issues,
or an unsupported/blocked payment environment.
TRIGGER_PAYMENT_TYPE_NOT_SUPPORTED
Trigger is not supported for this
payment type. Returned when
up.trigger(paymentType)
is called with a payment method that does not support trigger mode,
is not enabled, not available on the device/browser, or not
recognized by UC.
UNIFIED_PAYMENTS_PAYMENT_PARAMETERS
Occurs when no valid payment parameters
exist when initializing button. Returned when the merchant calls
VAS.UnifiedCheckout(sessionJWT)
without
providing valid payment parameters — meaning the SDK cannot
initialize the payment buttons because the supplied configuration is
missing, empty, or malformed.
UNIFIED_PAYMENTS_VALIDATION_FIELDS
A validation error occurred. Missing or
invalid values in required fields
UNIFIED_PAYMENTS_VALIDATION_PARAMS
Trigger is not supported for this
payment type. Returned when
up.trigger(paymentType)
is called with a payment method that does not support trigger mode,
is not enabled, not available on the device/browser, or not
recognized by UC.
404
The
specified resource not found in the system.
500
Unexpected server error.
Update to
Click to Pay Drop-In UI
Version 1
The version 1 (v1) SDK simplifies your integration with fewer lines of code, a
streamlined API, and enhancements such as auto-processing and a full event system. The core
flow is the same in v1, and migrating to v1 involves only straightforward method
renames.
Summary of Changes
Aspect
v0
v1
Initialization
new
Accept(session).unifiedPayments()
VAS.UnifiedCheckout(session)
Display the payment UI
up.show(options)
checkout.mount(target)
Events
None
Full event system on client and
checkout
Cleanup
up.dispose()
checkout.destroy()
+
client.destroy()
Hide UI
up.hide()
checkout.unmount()
Target Origin
Multiple non-usable URLs can be
included in the request.
If any origins are absent or
mismatched, for example, they are not presented in
Click to Pay Drop-In UI
, the system prevents
Click to Pay Drop-In UI
from loading and displays a client-side
error message.
Summary of v0 and v1 Changes
Feature
Pre V1 Support
V1 Support
Description
Status
Business Center
Capture context endpoint
/up/v1/capture-contexts
/up/v1/sessions
Capture context management
API only
API only or API and
Business Center
Business Center
configuration is at the merchant level.
Unified Checkout
Look
and Feel in
Business Center
Business Center
configuration is at the merchant level.
Unified Checkout
Look
and Feel Using the API
Configure the look and feel in a
Sessions API request.
Click to Pay
Configuration
API only
API or API and
Business Center
Business Center
configuration is at the merchant level.
Real-time preview in
Business Center
Business Center
configuration is at the merchant level.
Three-decimal currency
support
SDK
Legacy Unified Payments SDK
supported
New UC SDK
Payment Details API
/up/v1/payment-details/
{id}
JTI used in place of transient
token
JTI is located in the transient
token
Future enhancements
Manual opt-in is required.
Automatic when the
clientVersion
is not included in the
Sessions API request.
Legacy versions receive critical
updates only.
Initialization
Initialization with
Click to Pay Drop-In UI
v1 is done in a single
asynchronous factory call. There is no intermediate
Accept
object:
v0 Initialization
const accept = new Accept(sessionJWT);
const up = accept.unifiedPayments();
const trigger = client.createTrigger('CLICKTOPAY');
const result = await trigger.mount('#screen');
Update Reason Codes
Some reason codes were renamed in v1. This table shows the v0 reason code name and
the corresponding name in the v1 client-side SDK:
v0 Reason Code
v1 Reason Code
SHOW_LOAD_CONTAINER_SELECTOR
MOUNT_CONTAINER_SELECTOR
SHOW_LOAD_ERROR
MOUNT_ERROR
SHOW_LOAD_INVALID_CONTAINER
MOUNT_INVALID_CONTAINER
SHOW_LOAD_SIDEBAR_OPTIONS
MOUNT_SIDEBAR_OPTIONS
SHOW_PAYMENT_TIMEOUT
MOUNT_PAYMENT_TIMEOUT
SHOW_PAYMENT_UNAVAILABLE
MOUNT_PAYMENT_UNAVAILABLE
SHOW_TOKEN_TIMEOUT
MOUNT_TOKEN_TIMEOUT
SHOW_TOKEN_XHR_ERROR
MOUNT_TOKEN_XHR_ERROR
UNIFIED_PAYMENTS_ALREADY_SHOWN
CHECKOUT_ALREADY_MOUNTED
UNIFIED_PAYMENTS_PAYMENT_PARAMETERS
CHECKOUT_PAYMENT_PARAMETERS
UNIFIED_PAYMENTS_VALIDATION_PARAMS
CHECKOUT_VALIDATION_PARAMS
IMPORTANT
The server-side API continues to return
these v0 reason codes. The v1 reason codes listed here are used only in the
client-side SDK. For all v1 client-side error codes, see Handle Errors.
Version 1 Update Checklist
You must complete these tasks before you can complete your migration from
Your implementation consultant will ask you
for a mock-up of your payment flow for confirmation that it is compliant with the
Click to Pay
UI design standards.
Recognized
Click to Pay
Customer
The cardholder is presented with their stored
Click to Pay
cards
in the UI when they are on a recognized device:
Figure:
Recognized
Click to Pay
Customer UI
Unrecognized
Click to Pay
Customer
When the cardholder has a
Click to Pay
account but is not on a
registered device, they receive a one-time password to their registered email
address and phone number to authenticate their identity before their stored
Click to Pay
credentials are shown:
Figure:
Unrecognized
Click to Pay
Customer on a Recognized
Device UI
No
Click to Pay
Account
When the cardholder does not have a
Click to Pay
account, they
can provide a new email address to perform a new lookup or they can choose to enter
their card details manually. The cardholder can make a one-time payment or complete
the payment and choose to create a
Click to Pay
account for
future use:
Figure:
No
Click to Pay
Account UI
Click to Pay
UI Examples
This section contains UI examples of how you should display
Click to Pay
on your payment page. For information about how to display
the UI, see JavaScript API Reference.
Click to Pay
Replaces PAN Capture
Click to Pay
is the card entry payment option within your payment
page.
JavaScript flow within your own
payment button without requiring the cardholder to select a card payment option.
This example shows a recognized user payment flow where the cardholder's information
is shown automatically next to the other payment methods hosted within your payment
page. For information about customizing how to trigger
payment button as a separate
payment method from the card payment button. If you do this, the cardholder is not
prompted with their
Click to Pay
cards and must manually enter
their payment details. They will also not have the option to store their card within
Click to Pay
for future use.
These examples show multiple card payment options and
Click to Pay
in a UI:
Figure:
Multiple Card Payment Options in UI Example 1
Figure:
Multiple Card Payment Options in UI Example 2
Figure:
Multiple Card Payment Options in UI Example 3
Processing Authorizations with a Transient Token
After you validate the transient token, you can use it in
place of the PAN with payment services for 15 minutes. The transient token can be
used multiple times within the 15-minute period.
Authorization with a Transient Token
This section provides the minimal set of information required to perform a successful
authorization with a transient token that is generated by the Flex API.
IMPORTANT
Each request that you send to
Cybersource
requires header information. For information about constructing the headers for your
request, see the
REST Example: Authorization with a Transient Token
Request
IMPORTANT
The transient token may already contain information such as
billing address and total amount. Any fields included in the request will
supersede the information contained in the transient token.
This section includes examples of the interfaces that your customers can expect when
completing a payment with
Click to Pay
.
Completing a payment with
Unified Checkout
requires the customer to
navigate through a sequence of interfaces:
Figure:
Click to Pay
UI
Set Up the Transacting Organization and Products
The transacting organization is the entity that processes transactions. Follow these
steps to create a transacting organization and configure products for it:
Click
Start
in the Transacting Organization and Products
section. The Transacting Organization and Products page is displayed.
Optional: modify the name and ID of the organization by using the text fields in the
Transacting Organization Details section. The ID must be unique, not just in the portfolio
or account, but across the system. By default, the name is the merchant name with 001
added to the end of the name. If you accept this default, additional transacting
organizations will have default names that iterate the numbers at the end of their names,
beginning with 002.
Optional: By default, the organization information is inherited from the parent
organization. To edit the organization information, click
Edit
in
the Transacting Organization Information section. After editing, click
Apply
.
To enable a product in the Product Enablement section, click the Enablement drop-down
menu and select
Enabled
.
To modify the configuration, click the
Edit
or
Configure
button (depending on the product). Some products are
not configurable.
To confirm the configuration, click
Apply
.
To save all product configurations, click
Save
. You are returned
to the Add Merchant page.
To continue working with this organization, click
Continue working with this
merchant
. To finish and return to Merchant Management or to add another
merchant, click
Return to merchant management
.
ADDITIONAL INFORMATION
The image below shows the Transacting Organization and Products page.
Figure:
Transacting Organization and Products
Add Merchant Account Information
Follow these steps to add merchant account information:
In Basic Information, enter the merchant account name and the organization ID in the
provided text fields.
ADDITIONAL INFORMATION
The merchant account name is the name of the business.
The organization ID is the name or identifier of the account that you are creating.
It must be unique, not just in the portfolio or account, but in the system.
Enter the merchant information in the provided text fields. Required fields are noted
with an asterisk (*).
Click
Save
. You are returned to the Add Merchant page. You can
skip the optional hierarchy step by clicking
Skip
.
Configure the Transacting Organization and Products
Follow these steps to modify the transacting organization details, or to enable and
configure products for the transacting organization:
Click
Start
in the Transacting Organization and Products
section. The Transacting Organization and Products page is displayed.
Optional: modify the name and ID of the organization by using the text fields in the
Transacting Organization Details section. By default, the name is the merchant name with
001 added to the end of the name. If you accept this default, additional transacting
organizations will have default names that iterate the numbers at the end of their names,
beginning with 002.
Optional: to edit the organization information, Click
Edit
in
the Transacting Organization Information section. After editing, click
Apply
.
To enable a product in the Product Enablement section, click the Enablement drop-down
menu and select
Enabled
.
To modify the configuration, click the
Edit
or
configure
button (depending on the product). Some products are
not configurable.
To confirm the configuration, click
Apply
.
To save all product configurations, click
Save
. You are returned
to the Add Merchant page.
To continue working with this organization, click
Continue working with this
merchant
. To finish and return to Merchant Management, click
Return to merchant management
.
Components
Components UI
This image shows the
Unified Checkout
components UI.
Figure:
Unified Checkout
Components UI
Components Integration JavaScript Example
// ============================================================
// COMPONENTS API - USAGE GUIDE
// ============================================================
// ============================================================
// FLOW 1: AUTO-PROCESSING (autoProcessing: true)
// Mount returns complete result
// ============================================================
// Initialize the Unified Checkout client
const client = await window.VAS.UnifiedCheckout(sessionJWT);
// Create component with auto-processing enabled
const component = client.createComponent('PANENTRY', {
autoProcessing: true
});
// Mount - automatically processes payment and returns complete result
const paymentResult = await component.mount('#payment-container');
console.log('Payment complete:', paymentResult);
// Clean up
component.destroy();
// ============================================================
// FLOW 2: MANUAL COMPLETE (autoProcessing: false)
// Mount returns transient token, then the merchant can manually complete payment
// ============================================================
// Initialize the Unified Checkout client
const client = await window.VAS.UnifiedCheckout(sessionJWT);
// Create component with auto-processing disabled
const component = client.createComponent('PANENTRY', {
autoProcessing: false
});
// Mount - returns transient token only
const token = await component.mount('#payment-container');
console.log('Received token:', token);
// Manually complete the payment
const paymentResult = await component.complete(token);
console.log('Payment complete:', paymentResult);
// Clean up
component.destroy();
// ============================================================
// FLOW 3: TRANSIENT TOKEN ONLY (autoProcessing: false, no complete)
// Mount returns transient token only.
// ============================================================
// Initialize the Unified Checkout client
const client = await window.VAS.UnifiedCheckout(sessionJWT);
// Create component with auto-processing disabled
const component = client.createComponent('PANENTRY', {
autoProcessing: false
});
// Mount - returns transient token only
const token = await component.mount('#payment-container');
console.log('Received token:', token);
// Clean up
component.destroy();
// ============================================================
// LIFECYCLE METHODS (available in all flows)
// ============================================================
// Mount - display the payment form
const result = await component.mount('#payment-container');
// Unmount - hide the form without destroying it
component.unmount();
// Remount - can mount again after unmounting
await component.mount('#payment-container');
// Check mounted state
const mounted = component.isMounted(); // true or false
// Destroy - permanently destroy the component
component.destroy();
// Check destroyed state
const destroyed = component.isDestroyed(); // true or false
// ============================================================
// EVENT HANDLING (optional for all flows)
// ============================================================
// Subscribe to events
component.on('mounted', () => console.log('Form displayed'));
component.on('unmounted', () => console.log('Form hidden'));
component.on('destroyed', () => console.log('Component destroyed'));
// ============================================================
// SUPPORTED PAYMENT TYPES
// ============================================================
client.createComponent('PANENTRY'); // Manual card entry
client.createComponent('CLICKTOPAY'); // Click to Pay
client.createComponent('CHECK'); // Check payment (US & CA Only)
When
CLICKTOPAY
is included in
allowedPaymentTypes
, use
client.createComponent('CLICKTOPAY')
and not
client.createComponent('PANENTRY')
.
CLICKTOPAY
renders the full
Click to Pay
lookup flow and automatically
displays an option to pay with a new card for users without a
Click to Pay
profile. This option ensures that the PAN entry flow is
also included. Using only
PANENTRY
bypasses
Click to Pay
, even if it is included in your capture context.
This table provides an overview of how to use the components integration
method:
Components Integration Method
allowedPaymentTypes
Method
Components Use
CLICKTOPAY
with or without
PANENTRY
createComponent('CLICKTOPAY', …)
PANENTRY
only
createComponent(PANENTRY, …)
Multiple wallets +
CLICKTOPAY
createCheckout(…)
The Checkout API renders
all checkout options automatically.
IMPORTANT
There is no error if you load
PANENTRY
when
CLICKTOPAY
is included in
your capture context. The component will be mounted successfully, but
Click to Pay
is not shown in the UI. This may result in one-time
password emails on the server-side but no
Click to Pay
UI
displaying on the client side.
Trigger
Trigger UI
This image shows the
Unified Checkout
trigger UI.
Figure:
Unified Checkout
Trigger UI
Trigger Integration JavaScript Example
// ============================================================
// TRIGGER API - USAGE GUIDE V2
// ============================================================
// Triggers load the payment UI without displaying the Unified Checkout
// button. Use when a custom event should initiate the payment flow.
// Supported payment types: PANENTRY and CLICKTOPAY only.
// IMPORTANT: Trigger always opens in SIDEBAR mode only.
// The displayMode: 'sidebar' option must be set when creating the trigger.
// The merchant provides their own button/element to launch the payment flow.
// ============================================================
// FLOW 1: AUTO-PROCESSING (autoProcessing: true)
// Mount returns complete payment result
// ============================================================
// Initialize the Unified Checkout client
const client = await window.VAS.UnifiedCheckout(sessionJWT);
// Create trigger — sidebar is the only supported display mode for Trigger
const trigger = client.createTrigger('PANENTRY', {
displayMode: 'sidebar',
autoProcessing: true
});
// Mount is called when the merchant's own button is clicked
// This opens the sidebar payment UI and resolves when payment is complete
document.getElementById('your-pay-button').addEventListener('click', async () => {
const paymentResult = await trigger.mount('#payment-container');
console.log('Payment complete:', paymentResult);
});
// Clean up
trigger.destroy();
// ============================================================
// FLOW 2: MANUAL COMPLETE (autoProcessing: false)
// Mount returns transient token, then the merchant can manually complete payment
// ============================================================
// Initialize the Unified Checkout client
const client = await window.VAS.UnifiedCheckout(sessionJWT);
// Create trigger with auto-processing disabled
const trigger = client.createTrigger('PANENTRY', {
displayMode: 'sidebar',
autoProcessing: false
});
// Mount is called when the merchant's own button is clicked
document.getElementById('your-pay-button').addEventListener('click', async () => {
const token = await trigger.mount('#payment-container');
console.log('Received token:', token);
// Manually complete the payment
const paymentResult = await trigger.complete(token);
console.log('Payment complete:', paymentResult);
});
// Clean up
trigger.destroy();
// ============================================================
// FLOW 3: TRANSIENT TOKEN ONLY (autoProcessing: false, no complete)
// Mount returns transient token only — server handles payment authorisation
// ============================================================
// Initialize the Unified Checkout client
const client = await window.VAS.UnifiedCheckout(sessionJWT);
// Create trigger with auto-processing disabled
const trigger = client.createTrigger('PANENTRY', {
displayMode: 'sidebar',
autoProcessing: false
});
// Mount is called when the merchant's own button is clicked
document.getElementById('your-pay-button').addEventListener('click', async () => {
const token = await trigger.mount('#payment-container');
console.log('Received token:', token);
// Pass transient token to your server for payment authorisation
sendToServer(token);
});
// Clean up
trigger.destroy();
// ============================================================
// LIFECYCLE METHODS (available in all flows)
// ============================================================
// Mount - opens the sidebar payment UI (called from merchant's own click handler)
const result = await trigger.mount('#payment-container');
// Unmount - hide the form without destroying it
trigger.unmount();
// Remount - can mount again after unmounting
await trigger.mount('#payment-container');
// Check mounted state
const mounted = trigger.isMounted(); // true or false
// Destroy - permanently destroy the trigger
trigger.destroy();
// Check destroyed state
const destroyed = trigger.isDestroyed(); // true or false
// ============================================================
// EVENT HANDLING (optional for all flows)
// ============================================================
// Subscribe to events
trigger.on('mounted', () => console.log('Sidebar payment UI displayed'));
trigger.on('unmounted', () => console.log('Sidebar payment UI hidden'));
trigger.on('error', (err) => console.error('Trigger error:', err.code, err.message));
trigger.on('destroyed', () => console.log('Trigger destroyed'));
// ============================================================
// SUPPORTED TRIGGER TYPES
// ============================================================
// IMPORTANT: When using createTrigger() for Click to Pay,
// you must create a custom UI. See Click to Pay UI Guidelines.
client.createTrigger('PANENTRY', { displayMode: 'sidebar' }); // Manual card entry
client.createTrigger('CLICKTOPAY', { displayMode: 'sidebar' }); // Click to Pay
// ============================================================
// CAPTURE CONTEXT REQUIREMENT
// ============================================================
// The capture context allowedPaymentTypes must include the payment type
// used in createTrigger(). For PANENTRY, ensure your session request includes:
//
// "allowedPaymentTypes": ["PANENTRY", ...]
//
// Without PANENTRY in allowedPaymentTypes, createTrigger('PANENTRY') will
// fail silently and the sidebar will not open.
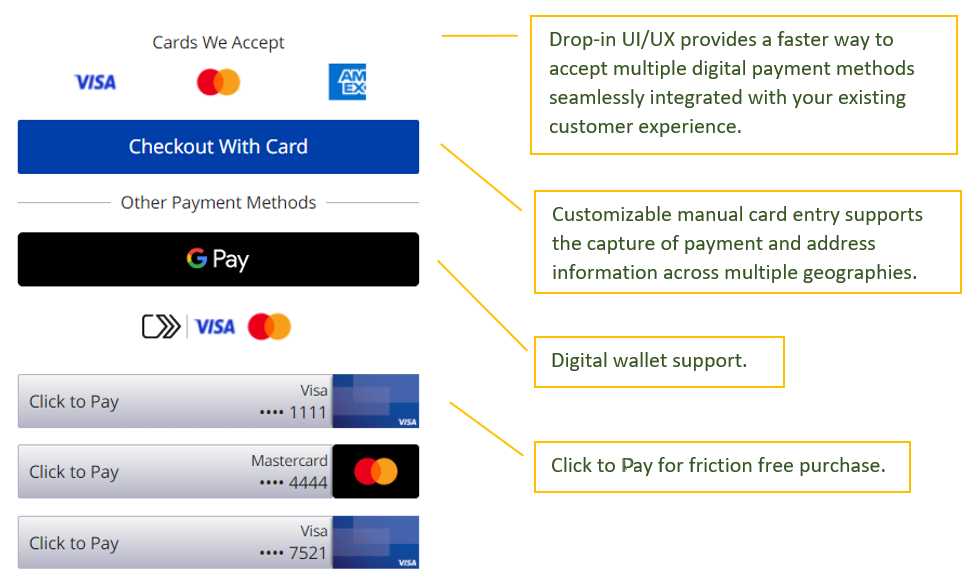

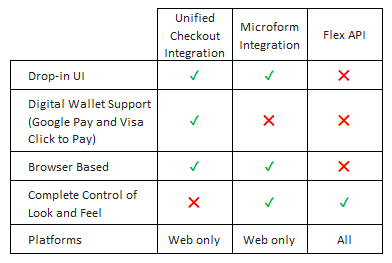


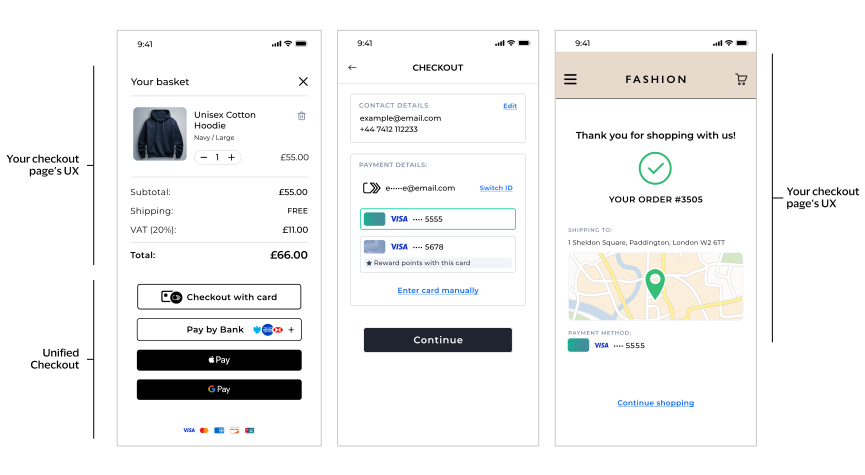


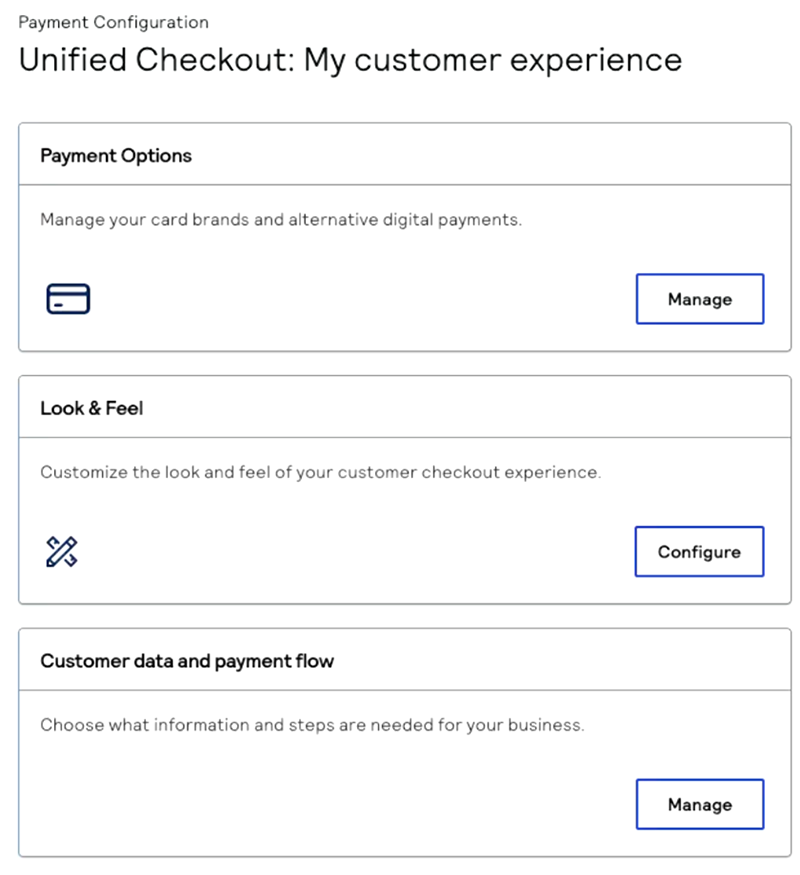
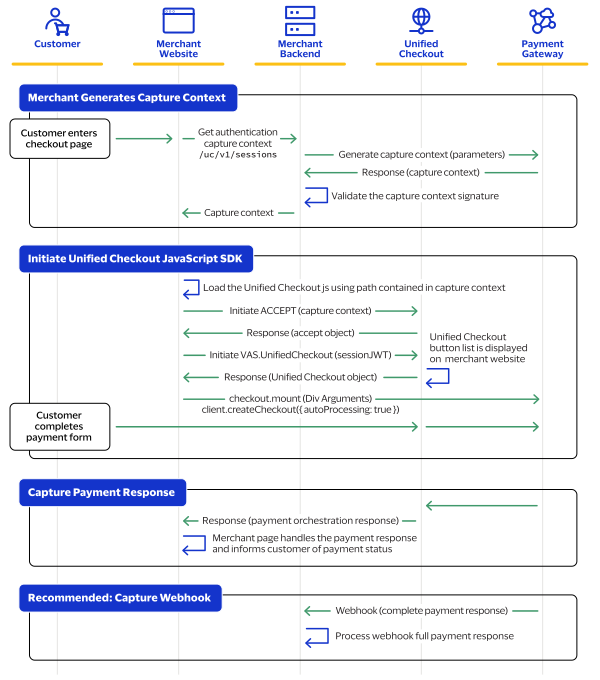


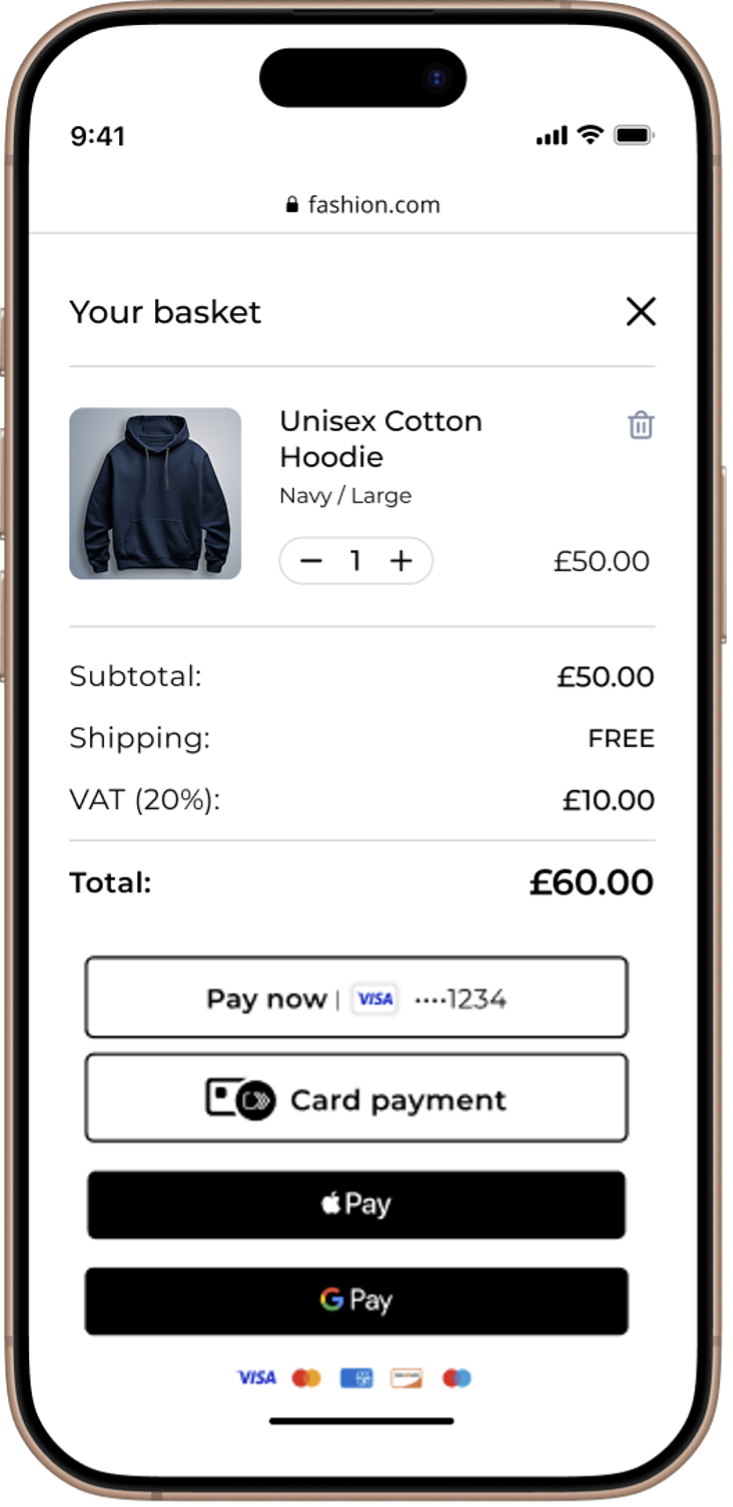
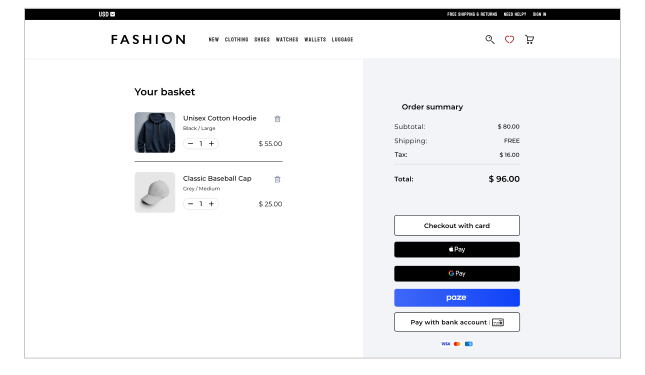
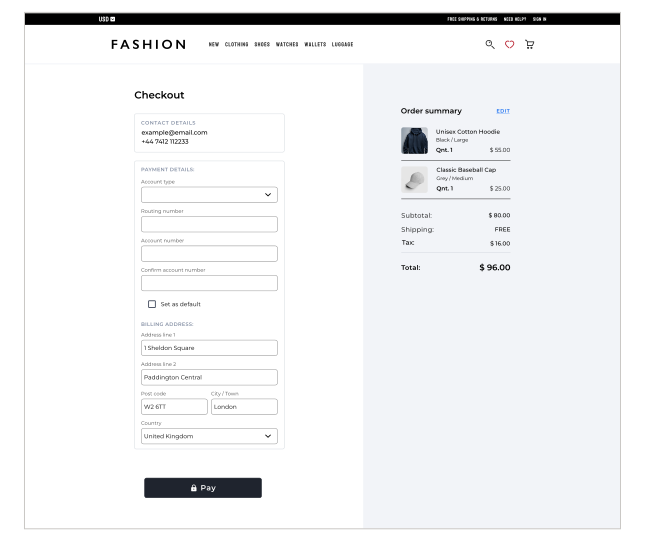
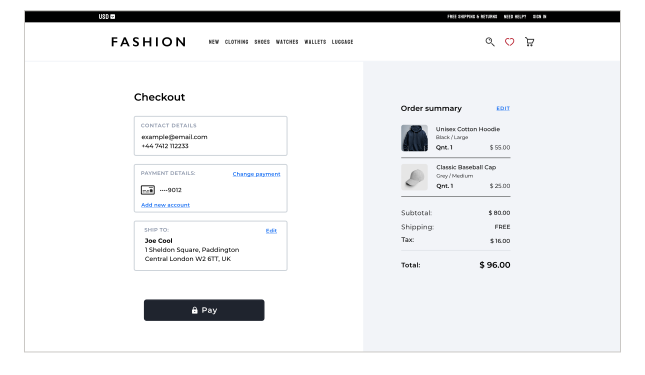
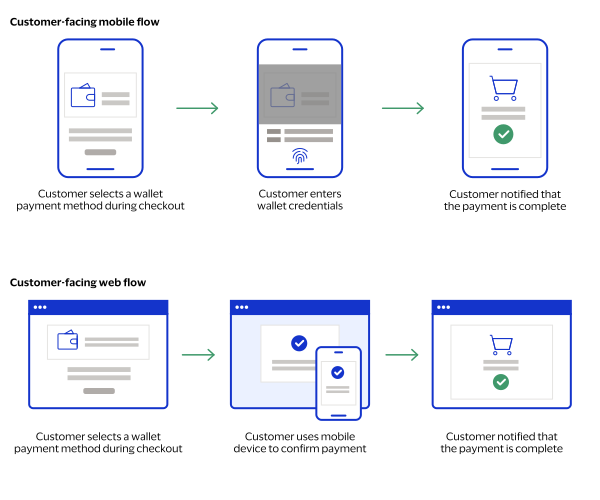
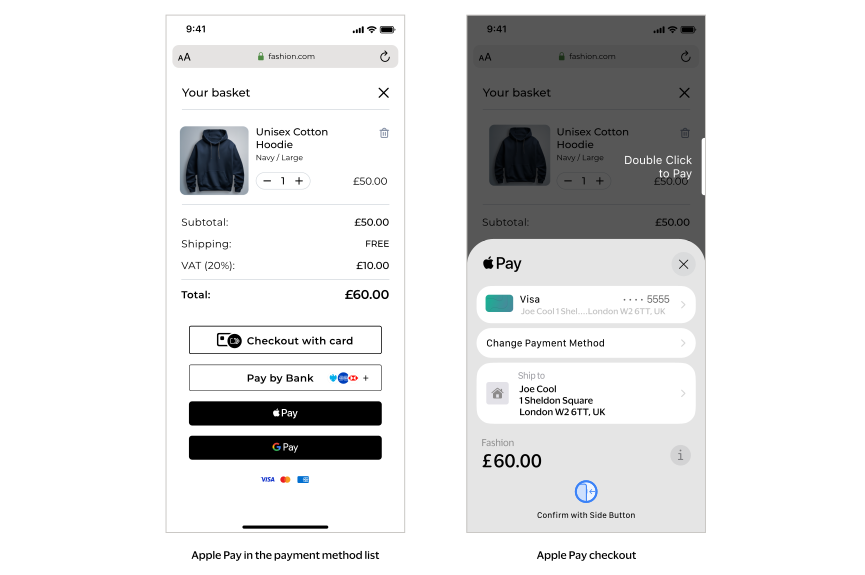
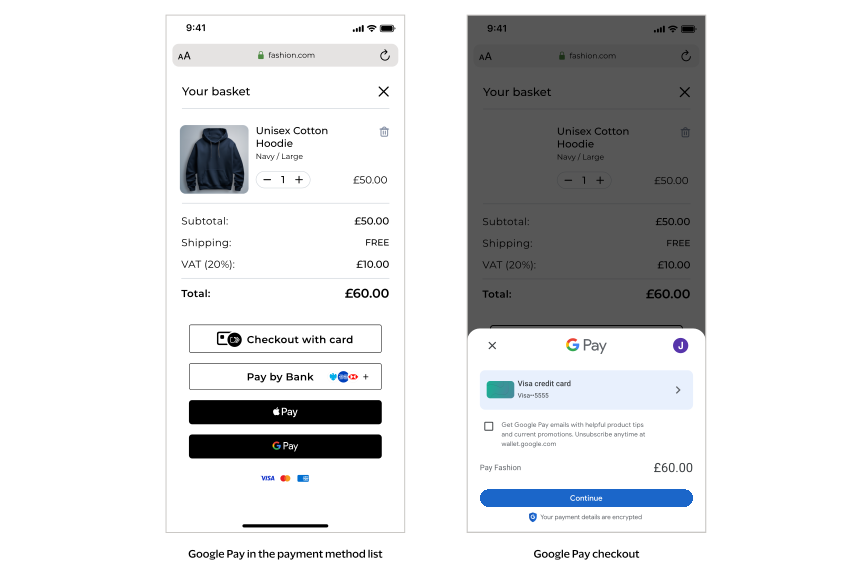
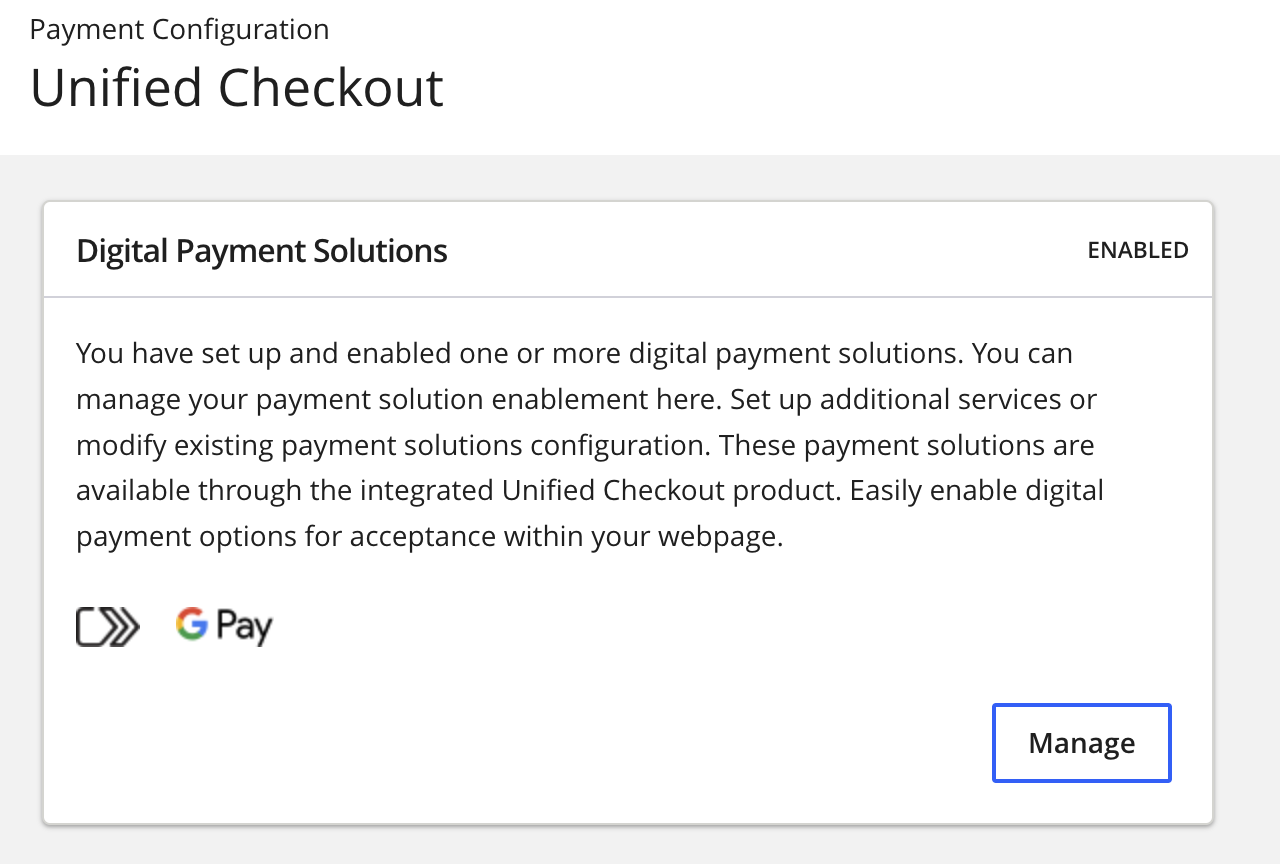 IfClick to Payis not enabled, clickOnnext toClick to Pay.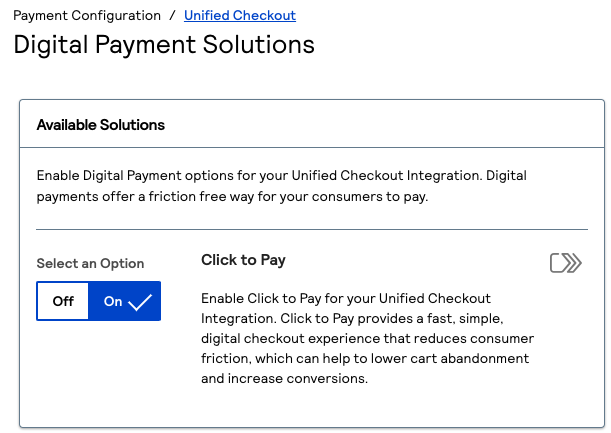
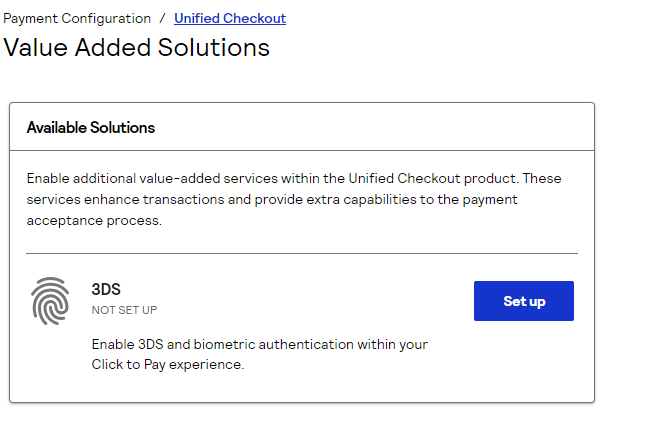
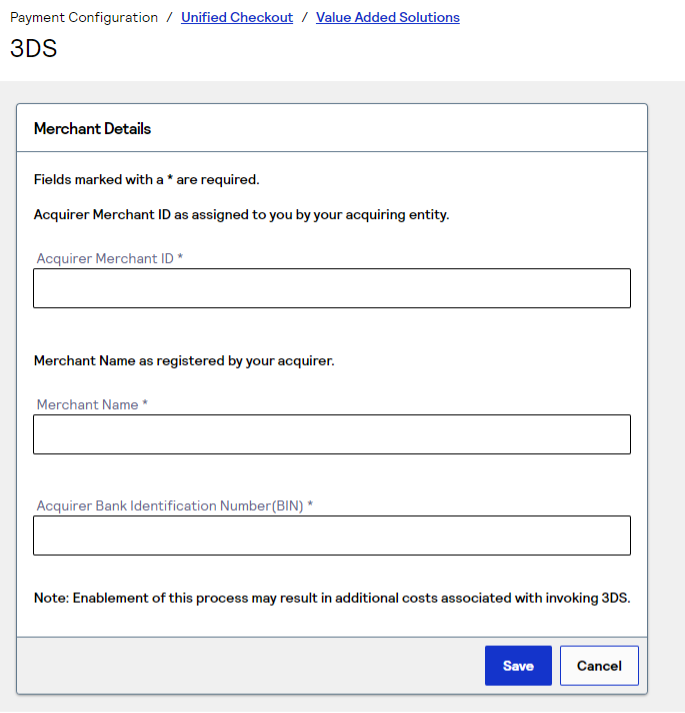

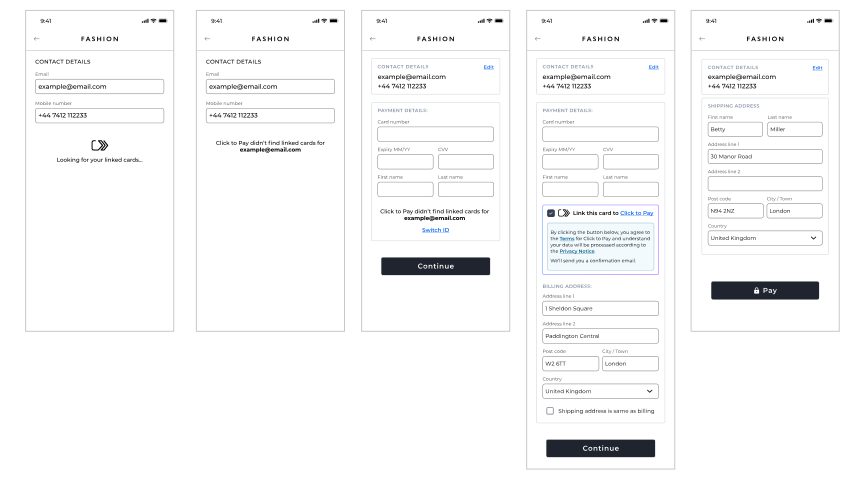

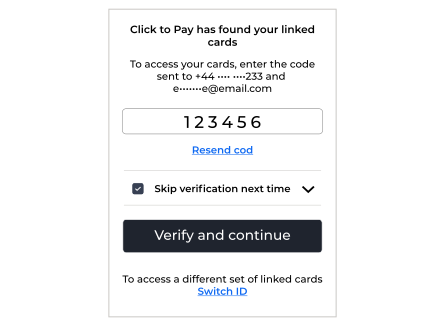
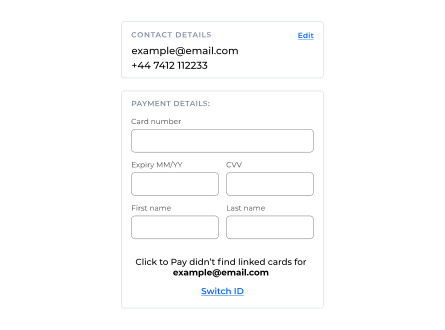
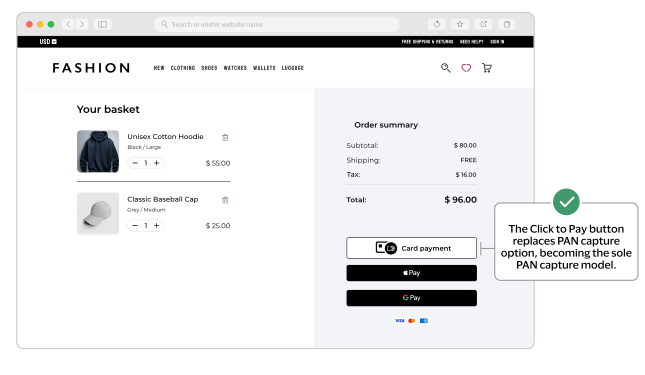
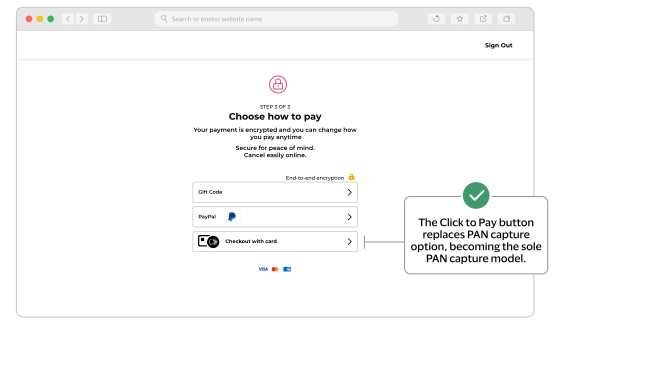
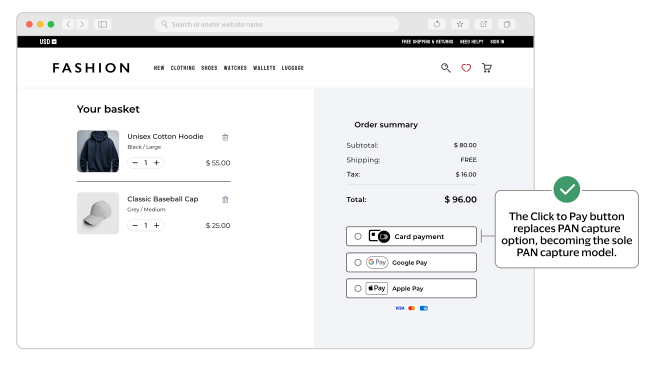
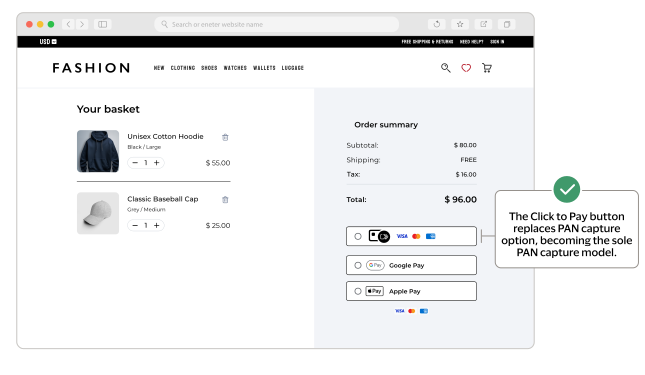
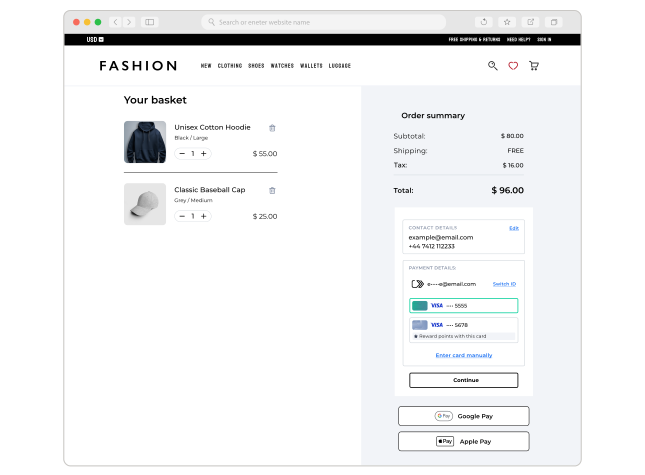
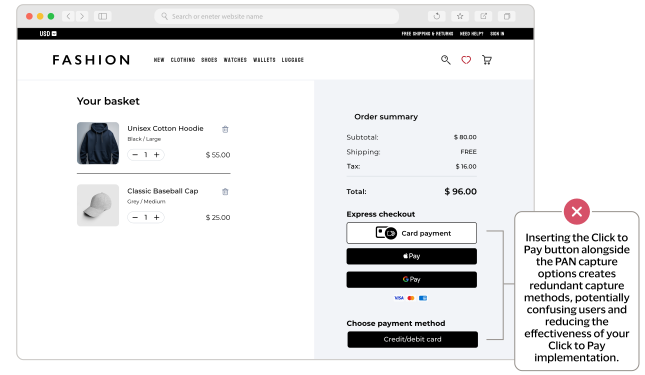
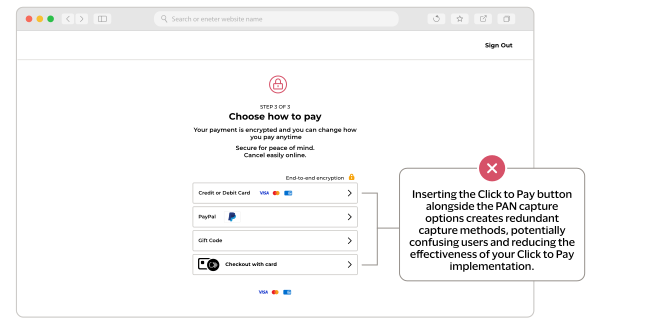
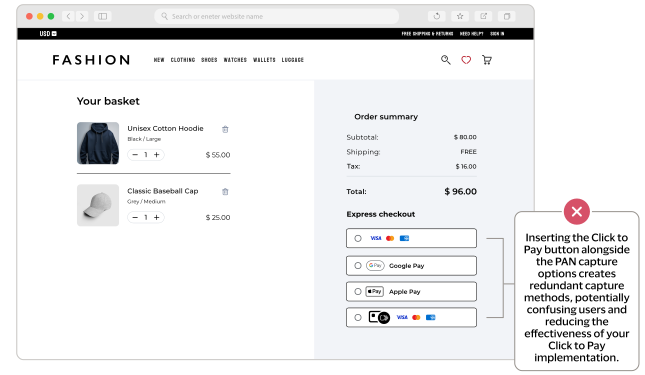
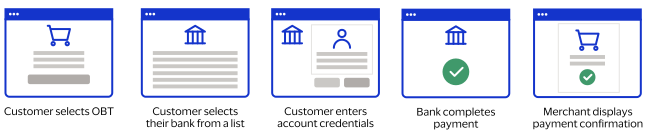
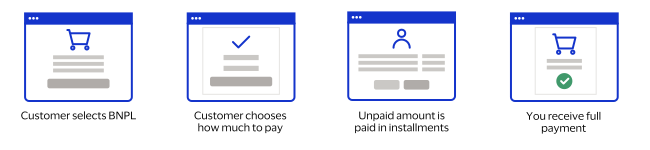
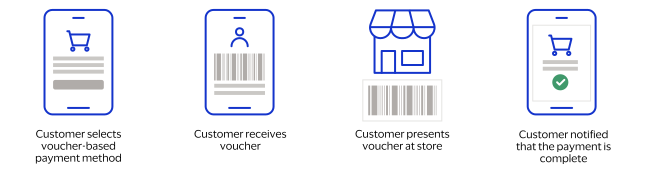

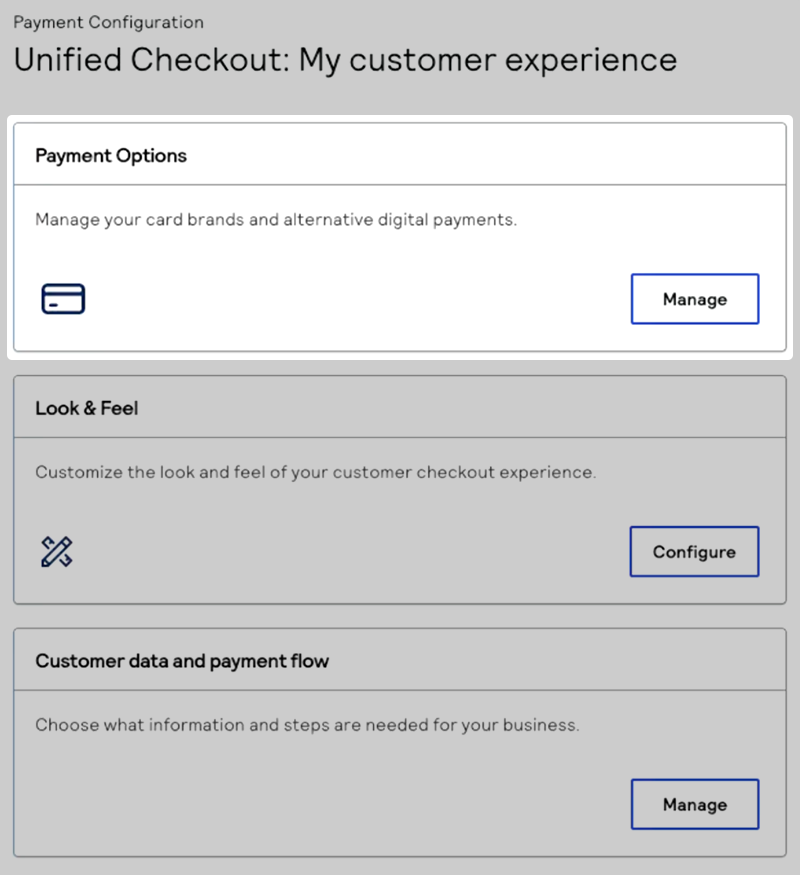
 ) to rearrange the order of the payment options.IMPORTANTSome payment options are set at the portfolio level and cannot be reordered. When you see a pin icon next to a payment option, you cannot move that payment option in the list of available methods. You must contact your portfolio administrator if you want to reorder the list of available payment options.These payment options are supported byUnified Checkout:
 ) to display the card brand logos in your button
list.Click the checkbox next to each card brand that you want to display in your checkout UI. Click the drag icon (
) to display the card brand logos in your button
list.Click the checkbox next to each card brand that you want to display in your checkout UI. Click the drag icon (